Setting the Printout Finishing
Adding a margin on pages ([Binding Margin])
A margin for binding is added on pages.
In the [Layout] tab, select the [Binding Margin] check box.
 In [Binding Position] in the [Layout] tab, specify the margin position.
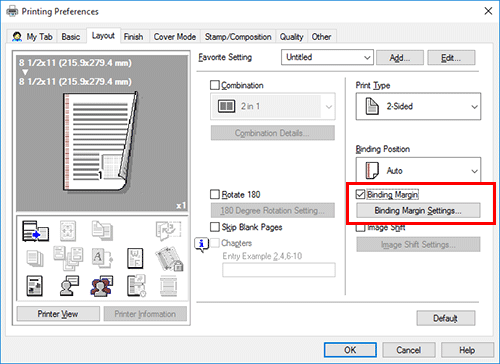
Click [Binding Margin Settings...].
Adjust the size of margin and click [OK].
Setting
Description
[Shift Mode]
Select how the images are shifted for creating the margin.
[Front Side]/[Back Side]
Specify the size of the margin on the front side.
When you print on both sides, specify the size of the margin on the back side. When the [Same value for front and back sides] check box is selected, a margin of the same size is created on both front and back sides.
 Tips
Tips [Binding Margin] is available only when the printer driver for Windows is used.
Stapling paper ([Staple])
Each set of sheets can be stapled (at a corner or at two positions) and output automatically. This function is useful for preparing a project proposal or other booklet materials.
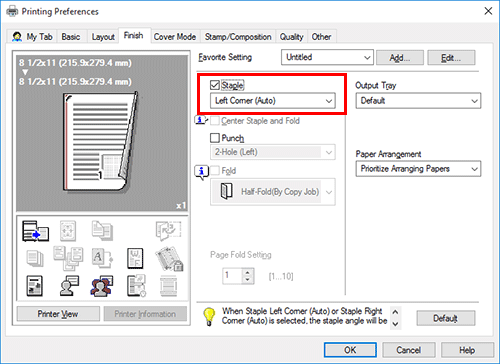
In the [Finish] tab, select the [Staple] check box. In addition, specify the number and positions of staples.
 Tips
Tips To use this function, an option is required. For details on the required option, refer to [Print options] .
 In [Binding Position] in the [Layout] tab, specify the staple position.
Binding in the center of the paper ([Center Staple and Fold])
The printed sheets are bound in the center and folded before they are output.

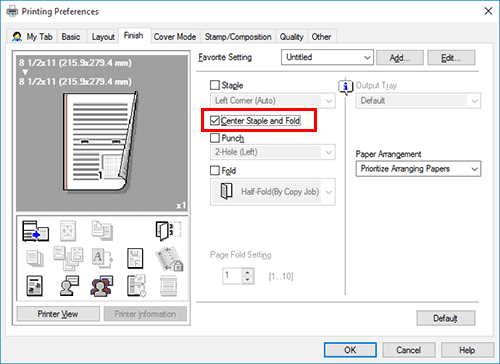
In the [Finish] tab, select the [Center Staple and Fold] check box.
As the sheets are bound in the center, use the combined document data or set the [Print Type] to [Booklet] on the [Layout] tab.
 Tips
Tips To use this function, an option is required. For details on the required option, refer to [Print options] .
Punching the printed sheets ([Punch])
Printed sheets are punched for filing before they are output. This function is useful when you want to bind printed materials in files.
In the [Finish] tab, select the [Punch] check box. In addition, specify the number and positions of punch holes.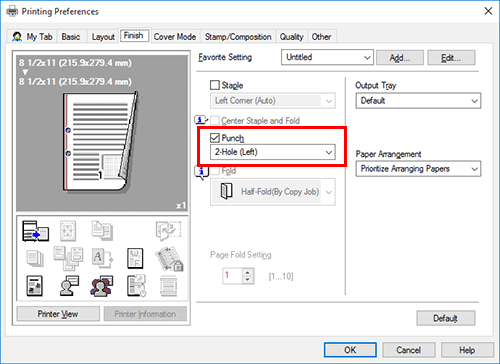
 Tips
Tips To use this function, an option is required. For details on the required option, refer to [Print options] .
 In [Binding Position] in the [Layout] tab, specify the punch position.
 The number of punched holes varies depending on the area you are in.
Folding paper ([Fold])
The printed sheets are creased before they are output.
Half-Fold

Tri-Fold

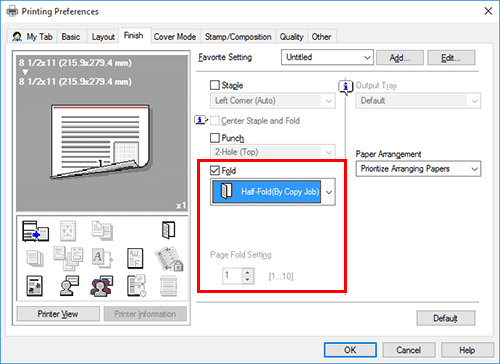
In the [Finish] tab, select the [Fold] check box, and select the folding mode.
When you want to fold page by page, specify the number of pages to be folded at one time in [Page Fold Setting].
 Tips
Tips To use this function, an option is required. For details on the required option, refer to [Print options] .
 This function cannot be used on originals that contain more pages than the number of pages that can be folded by this machine.
Printing in a booklet format ([Booklet])
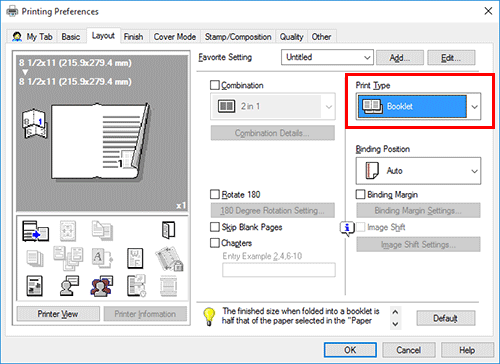
The pages in the original data are arranged and spread out in booklet format and printed on both sides of sheets. When the printed sheets are stacked and folded in two, the pages are arranged in the correct order.
In [Print Type] in the [Layout] tab, select [Booklet].
 Tips
Tips When paper is folded as a booklet, the finishing size is half that of the paper size you selected in [Paper Size].
 By selecting [Fold] or [Center Staple and Fold] in the [Finish] tab in combination with this function, you can create booklet-form documents by folding the printed sheets in the center or by binding them using two staples in the center.
 By selecting [Chapters] in the [Layout] tab in combination with this function, you can place the specified page on the front side.
Specifying the output tray ([Output Tray])
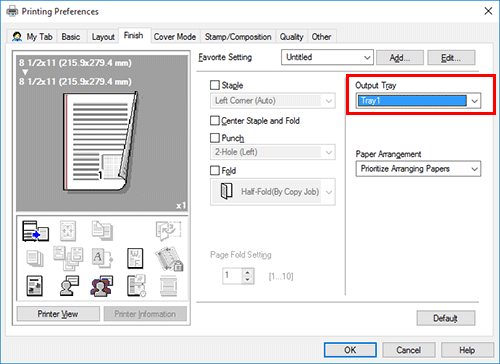
In [Output Tray] in the [Finish] tab, select the tray to which printed sheets are output.