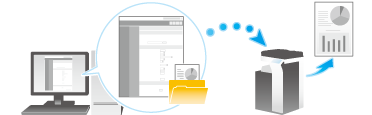
Directly Printing from the PC (Direct Print)
Direct Print
Direct Print is a function that enables you to directly send PDF (Ver.1.6), JPEG, TIFF, XPS, PS, PCL, Text, OOXML (.docx/.xlsx/.pptx), and PPML (.ppml/.vdx/.zip) files on your computer or in an SMB sharing folder to this machine to print them without using the printer driver.
A text file supports only 1-byte characters.
You can print a file stored on your computer or an SMB sharing folder by specifying it using Web Connection.
 Related setting
 You can specify how the paper size is determined when TIFF, JPEG, or PDF files are directly printed (default: [Auto Paper Select]). For details, refer to [TIFF Image Paper Setting] .
- To print a text file, you need to set [PDL Setting] to [Auto] (default: [Auto]). For details, refer to [PDL Setting] .
- When using any OOXML font not installed on this machine to print an OOXML file using the Direct Print function, you can add the OOXML font to this machine. TrueType and OpenType can be added as the OOXML fonts. For details on how to add an OOXML font, refer to [Adding a font/macro] .
Direct Print procedure
Connect to Web Connection using a Web browser, then specify the file you want to print. You can print PDF (Ver.1.6), JPEG, TIFF, XPS, PS, PCL, Text, OOXML (.docx/.xlsx/.pptx) and PPML (.ppml/.vdx/.zip) format files.
Access to the Web Connection, using the Web browser.
 For information on how to access Web Connection, refer to [How to access] .
Log in to the user mode.
For details on how to login to the user mode, refer to [Login methods] .Click [Direct Print].
Select the file you want to print, and click [OK].
[Select from PC]: Click [Browse...], then select a file to be printed from your computer.[Select from SMB List]: Click [SMB List], then select a file to be printed from the SMB sharing folder.
Change the print settings as necessary.
In [Basic Setting], you can set a number of copies, 2-sided Print, and Finishing if necessary.Settings
Description
[Number of Sets]
Enter the number of copies to be printed.
[1] is specified by default.
[Sort]
When printing multiple sets of copies, select this check box to output sets of copies one by one.
[ON] is specified by default.
[Paper Tray]
Select the paper tray for the printing paper.
[Auto] is specified by default.
[Printed Side]
Select the print sides of paper. [1-Sided] is specified by default.
- [1-Sided]: The original is printed on one side of paper.
- [2-Sided]: The original is printed on both sides of paper.
- [Booklet]: The original is printed in booklet format. The pages in the original data are arranged, spread, and printed on both sides of sheets. When the printed sheets are stacked and folded in two, the pages are arranged in the correct order.
[Original Orientation]
Specify the orientation of the original created in application software.
[Portrait] is specified by default.
[Staple]
Select whether to staple printed sheets.
[Do Not Send] is specified by default.
[Binding Position]
To perform 2-sided printing or to create a margin, select the binding position.
[Left Bind] is specified by default.
[Print Sheet/Book]
Select whether to print the currently selected sheet or the entire book when handling an Excel file.
[All Sheets] is specified by default.
[Combination]
Select whether to reduce and print multiple pages on the same side of a single sheet of paper. [OFF] is specified by default.
- [Raw]: Enter a number of pages to be placed in horizontal direction. [1] is specified by default.
- [Column]: Enter a number of pages to be placed in vertical direction. [1] is specified by default.
- [Page Zoom]: Select whether to automatically adjust the zoom ratio or specify any zoom ratio to enlarge or reduce a page. [Auto] is specified by default.
If you select [Output Method] in [Application Setting], you can specify the method to print the original on the machine. When using this function, click [Display].Settings
Description
[Print]
Select this option to print normally. [Normal Printing] is specified by default.
[Save in User Box]
Select this option to save the original in a box on this machine.
- [Use Box Number]: Click [Search from List], and select a User Box from the list to save data.
- [File Name]: Enter the file name used to save data in a User Box.
- [Print]: Select whether to save data in a User Box and simultaneously print it. [OFF] is specified by default.
[Secure Print]
Select this option to print highly confidential documents. Printing is allowed when the document ID and password are entered on this machine.
- [Secure Print ID]: Enter the document ID.
- Password: To enter (change) the password, select the [Password is changed.] check box, and then enter a new password.
[Proof Print]
Select this option to print a large number of copies. This machine prints only one copy and waits for the user's command before printing the remaining copies.
Click [OK].
The file is sent and printed.
 Reference
- When you print a password protected PDF file, the file is stored in the Password Encrypted PDF User Box. To print files from Password Encrypted PDF User Box, refer to [Store File in User Box, or Print File from User Box] .