
[User Registration]
Overview
Assign an arbitrary number to each user and set user information for each number.
The displayed screen varies depending on the [User Authentication] setting.

Reference
- For details about [User Authentication], refer to [General Settings].
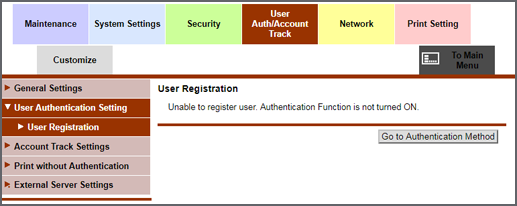
[User Registration] ([User Authentication]: [OFF])
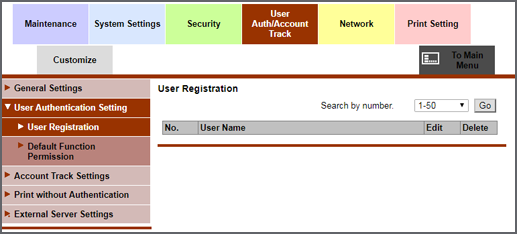
[User Registration] ([User Authentication]: [ON (External Server)])
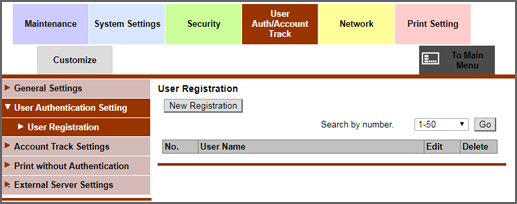
[User Registration] ([User Authentication]: [ON (MFP)])
Setting Procedure (Registering a New User / Editing User Information)
1
When registering a new user, click [New Registration]. When editing user information, click [Edit] of the target user.
The setting screen is displayed.
2
Set [No.].
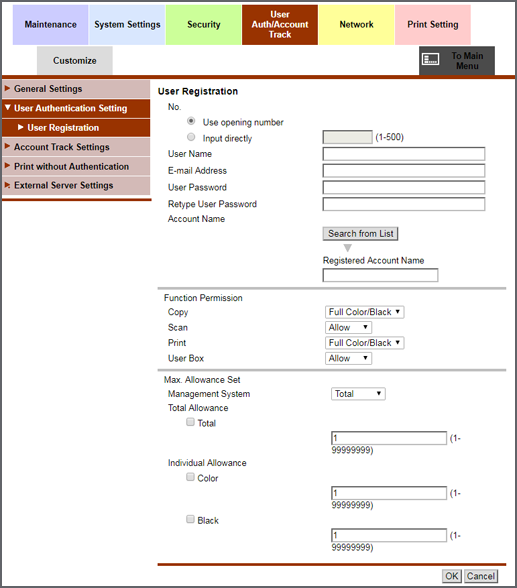
[Use opening number]: An opening number is assigned automatically.
[Input directly]: 1 to 500 numbers can be entered.
For editing, the registration number of the selected user is displayed. You cannot enter the number.
3
Enter [User Name] and [E-mail Address].
[User Name]: Can be entered using up to 64 single-byte characters (32 double-byte characters).
[E-mail Address]: Can be entered using up to 320 single-byte characters.
These items cannot be entered when [User Authentication] is set to [ON (External Server)].
4
Enter [User Password], and enter the same password again in [Retype User Password].
Up to 64 single-byte characters can be entered.
When [User Authentication] is set to [ON (External Server)], this item is not displayed.
5
When [Synchronize User Authentication & Account Track] is set to [Synchronize], click [Search from List], and set the user's account.
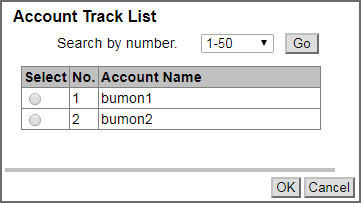
Click the radio button of the synchronized account, and click [OK].
6
In [Function Permission], set the functions available for the registered user.
For details about [Function Permission], refer to [Default Function Permission].
7
In [Max. Allowance Set], set the maximum number of sheets that the registered user can print.
[Management System]: Select [Total Allowance] or [Individual Allowance].
[Total Allowance]: Select the [Total] check box, and enter the maximum number of sheets that is the total of both [Color] prints and [Black] prints.
[Individual Allowance]: Select the [Color] or [Black] check box, and enter the maximum number of sheets that is the total of both prints.
8
Click [OK].
The setting completion screen is displayed.
9
Click [OK].
Setting Procedure (Deleting a User)
1
Click [Delete] of the user to delete.
The confirmation dialog box is displayed.
2
Click [OK].
3
Click [OK] on the setting completion screen.
 in the upper-right of a page, it turns into
  and is registered as a bookmark.