
Uninstalling by the installer (PCL driver)
The printer driver can be deleted by the installer.
Insert the Driver CD-ROM into the CD-ROM drive.
Make sure that the installer starts, and then go to Step 2.
If the installer does not start, open the printer driver folder on the CD-ROM, double-click [Setup.exe], and then go to Step 3.
Select [Install printers/MFPs] and click [PCL].
The printer driver installer starts.
Click [AGREE].
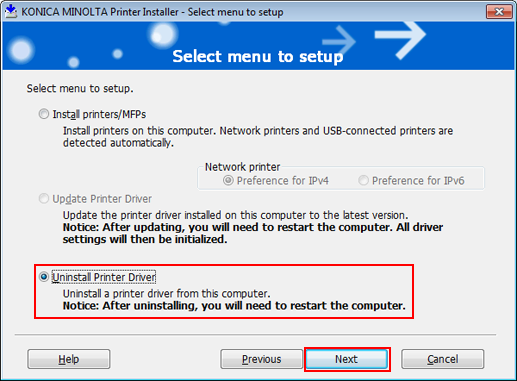
In the setup selection dialog box, select the [Uninstall Printer Driver], and then click the [Next].
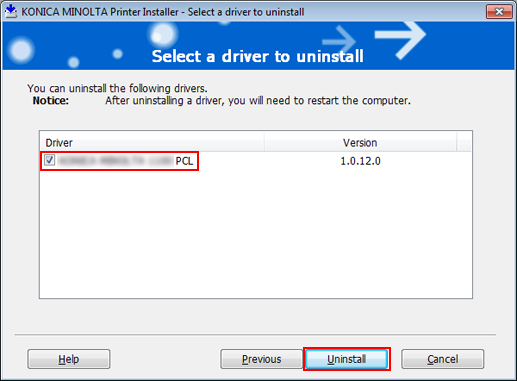
Select the component to be uninstalled and click [Uninstall].
Follow the on-screen instructions.
If the restart screen appears, click [OK] to restart the computer.