For network connection (SMB)
To use SMB printing, specify the port by specifying the printer while installing the printer driver. The printer can be specified either by searching for the printer on the network, or by entering the printer name directly.
Settings of this machine
To use SMB printing, you must configure the network settings for this machine in advance.
Items to be configured | Description |
|---|---|
IP Address | In [TCP/IP Settings] of this machine, specify the IP address. |
SMB Setting | To use SMB printing: |
For details on the network settings for this machine, refer to NIC Setting: Setting the Machine Network Information.
To use SMB printing in the IPv6 environment, [Direct Hosting Setting] for this machine must be enabled. For details, refer to Direct Hosting Setting.
Installing the printer driver by specifying the printer using the Add Printer Wizard
Installing the driver requires the administrator privilege.
Insert the Driver CD-ROM into the CD-ROM drive.
Click [Start], and then select [Printers and Faxes].
If [Printers and Faxes] is not displayed in the [Start] menu, open [Control Panel] from the [Start] menu, click [Printers and Other Hardware], then click [Printers and Faxes].
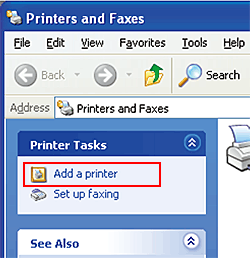
In Windows XP, select [Add a printer] from the [Printer Tasks] menu.
In Windows Server 2003, double-click [Add Printer].In Windows XP:
In Windows Server 2003:
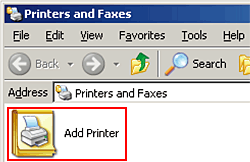
[Add Printer Wizard] is displayed.
Click [Next].
Select [Local printer attached to this computer], and then click [Next].
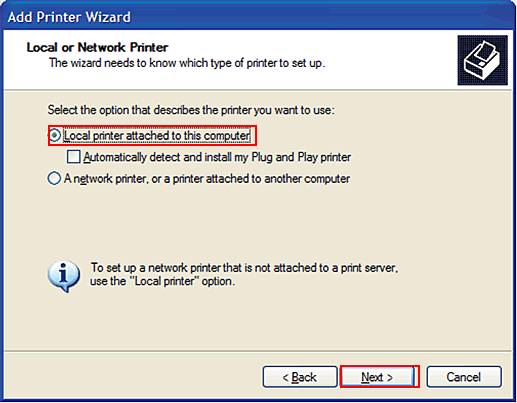
Clear the [Automatically detect and install my Plug and Play printer] check box.
Click [Create a new port:], select [Local Port] as the [Type of port:], and then click [Next].
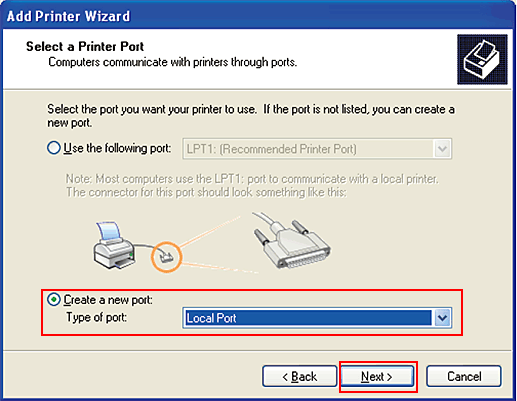
Enter "\\NetBIOS name\print service name" in the [Port Name] box.
Enter the same NetBIOS name and print service name specified in [SMB Setting] - [Print Setting].
Click [OK].
Click [Have Disk].
Click [Browse].
Select a desired printer driver in the CD-ROM, and then click [Open].
Select a folder according to the printer driver, operating system, and language to be used. The available printer drivers are the PS Plug-in driver and PPD driver.
Click [OK].
Click [Next].
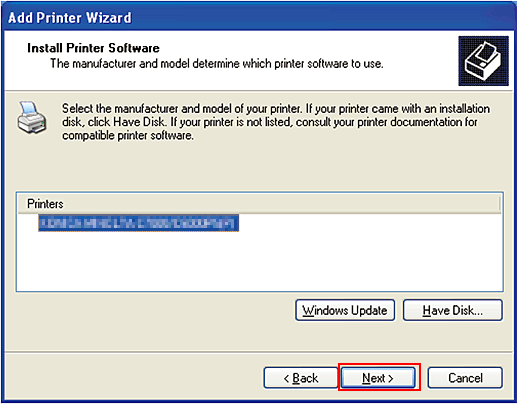
Follow the instructions on the windows that follow.
To use a network connection, perform a test print after the network settings have been configured.
Click [Finish].
If the "Windows logo testing" or [Digital Signature] window is displayed, click [Continue Anyway] or [Yes].
After finishing the installation, make sure that the icon for the installed printer is displayed in the [Printers and Faxes] window.
Remove the CD-ROM from the CD-ROM drive.
This completes the printer driver installation.

