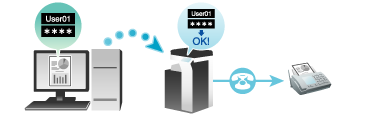
Send a Fax with Authentication Information
Fax transmission for authentication setup
If user authentication and account track have already been employed, each user needs to send his/her authentication information (the user name and password) to this machine when sending PC-Fax. This limits the users who can send PC-Fax via the machine and prevents unauthorized use by third parties.
When this machine receives a send job from a user who is not authorized to use this machine, or when this machine receives a send job that does not have any authentication information, this machine discards these jobs automatically.
 Tips
Tips A send job that does not have any authentication information refers to a job whose user authentication or account track has not been set correctly in the [Configure] tab in the [Properties] screen of the fax driver.
Operations required to use this function
Open the [Configure] tab of the fax driver, and ensure that the user authentication or account track has been set correctly.
Open the [Properties] screen of the fax driver.
 For details on how to open the [Properties] screen, refer to [How to display the Properties window] .
Open the [Configure] tab, and check the [Device Option] to ensure that the user authentication or account track has been set correctly according to the current operating environment.
If it is not configured correctly, select [User Authentication] or [Account Track] from the list, then change the relevant setting in [Setting].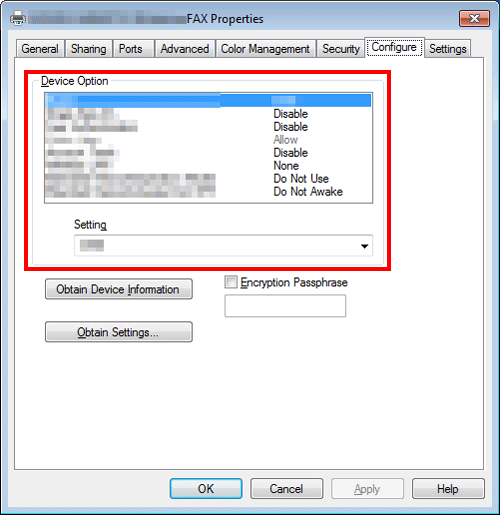
Click [OK].
How to send
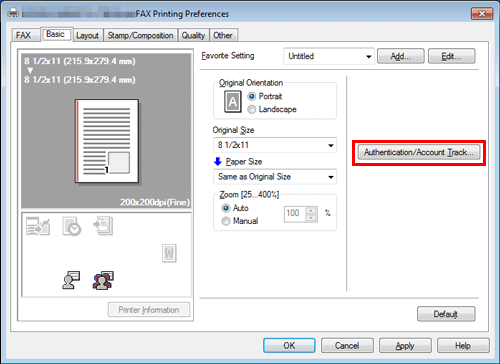
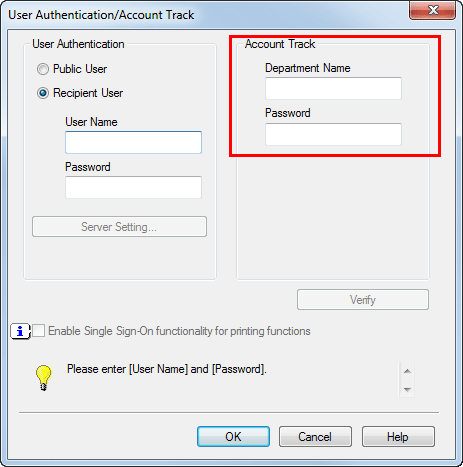
In the [Basic] tab, click [Authentication/Account Track...].
When user authentication is enabled, select [Recipient User], then enter the user name and password.
If access to this machine by public users (unregistered users) is allowed, you can select [Public User] and send a fax without entering the user name and password.When using an external authentication server, click [Server Setting...] and select the authentication server.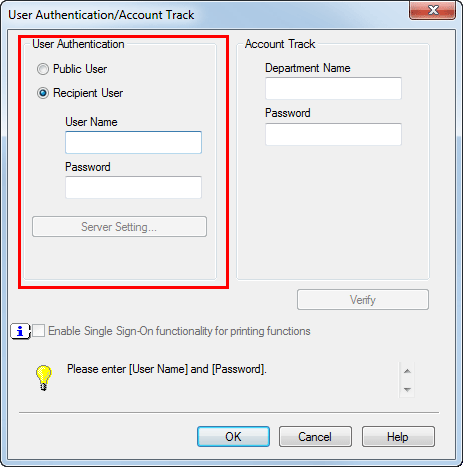 If you always use the same user name and password, registering them in advance eliminates the need for entering them each time. For details, refer to [Change the default print settings] .
If account track is enabled, enter the account name and password.
 If you always use the same account name and password, registering them in advance eliminates the need for entering them each time. For details, refer to [Change the default print settings] .
Click [OK].
If the PC can communicate with this machine, you can click [Verify] to check the entered authentication information. Also, you can check the authentication information for errors before printing it.To perform MFP authentication when external server authentication is used together, select the [MFP Authentication] check box in the [Other] tab.

Send a fax.
If the authentication information is correct, the fax is sent.