
Copying on Paper of a Custom Size
Copying on paper of a custom size
This section explains how to load custom-size paper into the Bypass Tray.
1
Load the original.
2
Display the Copy screen of classic style.
3
Load custom size paper into the Bypass Tray with the print side facing down.
The screen for selecting the paper type and paper size appears.
4
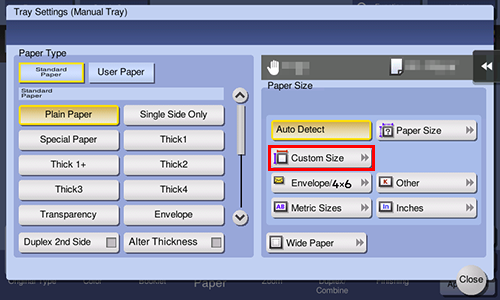
In [Paper Size], tap [Custom Size].

5
Enter the paper size in [Custom Size Settings], and close the screen.
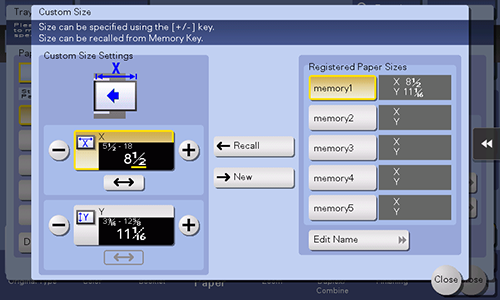
To specify a size registered in the memory, select the paper size recalled from [Registered Paper Sizes], and tap [Recall].

6
Use the Start key to start copying.
Registering a custom size of paper in memory
1
Display the Copy screen of classic style.
2
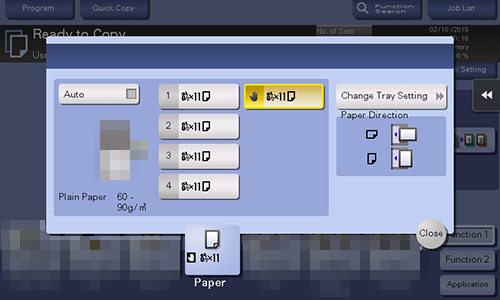
Tap [Paper] and select the tray you can set the custom size to. Then, tap [Change Tray Setting].

3
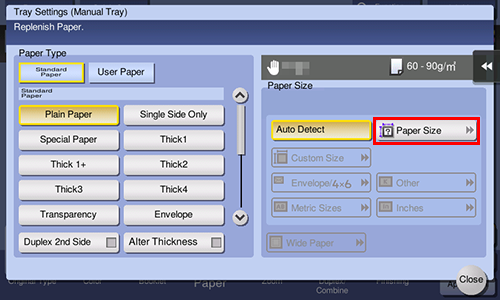
Tap [Paper Size].

4
Load a single sheet to be measured on the ADF or Original Glass.
NOTICE
- If a sheet is loaded on the Original Glass, leave the Original Cover open.
- If the weight (max. 210 g/m2 (55-7/8 lb)) of thick paper exceeds the paper weight allowable for the ADF, it causes a failure in the ADF. When the weight of loaded paper exceeds the paper weight allowable for the ADF, load paper on the Original Glass.
5
Use the Start key to start the size measuring process.
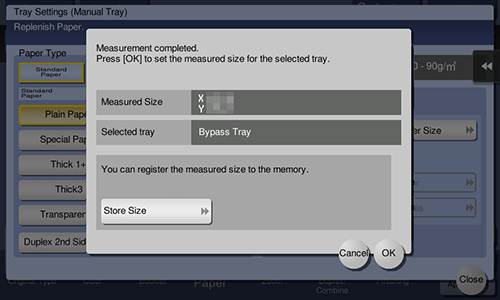
When measurement is completed, the screen for confirming the measurement result is displayed.
6
Tap [Store Size].

7
In [Registered Paper Sizes], select the key of the memory to register data in.
To change the name of the selected memory key, tap [Edit Name].
8
Tap [OK].
9
To set the detected size to the paper size, tap [OK].

 in the upper-right of a page, it turns into
  and is registered as a bookmark.