Associating This Machine with an Android Terminal Using NFC
Enabling the NFC function of this machine
NFC is the standard for near-field communication that is used for connection between handheld terminals or other devices several tens of centimeters away each other.
Configure a setting to support NFC on this machine. You can just place the Android terminal on the Mobile Touch Area of this machine and connect the Android terminal to this machine.
Select [System Settings] - [System Connection Setting] - [Mobile Connection Settings] in administrator mode of Web Connection (or in [Utility] - [Administrator] of this machine), and configure the following settings.
Setting | Description |
|---|---|
[Simple Connection Setting] | Configure functions to associate with a mobile terminal.
|
[Wireless Connection Setting] | Specify information required to connect from a mobile terminal to this machine in wireless mode.
When [Network I/F Configuration] is set to [Wireless Only], a pairing is established by applying the wireless settings of this machine; therefore, this setting is not displayed. |
[Touch Connection Link Application Settings] | When you place the Android terminal on the Mobile Touch Area of this machine, select an application to be started preferentially (default: [Konica Minolta Mobile Print]). |
To use NFC, you need to mount an option. For details on the required option, refer to Here.
Connecting an Android terminal to this machine via NFC using Konica Minolta Mobile Print
This section describes how to connect an Android terminal to this machine using Konica Minolta Mobile Print installed in the Android terminal.
Enable the NFC terminal setting of Konica Minolta Mobile Print.
Enable the wireless connection and NFC for the Android terminal.
Enable the NFC function of this machine (Here).
Check that this machine and the Android terminal are connected to the same wireless LAN environment.
Start the Android terminal.
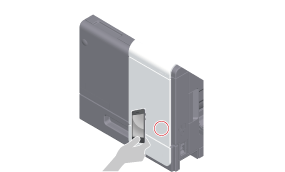
Place the Android terminal on the Mobile Touch Area of this machine.
Cancel the sleep mode of the Android terminal or unlock the screen, and then place the Android terminal on the Mobile Touch Area.
When multiple compatible applications are installed on the Android terminal, the application, to which the priority is given by the administrator, is started.

This starts a pairing with this machine, and registers this machine in the application.
For details on how to operate the application, refer to Help of the application.
