Q. Can I scan the original with its headers and punch holes erased?
Operation procedure
Load the original.
Tap [Scan/Fax] and select a destination.
Tap [Application] and select [Frame Erase].
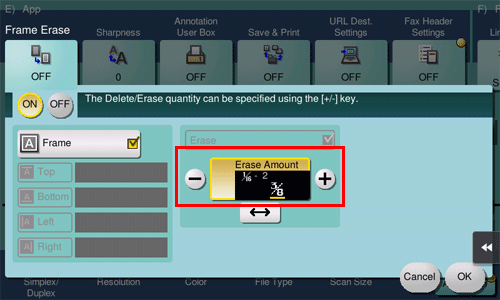
Tap [ON].
To erase the four sides of the original by the same width, tap [+] and [-] to specify the width to be erased.
 To display the Keypad, tap the input area for the numeral. If necessary, you can specify the width to be erased using the Keypad.
To specify the width of the frame to be erased individually, tap [Frame] to clear the check box, select a target side, then tap [+] or [-] to specify the width to be erased.
 To display the Keypad, tap the input area for the numeral. If necessary, you can specify the width to be erased using the Keypad.
 When specifying the erase width individually, you can set to exclude a side from erasing by selecting the side and canceling the setting of [Erase] for that side.
Tap [OK].
Press the Start key to start scanning of the original.
 Press the Preview key (default: Register key 4) before the Start key to check the finishing on the Touch Panel. For the procedure for checking the finish, refer to [Checking the Finish before Sending] .