Storage Option Settings
- Specifying a file name (File Name)
- Scanning a 2-sided original (Simplex/Duplex)
- Specifying the resolution to scan the original (Resolution)
- Selecting the color mode to scan the original (Color)
- Specifying the file type of the scanned original (File Type)
- Specifying the original size (Scan Size)
- Scanning originals of different sizes (Inch.Mixed original)
- Scanning a long original (Long Original)
- Specifying the original loading direction (Original Direction)
- Specifying the original binding position (Binding Position)
- Skipping blank pages (Blank Page Removal)
- Splitting the left and right pages of a book and catalog (Book Original)
- Scanning a number of originals in several batches (Separate Scan)
- Selecting the appropriate image quality level for the original (Original Type)
- Adjusting the density to scan the original (Density)
- Adjusting the background density of the original to be scanned (Bkgd. Removal)
- Scanning after erasing text and shadows in the margins of an original (Frame Erase)
- Sharpening the border between text etc. (Sharpness)
Specifying a file name ([File Name])
Rename a file of the scanned original data (using up to 30 characters).
When you do not change the file name, the file name is automatically assigned according to the rule of "Initial of the function" + "Device Name" + "Date" + "sequential number" + "Page Number" + "File extension". A file name consists of the following information:
Item | Description |
|---|---|
Initial of the function | Indicates the mode used for scanning data.
|
Device Name | The name of this machine registered in [Machine Setting] - [Input Machine Address] - [Device Name]. |
Date | Indicates the year, month, day, hour, and minute when the original was scanned. For example "11050115230" means that the file was scanned on May 1, 2011, 15:23. The last digit (0) indicates the order when file conversion is performed multiple times in a certain minute. If file conversion is performed twice between 15:23 and 24, the last digit appears as 231 and 232. |
Sequential number | A sequential number is given when a multi-page original is converted by page, and the number indicates the page number of original data. Page numbers are automatically included in the file name when the file is saved or sent. Consider this part for FTP Send or other transmission when a FTP server has restrictions regarding file names. |
File extension | Extension of the file to be saved. An extension is automatically included in the file name when the file is saved or sent. |

The following characters may be garbled depending on the destination environment; therefore, we recommend that you do not use them in a file name.
< > : * ? " / \ |

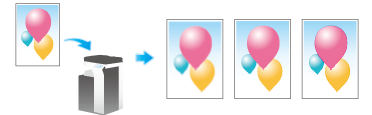
Scanning a 2-sided original ([Simplex/Duplex])
Using the ADF, you can automatically scan the front and back sides of an original. Also, you can scan only one side of the first page, then scan both sides of the remaining pages.
Setting | Description |
|---|---|
[1-Sided] | Scans one side of an original. |
[2-Sided] | Scans both sides of an original. |
[Cover + 2-sided] | Scans only one side for the first page in the original, and scan both sides of the remaining pages. |
Specifying the resolution to scan the original ([Resolution])
Select a resolution to use to scan the original.
Setting | Description |
|---|---|
[Scan Resolution] | Select a resolution of the original to be saved in the User Box.
|
[Fax Resolution] | Select the resolution of the original for sending a fax. When using fax transmission, Internet fax transmission, or IP address fax transmission, select the following resolution to scan an original.
|
Selecting the color mode to scan the original ([Color])
Select a color mode for scanning originals.
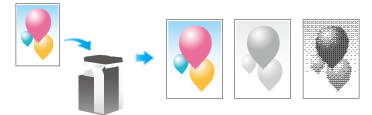
Setting | Description |
|---|---|
[Auto Color] | Automatically determines [Full Color] or [Gray Scale] to fit the original color when scanning the original. |
[Full Color] | Scans in full color regardless of whether the original is in color or in black and white. Select this option to scan originals of other than black and white and scanning color photos. |
[Gray Scale] | Scans in gray scale regardless of whether the original is in color or in black and white. Select this option to scan originals with many halftones, such as black and white photos. |
[Black and White] | Scans an original in black or white without using gray scales. Select this option to scan originals with distinct black and white areas, such as line drawings. |
Specifying the file type of the scanned original ([File Type])
The available file types are PDF, TIFF, JPEG, XPS, PPTX, and other types. You should use the password encrypted PDF file format to store important original data.
Setting | Description |
|---|---|
[File Type] | Select the file type to be saved from the following:
|
[Scan Setting] | Select a filing page unit when an original consists of multiple pages.
|
[E-mail Attachment Method] | Select the E-mail attachment method when [Page Setting] is set to [Page Separation].
|
[PDF Detail Setting] | If [PDF] or [Compact PDF] is selected for file format, you can configure the PDF option settings. You can enhance security by attaching a digital signature that identifies the author of the file, by file encryption, etc. |
[PDF Detail Setting] allows the following settings.
Setting | Description |
|---|---|
[Encryption] | Select [ON] to encrypt a file.
|
[Digital Signature] | Select [ON] to add a signature (certificate) of this machine to a PDF file. Also, select the signature encryption level from [SHA1] or [SHA256]. You can certify the author of a PDF, and prevent forgery or unauthorized modification. This function is enabled when a certification is registered on this machine. The E-mail address of the certificate of this machine must match the E-mail address of the administrator. |
Specifying the original size ([Scan Size])
Select the size of the original to be scanned. To scan a custom-size original, enter the size manually.
Scanning originals of different sizes ([Inch.Mixed original])
When an original consists of multiple pages of different sizes, the pages can be scanned at one time by using the ADF if they have the same width in the inch size.

This function is available only for the following original sizes.
8-1/2 11, 8-1/2 14, 5-1/2 8-1/2
Scanning a long original ([Long Original])
Load an original that is longer than the standard size in the feeding direction, into the ADF. Specifying [Long Original] allows you to send an original that is up to 39-3/8 inches (1000 mm) in length.

Specifying the original loading direction ([Original Direction])
When scanning a 2-sided original, specify the original loading direction so that the vertical direction of the scanned original is set correctly.
Specifying the original binding position ([Binding Position])
Specify the binding position to suit the orientation of the target original.
Setting | Description |
|---|---|
[Auto] | Automatically configures the binding position of the original. When the long side of the original is 11-11/16 inches (297 mm) or less, the binding position is set to the long side of the paper. When the long side of the original exceeds 11-11/16 inches (297 mm), the binding position is set to the short side of the paper. |
[Left] | Select this option when the binding position is set to the left of the original. |
[Top Bind] | Select this option when the binding position is set to the top of the original. |
Skipping blank pages ([Blank Page Removal])
When [Blank Page Removal] is specified to scan an original including blank pages using the ADF, blank pages are excluded from scan targets. Blank pages detected are not counted as original pages.

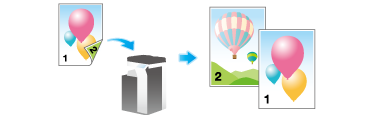
Splitting the left and right pages of a book and catalog ([Book Original])
You can scan two-page spreads such as books and catalogs separately into left and right pages, or scan them as one page. If you place a book or catalog on the Original Glass, you do not need to close the ADF to scan it.
Setting | Description |
|---|---|
[ON]/[OFF] | Select [ON] to specify Book Original. |
[Output Method] | Specify the method to scan a two-page spread.
|
[Binding Position] | If [Separation], [Front Cover] or [Front & Back Covers] is selected for [Output Method], select the two-page spread binding position. Select [Left Bind] for two-page spreads of left binding, and [Right Bind] for two-page spreads of right binding. Note that if the binding position is incorrectly specified, the page order of the two-page spread is reversed between the left- and right-hand pages. |
[Frame Erase] | Erases the shadow of the surrounding that is created when the original cover cannot be closed properly due to the thickness of the original. You can erase the four sides of the original to the same width. Additionally, you can erase the four sides of the original to different widths.
|
[Center Erase] | Specify the fold width to erase. This function erases the shadow created in the center when the original cover cannot be closed correctly due to the thickness of the original. |
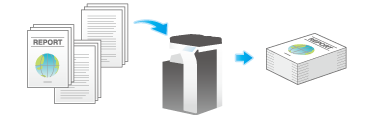
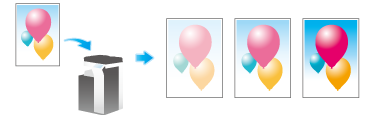
Scanning a number of originals in several batches ([Separate Scan])
If the number of original sheets is so large that they cannot be loaded into the ADF at the same time, you can load them in several batches and handle them as one job. You can also scan the original using both ADF and Original Glass alternately.
Load the original.

Do not load more than 80 sheets (21-1/4 lb (80 g/m2)) at a time into the Original Tray of the ADF, and do not load the sheets up to the point where the top of the stack is higher than the
 mark. Doing so may cause an original paper jam, original damage, or ADF failure.
Tap [Separate Scan], and set to [ON].
Set options if necessary.
Use the Start key to start scanning.
Load the next original, and use the Start key to start scanning.
If necessary, tap [Change Setting] to change the option settings according to the new original.
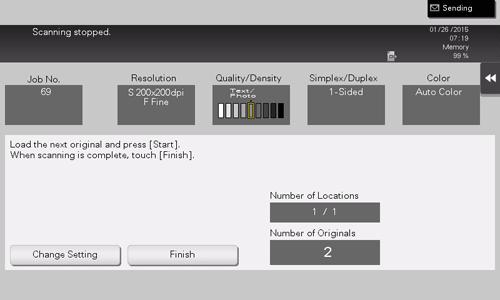
Repeat step 4 until all originals have been scanned.
After all originals have been scanned, select [Finish].
Use the Start key to start saving.
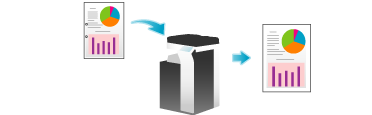
Selecting the appropriate image quality level for the original ([Original Type])
Select the appropriate image quality level for the original and scan at the optimal level of image quality.
Setting | Description |
|---|---|
[Text] | Scans an original that consists primarily of text at the optimum level of image quality. This function sharpens the edges of each character, creating easy-to-read images. |
[Text/Photo Printed] | Scans an original consisting primarily of text and photos at the optimum image quality level. This function sharpens the edges of each character and reproduces smoother photos. Select this option to scan printed originals such as brochures and catalogs. |
[Text/Photo PhotoPaper] | Scans an original consisting primarily of text and photos at the optimum image quality level. This function sharpens the edges of each character and reproduces smoother photos. Select this option to scan originals that include photos printed on photographic paper. |
[Photo Printed Photo] | Scans an original consisting of only photos at the optimum image quality level. Select this option to scan printed originals such as brochures and catalogs. |
[Photo Photo Paper] | Scans an original consisting of only photos at the optimum image quality level. Select this option to scan originals printed on photographic paper. |
[Dot Matrix] | Scans an original, which consists primarily of text such as thin or faint characters, at the optimum image quality level. This function reproduces text using high pixel density, creating easy-to-read text. |
[Copied Paper] | Scans an original, which is output with an even density from the copier or printer, at the optimum level of image quality. |
[Bar Code/Contract] | Reduces the file size when scanning the original such as a contract or bar code in black and white. If [Bar Code/Contract] is selected, [Color] is synchronously changed to [Black]. This option is available when the file type is set to TIFF, PDF, or XPS. |
Adjusting the density to scan the original ([Density])
Adjust the density (Dark or Light) to scan the original.
Adjusting the background density of the original to be scanned ([Bkgd. Removal])
You can adjust the density of the background area for originals with colored backgrounds (newspaper, recycled paper, etc.) or originals that are so thin that text or images on the back would be scanned.

Setting | Description |
|---|---|
[Background Removal] | Scans a 2-sided original made of thin paper or an original with the colored background, with the optimum image quality.
|
[Bkgd. Removal Level] | Adjusts the density of the background color for an original with a colored background. Selecting [Auto] automatically determines the density of the background color, and scans an original at the optimum background density level. |
Scanning after erasing text and shadows in the margins of an original ([Frame Erase])
Erase an area of an identical specified width along the four sides of an original. You can specify the width to be erased for each side.
Setting | Description |
|---|---|
[ON]/[OFF] | Select [ON] to set Frame Erase. |
[Frame] | Erases the four sides of the original by the same width amount. In [Erase Amount], specify the width to erase. |
[Top]/[Bottom]/[Left]/[Right] | Specify a different width for each side of the original to erase the side. Cancel the [Frame] setting, select the side to erase the frame, and specify the width to erase in [Erase Amount]. If you do not want to erase the side, cancel the setting for [Erase]. |
Sharpening the border between text etc. ([Sharpness])
Specifying [Sharpness] sharpen the edges of images such as text in the table and graphics to improve legibility. This function also smoothens the rough contours of an image or sharpens blurred images.