
Tray Paper Setting
Changing tray paper setting
The available paper type varies depending on the paper tray, so the displayed screen is different. For details on the available paper, refer to Here.
On the [Paper] setting screen, tap the setting icon (
 ) of the tray you want to change paper settings for.
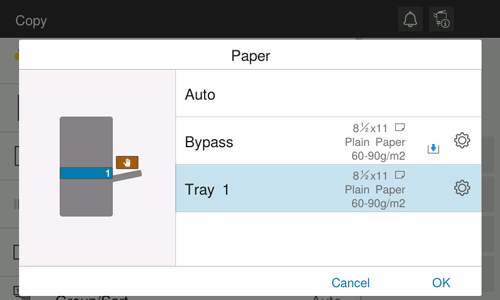
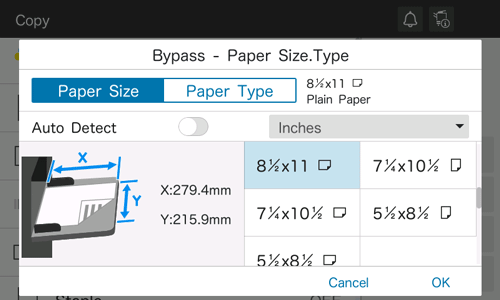
In [Paper Size], specify the size of the loaded paper.
[Auto Detect]: Automatically detects the size of the loaded paper (only for the optional Paper Feed Unit).
[Custom Size]: Directly specify the length and width of paper. For details, refer to Here.
[Metric Sizes]: Specify the metric size of paper.
[Inch Sizes]: Specify the inch size of paper.
[Envelope/4 6] ([Envelope/A6 Card]): Specify postcard or standard-size envelope.
[Other]: Specify other standard paper sizes.
In [Paper Type], specify the type of the loaded paper.
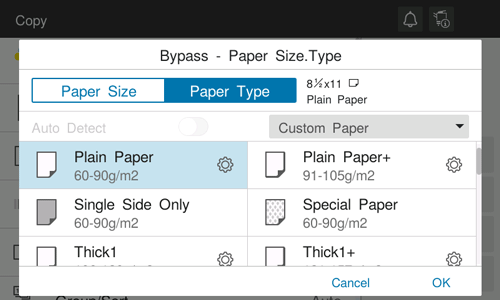
Tap [OK].

When using plain paper of 15-15/16 lb to 18-5/8 lb (60 g/m2 to 70 g/m2), tap the setting icon (
) in [Plain Paper] of [Paper Type], and set to [Alter Thickness ON]. The paper tray set to [Alter Thickness ON] is placed to a low priority level among the paper trays in which plain paper is loaded. However, if [Alter Thickness ON] is set to all paper trays, the appropriate paper tray is selected based on the priority sequence specified in [Auto Paper Tray Selection Setting] (Here).
Specifying the custom size
When loading custom-sized paper, directly enter the length and width of paper.
Custom-size paper can be loaded in Tray 1 or Bypass Tray.
On the [Paper] setting screen, tap the setting icon (
) of the tray you want to change paper settings for.Tap [Custom Size] from the drop-down list of [Paper Size].
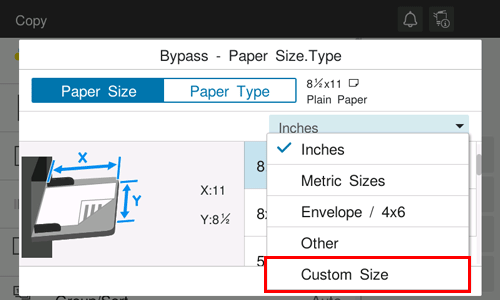
Specify the length and width of the paper.
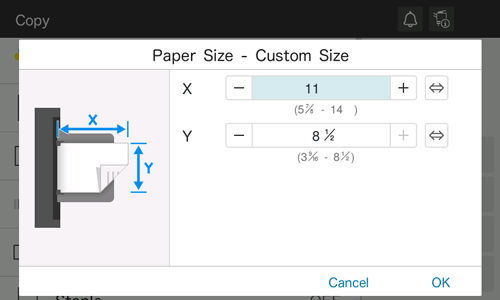
Tap [OK].