
Specifying a Destination
Directly entering the destination
Directly enter destination information.
Tap [+].

Select [SMB].
Enter destination information.
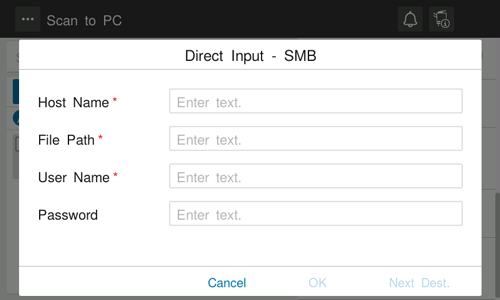
Setting
Description
[Host Name]
Enter the destination computer name (host name) or full computer name (FQDN) (using up to 253 bytes).
If you cannot specify the computer name or full computer name, enter the IP address.
Example to enter the computer name (host name): "HOME-PC"
Example to enter the full computer name (FQDN): "host1.test.local"
Example to enter the IP address (IPv4): "192.168.1.1"
Example to enter the IP address (IPv6): "fe80::220:6bff:fe10:2f16"
[File Path]
Enter the shared folder name of the host specified in [Host Name] (using up to 255 bytes).
Example to enter the folder name: "scan"
Example to enter the folder name in the folder: "scan\document"
[User Name]
Enter the name of a user with folder access rights (using up to 64 characters).
[Password]
Enter the password (using up to 64 characters, excluding double quotation marks ").
Tap [OK].
Using Address Book
Selecting the Destination tab ( ) displays a list of destinations registered on this machine. Switch the display using an index, and specify the target destination. For details, refer to Here.
Searching for the registered destination
Tapping the Search tab ( ) displays the destination search screen. If a large number of destinations are registered, the system searches for the registered name of the destination or characters of the address to find the target destination. For details, refer to Here.
Using Job History
Tapping the History tab ( ) displays a list of transmission logs. Specify the target destination from the previous five job histories. For details, refer to Here.