
Printing Only the Cover and Chapter on a Different Type of Paper
1
Open the file in the application, and click [File]. Then click [Print] from the menu.
2
Select this machine from the printer list, and click [More settings] (or [Preferences]).
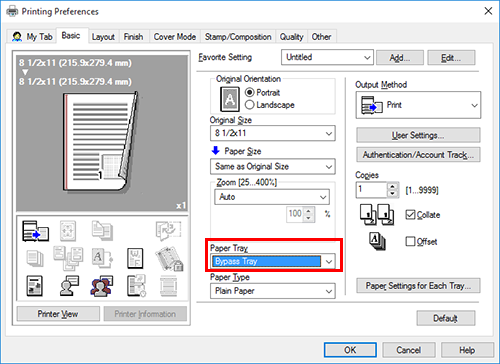
3
In [Paper Tray] in the [Basic] tab, select one other than [Auto].
4
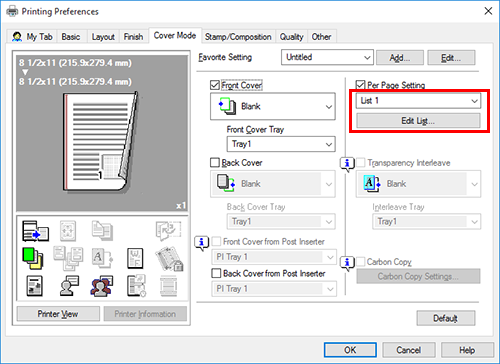
To print the cover on a different type of paper, select the [Front Cover] check box on the [Cover Mode] tab.
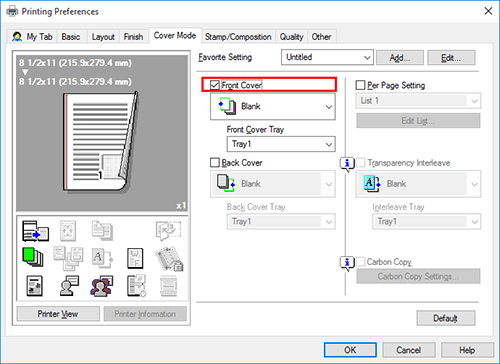
5
Select [Blank] or [Print] from [Front Cover] and select a paper tray from [Front Cover Tray].
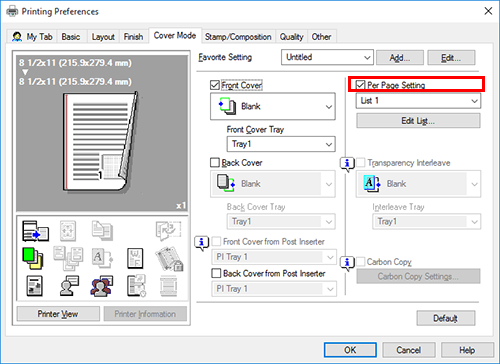
6
To print chapter covers on a different type of paper, select the [Per Page Setting] check box on the [Cover Mode] tab.
7
Select a list number and click [Edit List...].
8
Click [Add] and enter the page number(s) for chapter cover(s) in [Page Number].
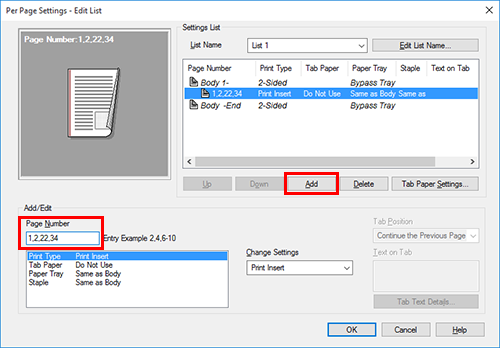
To print more than one chapter cover, separate the page numbers with commas.
9
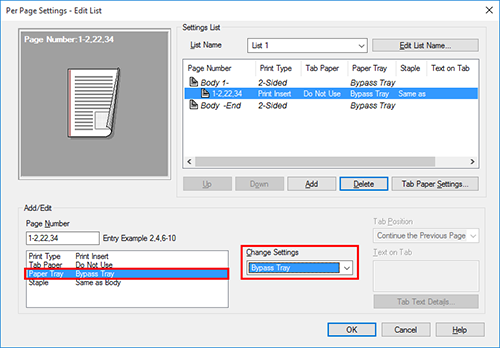
Select [Paper Tray] and select a paper tray from [Change Settings].
10
Click [OK].
11
Click [OK].
12
Click [Print].

Tips
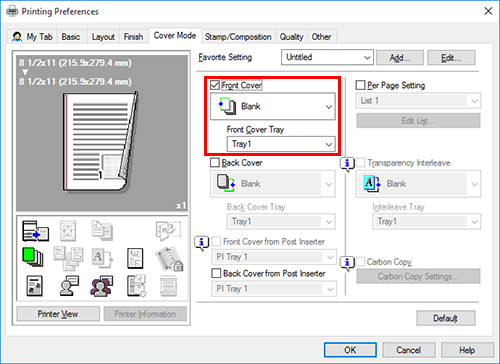
- When an optional Post Inserter is mounted, you can also check [Front Cover from Post Inserter] in step 4. If you select the [Front Cover from Post Inserter] check box, check that paper is loaded in the Post Inserter, and select a paper tray.
- [Front Cover] and [Front Cover from Post Inserter] cannot be specified simultaneously.
 in the upper-right of a page, it turns into
  and is registered as a bookmark.