
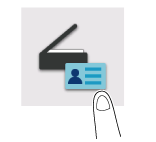
Scanning the Card
About scanning the ID card
You can scan and send a small-sized original such as an insurance card or driver's license with a simple operation.
Any size of a range of cards can be registered as the original size. In addition, you can select the Combine method according to your objective, such as combining the scanned original data into one file, or dividing it into individual files.
How to scan
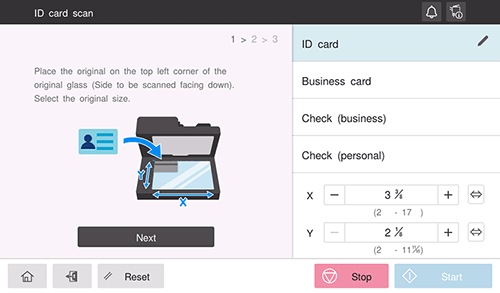
Tap [ID card scan] on the home screen.
Place a card on the Original Glass.
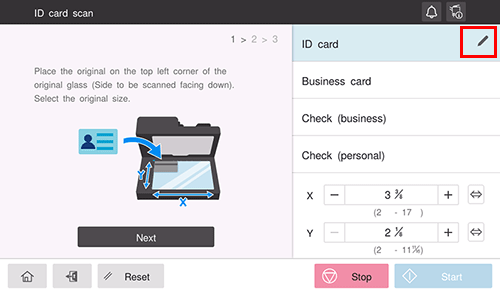
Place the original in the left corner of the Original Glass with the scanning side facing down.
Select the original size, and tap [Next].
Select the registered original size, or manually enter the original size.
You can change the registered contents of the original size. For details, refer to Here.
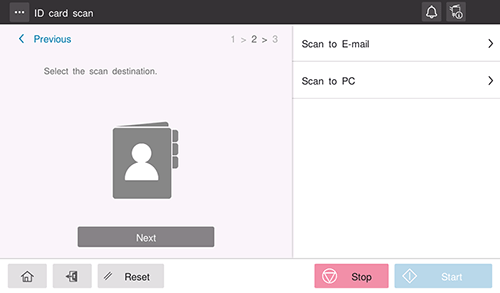
Select the destination, and tap [Next].
To send to the E-mail address, tap [Scan to E-mail].
To send to the FTP/SMB/WebDAV address, tap [Scan to PC].
If you tap the menu icon (
 ) at the top of the screen, you can register up to five destinations that can only be used for this function. The registered destinations can be selected from the list on the right.
Specify transmission options as needed.
In [Sending method], you can specify how to collect the scanned original data into a file.
[Single page]: Scans the original once and sends the file.
[Separate files]: Scans multiple originals in succession and sends each original as a single file.
[All in one file]: Scans multiple originals in succession and collects them into a single file for sending.
To check the finish, select the [Preview] check box.
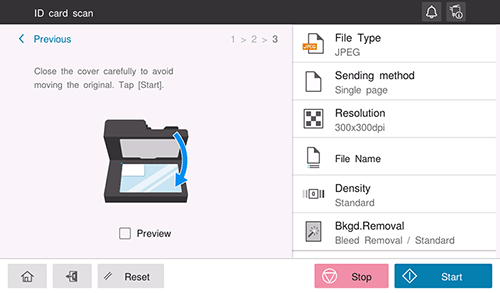
Close the original cover, and use the Start key to start sending.
If you select [Separate files] or [All in one file] in [Sending method] of the sending option, load the next original on the Original Glass, and tap [Continue scanning]. After all originals have been scanned, use the Start key to start sending.

The destinations registered in the menu at the top of the screen in step 4 are only available for this function. When editing or deleting a destination registered in the menu at the top of the screen, tap [Edit/delete destination] in the menu at the top of the screen. To edit a destination, tap the pencil icon (
 ) of the destination you want to edit. To delete a destination, tap the trash icon (
 ) of the desired destination.
Registering the original size
Tap the pencil icon of the original size.
Select the original size setting method.
If you want to select the original size from the default size, select [Preset size].
If you want to set the original size manually, select [Enter manually].
If you select [Enter manually], specify the guide image, registered name, and size.
If you tap [Change image], you can change the guide image displayed on the [ID card scan] screen to suite the card.
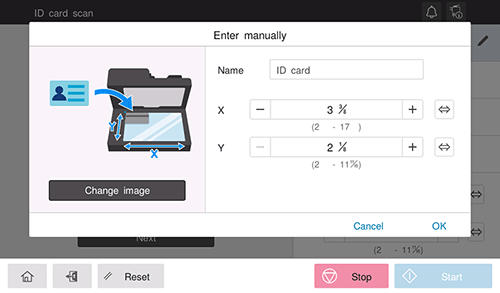
Tap [OK].