
Optional settings before file transfer
- Change the file resolution (Resolution)
- Change the file color (Color)
- Change a file type (File Type)
- Rename a file or a subject (E-mail Settings)
- Add the date and time (Date/Time)
- Add a page number (Page Number)
- Add a stamp (Stamp)
- Add information to the header/footer (Header/Footer)
- Send and print at the same time (Save & Print)
- Report the destination of transfer file (URL Dest. Settings)
- Encrpt an e-mail (Mail Encryption)
- Add digital signature to e-mails (Digital Signature)
- Send by renaming the sender (Fax Header Settings)
- Set a fax line type (Line Setting)
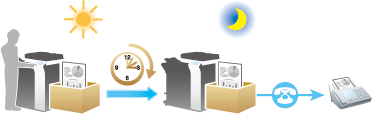
- Send a fax at preset time (Timer TX)
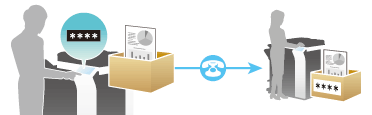
- Send a fax with a password (Password TX)
- Send a fax with F-code (F-Code TX)
Change the file resolution ([Resolution])
You can change the resolution, used for file storage in the User Box, and transfer file at a different resolution.
Change the file color ([Color])
You can change the color mode settings, used for file storage in the User Box, and send the file in new color.
The color mode can be selected from four types: [Use Existing Color Setting] to fit the color of the stored file, [Full Color], [Gray Scale], and [Black].
Change a file type ([File Type])
You can change the type of file, used for storage in the User Box, and transfer the file in new format.
The PDF, TIFF, JPEG, XPS, and PPTX file types are selectable. You should use the password encrypted PDF file format to store important files.
Rename a file or a subject ([E-mail Settings])
You can rename a file to be transferred.
When sending an e-mail, correct its subject and text if necessary.
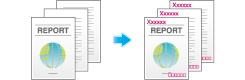
Add the date and time ([Date/Time])
Set a stamp position and format, and add the file transmission date and time.
The date and time can be printed either on all pages or only on the first page.

Add a page number ([Page Number])
Select the stamping position and format, and add page and chapter numbers.
Page and chapter numbers are printed on all pages.

Add a stamp ([Stamp])
Text such as "PLEASE REPLY" and "DO NOT COPY" are printed on the first page or all pages. You can select the text to be added from the registered fix stamps and arbitrary registered stamps.

Add information to the header/footer ([Header/Footer])
Add the date and time and any other desired text in the top and bottom margins (header/footer) of the specified page. You must register the information to be added for the header and footer in advance on this machine.
Send and print at the same time ([Save & Print])
You can print data at the same time as you are using Scan or Fax TX.
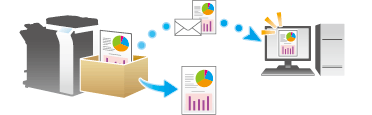
Report the destination of transfer file ([URL Dest. Settings])
When the SMB transmission, FTP transmission, or WebDAV transmission is complete, an e-mail showing the destination of transmission data is delivered to the specified address.
Encrpt an e-mail ([Mail Encryption])
You can encrypt e-mails to prevent wiretapping by third parties during transmission.
Add digital signature to e-mails ([Digital Signature])
When the MFP sends an e-mail, you can add a digital signature to it to prove the authenticity of the sender, and the recipient can confirm that data has not been tampered with.
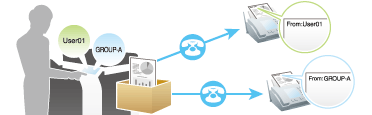
Send by renaming the sender ([Fax Header Settings])
You can use different sender names to send faxes to recipients.
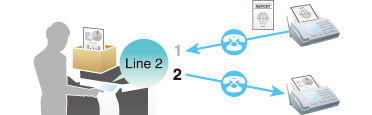
Set a fax line type ([Line Setting])
You can set a communication system or protocol and a line type for fax transmission.
Send a fax at preset time ([Timer TX])
You can set a time to send the fax.
For details, refer to the following page.
- When you are using a User Box, refer to Here.
Send a fax with a password ([Password TX])
A fax is sent with a password to a device for which fax destinations are restricted by passwords (that is, the Closed Network RX function is used).

For details, refer to the following page.
- When you are using a User Box, refer to Here.
Send a fax with F-code ([F-Code TX])
You can set an F-code for fax and send it to the Relay User Box or the Confidential User Box.
For details, refer to the following page.
- When you are using a User Box, refer to Here.