Specifying the color and image quality
- Selecting colors for printing (Select Color)
- Fine-tuning the image quality according to the original (Quality Adjustment)
- Selecting the optimum color representation for the original (Color Settings)
- Specifying the graphic pattern density (Pattern) (PCL only)
- Specifying the compression ratio of graphic images (Image Compression) (PCL only)
- Making the image glossy (Glossy Mode)
- Preventing the generation of white space around images (Auto Trapping / Black Over Print (PS only))
- Saving toner (Toner Save)
- Sharpening the border between text etc. (Edge Enhancement)
- Specifying font processing (Font Settings)
- Preventing failure in printing thin lines (Thin Line Support) (PCL only)
- Convert colors according to the RGB values of the original (Convert to Gray Scale) (PCL only)
Selecting colors for printing ([Select Color])
Select colors for printing. There are four color modes: [Auto Color] that fits the original color, [Full Color], [Gray Scale], and [2 Color].

In [Select Color] in the [Quality] tab, select a color mode for printing.

[Full Color] is a function of the PS driver.
[2 Color] is a function of the PCL driver.
Fine-tuning the image quality according to the original ([Quality Adjustment])
You can fine tune the color image quality according to the original. For example, you can increase the vividness or reduce the color difference.
You can adjust the overall image quality of the original, and you can also adjust in detail the image quality of each element of the original, such as text and photos. When you are using the PCL driver, you can adjust the brightness and contrast.

In the [Quality] tab, click [Quality Adjustment].
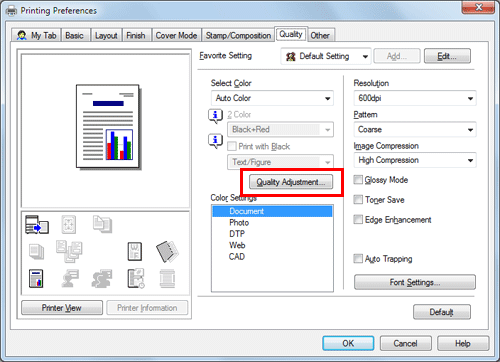
Fine tune the image quality according to the original.
[Simple]: The image quality of the entire original is adjusted. Specify the type of the color profile used for printing.
[Detail]: The image quality of the original is adjusted in detail for each element such as text, photos, figures, tables, and graphs. For each element, specify the type of the color profile used for printing and other profiles to be applied.
Click [OK].
When you are using the PS driver, you can manage the ICC profiles to be used. For details, refer to Here.
[Quality Adjustment] is available only when the printer driver for Windows is used.
Selecting the optimum color representation for the original ([Color Settings])
Select the optimum settings for the original to print it at the optimum image quality level.
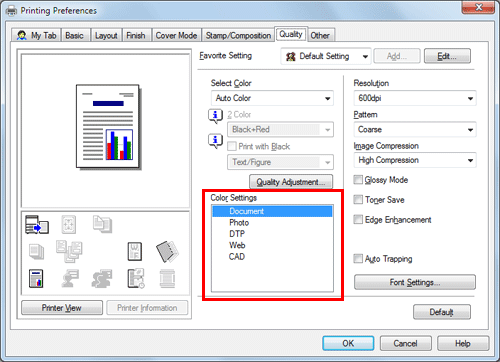
Select one of the following processes according to the original to be printed; the process suitable for originals consisting primarily of text, the process suitable for photos, the process suitable for originals created with DTP, the process suitable for printing Web pages, or the process suitable for printing CAD data.

In [Color Settings] in the [Quality] tab, select the optimum color setting mode for the original.
Specifying the graphic pattern density ([Pattern]) (PCL only)
In [Pattern] in the [Quality] tab, select the graphic pattern density.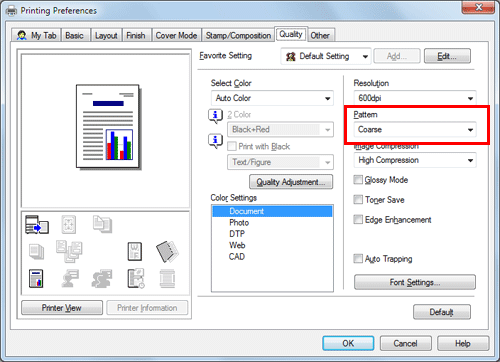
[Pattern] is available only when the printer driver for Windows (PCL) is used.
Specifying the compression ratio of graphic images ([Image Compression]) (PCL only)
In [Image Compression] in the [Quality] tab, select whether the quality or printing speed is preferred when the image data contained in the original is compressed.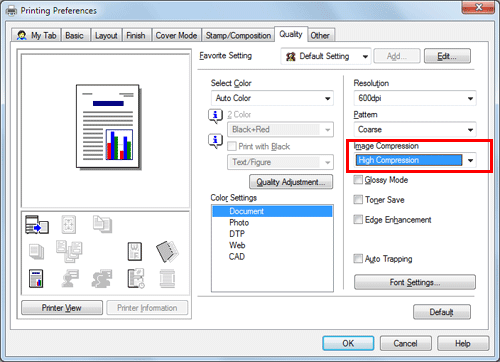
[Image Compression] is available only when the printer driver for Windows (PCL) is used.
Making the image glossy ([Glossy Mode])
Images are printed with a glossy finish.
In the [Quality] tab, select the [Glossy Mode] check box.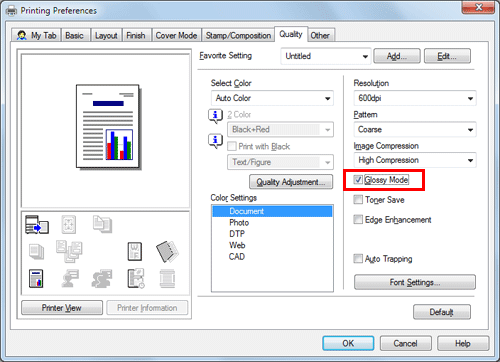
Preventing the generation of white space around images ([Auto Trapping] / [Black Over Print] (PS only))
The generation of white space on the boundary between different colors or around characters is prevented.
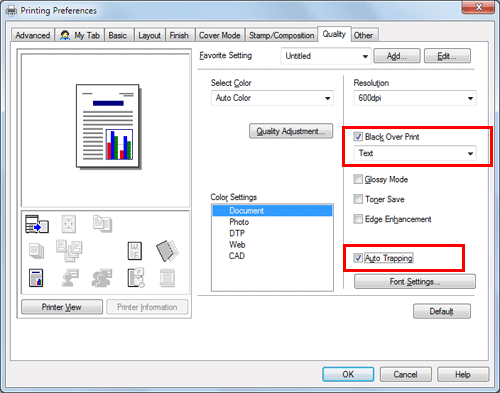
In the [Quality] tab, select the [Auto Trapping] check box or configure the [Black Over Print] setting.
Select the [Auto Trapping] check box to superimpose neighboring colors to print so as to prevent white space being generated around a picture.
Select the [Black Over Print] check box to superimpose black color on a neighboring color to print so as to prevent white space being generated around black characters or figures. You can select whether to print black only around the characters or around both characters and figures.
Saving toner ([Toner Save])
Selecting the [Toner Save] check box in the [Quality] tab adjusts the printing density in order to save the amount of toner consumed.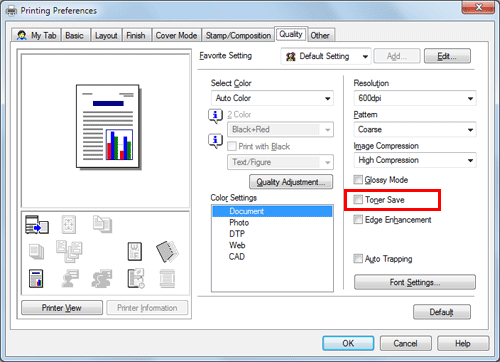
Sharpening the border between text etc. ([Edge Enhancement])
Sharpen the edges of images such as text in the table and graphics to improve legibility.
In the [Quality] tab, select the [Edge Enhancement] check box.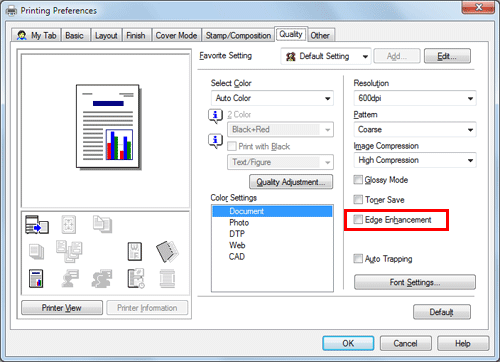
Specifying font processing ([Font Settings])
Specify how the fonts are processed for printing.
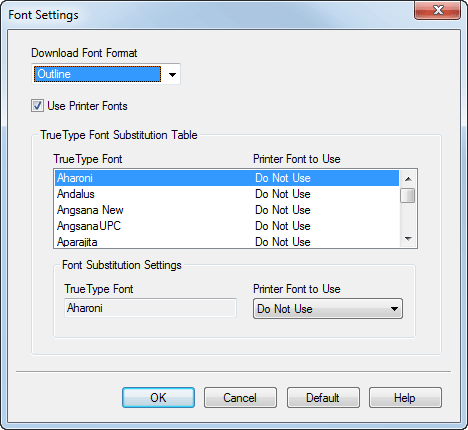
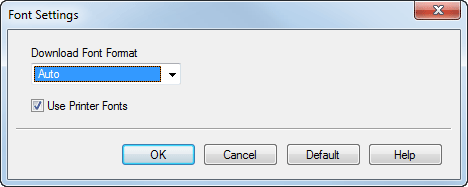
In the [Quality] tab, click [Font Settings].
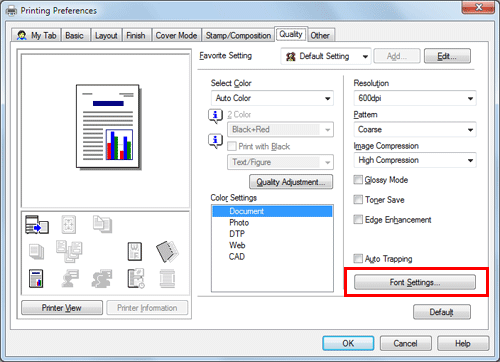
Change how the fonts are processed for printing.
PCL driver
PS driver
Settings
Description
[Download Font Format]
Select a type of fonts to be downloaded from the PC to this machine.
[Use Printer Fonts]
Select this check box to replace TrueType fonts with printer fonts during printing. Use of printer fonts increases the printing speed.
In normal printing operations, we recommend that you select this check box.
[TrueType Font Substitution Table] (PCL only)
Set this table when you want to specify the printer fonts that replace TrueType fonts.
From the list, select the TrueType font, then in [Printer Font to Use], select the printer font with which you want to replace the TrueType font.
Click [OK].
If characters are garbled in an environment using the PCL driver, we recommend that you select [Bitmap] in [Download Font Format] and clear the [Use Printer Fonts] check box.
[Font Settings] is available only when the printer driver for Windows is used.
Preventing failure in printing thin lines ([Thin Line Support]) (PCL only)
Select this option to prevent thin lines from disappearing in reduced-size printing.
On the [Other] tab, select the [Thin Line Support] check box.

This is effective for thin lines such as table borders created in Excel, but not for thin lines used in illustrations.
[Thin Line Support] is only available when the printer driver for Windows (PCL) is used.
Convert colors according to the RGB values of the original ([Convert to Gray Scale]) (PCL only)
When you open the [Quality] tab and set the [Select Color] to [Auto Color], the image is automatically converted into gray scale and printed if the RGB values of the original are below the thresholds you have set.
On the [Other] tab, check the [Convert to Gray Scale] box and set the threshold (the differential RGB values to be converted into gray scale).
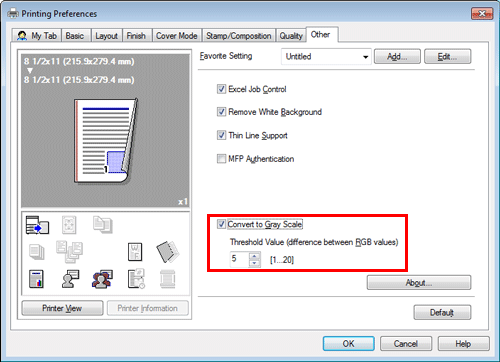
[Convert to Gray Scale] is available only when the printer driver for Windows (PCL) is used.


