
Using the Help function
Using the online help
Log in to Web Connection and click  , and you will be able to display the online help. The online help shows you the detailed descriptions of the function being set.
To display the online help, you must connect your computer to the Internet.
Displaying the meaning of the setting in the popup window
In the [Network] menu that appears after you log in to the administrator mode of Web Connection, you can use the popup help.
Placing the mouse cursor on the item of the screen (On Mouse) or clicking the item (On Focus) displays the description of that item in the pop-up window. While confirming the meaning of the item, you can configure network settings.
In the screen to log in to the administrator mode, you can specify the method to display the popup help.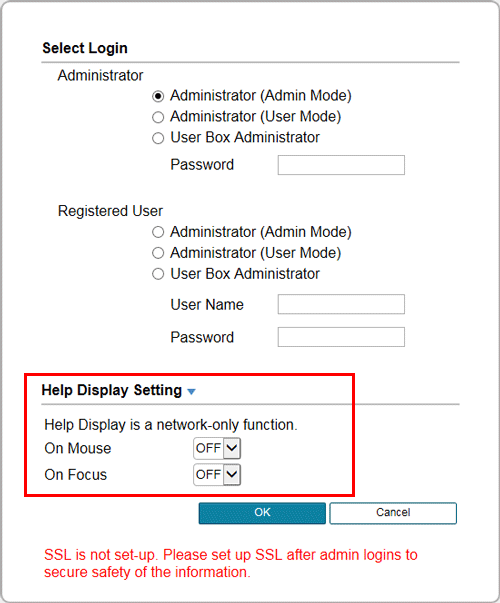
Settings | Description |
|---|---|
[On Mouse] | If you select [ON], the popup help is displayed when you place the mouse cursor on an item of the screen. |
[On Focus] | If you select [ON], the popup help is displayed when you click the entry area or option of a setting item. |
The popup help is displayed as shown below.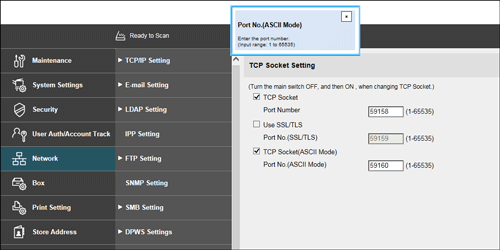
Using the wizard when configuring function settings
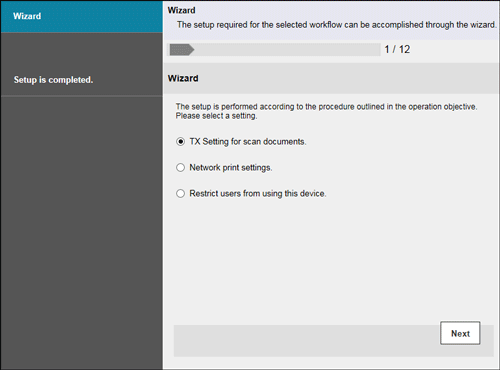
Some settings can be simply configured by entering settings as instructed in the screen via a wizard.
Setting using the wizard is available for the following functions.
[TX Setting for scan documents.]
[Transmit the scanned data via E-mail]
[Transmit the scanned data via E-mail (attach Digital Signature)]
[Transmit the scanned data via E-mail (Public Key Encryption)]
[Network print settings.]
[LPR Print]
[Print using RAW port]
[Print using SMB]
[Restrict users from using this device.]
[Do Not Authenticate]
[User Authentication Only]
[Account Track Only]
[User Authentication & Account Track]
[External Authentication Server]
To configure settings using the wizard, log in to the administrator mode, then select [Wizard].
The wizard screen is comprised of the following components.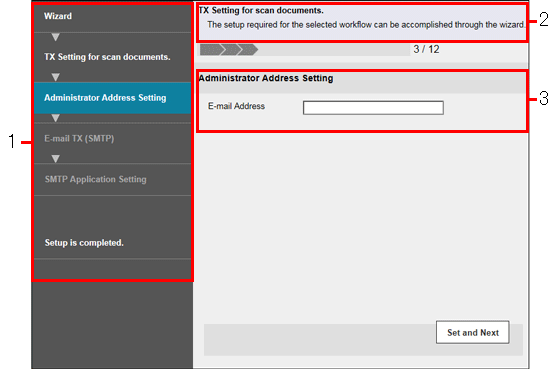
No. | Item | Description |
|---|---|---|
1 | Flow | Displays the setting flow. The current setting item is displayed in dark gray by which you can confirm the setting flow step you are in. Click one of the previous setting items to return to it and redo settings. |
2 | Purpose of the wizard | Displays the title of the wizard being set. |
3 | Check Job | Displays the setting item conforming to the flow. |

If you return to one of the previous setting items in the flow, you must redo settings at that item. The settings subsequent to the item to which you returned are not saved.
To finish the wizard during the setting process, click [Setup is completed.].