
Send a Fax with a Cover Sheet
When you open the [FAX Transmission Popup] screen and select the [FAX Cover Sheet] check box, you can add a cover sheet to the fax when sending.

You can edit the cover sheet data in the [FAX Cover Sheet Settings] screen, which is opened when you click [Settings...]. Also, you can set it in the [FAX] tab of the fax driver.
Open the [FAX Transmission Popup] screen, and select the [FAX Cover Sheet] check box.
Click [Settings...].
The [FAX Cover Sheet Settings] screen opens.
Select a size of cover sheet from the [Cover Size].
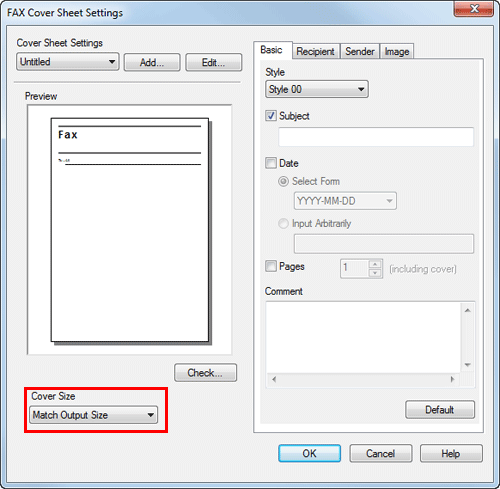
Set a style and subject of the cover sheet in the [Basic] tab.
Settings
Description
[Style]
Select a style of cover sheet.
[Subject]
When you write a subject on the cover sheet, select this check box and enter the subject (using up to 64 characters).
[Date]
When you write the date on the cover sheet, select this check box and specify the date format.
[Select Form]: Select a format of date.
[Input Arbitrarily]: Enter a format of date (using up to 20 characters).
[Pages]
When you write the total number of fax pages on the cover sheet, select this check box and select a number of fax pages including the cover sheet.
[Comment]
When you send a comment to the destination, enter it using up to 640 characters. (A New Line code is considered to be two characters long.)
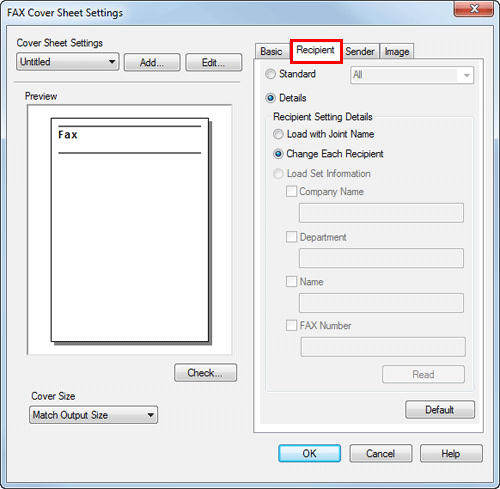
Open the [Recipient] tab, and select the [Standard] or [Details] format of destination.
Settings
Description
[Standard]
Use the standard characters to write the standard character string, which does not specify the recipient, on the cover sheet.
[Details]
When you write the recipient information on the cover sheet, set a style.
To add a title to the recipient, add it when you set the recipient name in the [FAX Transmission Popup] screen.
[Load with Joint Name]
Enter the joint name of recipients which has been added to the [Recipient List] of [FAX Transmission Popup] screen.
[Change Each Recipient]
This option changes the information written on the cover sheet for each recipient. Enter the contents of [Recipient List] displayed in the [FAX Transmission Popup] screen.
You can create different cover sheets for up to 100 recipients.
[Load Set Information]
Enter the information you have set in the [Company Name], [Department], [Name], and [FAX Number] fields (using up to 80 characters for each entry).
You can select this option if a recipient has been added to the [Recipient List] of [FAX Transmission Popup] screen.
When you click [Read], information of the first line of [Recipient List] of the [FAX Transmission Popup] screen is reflected.
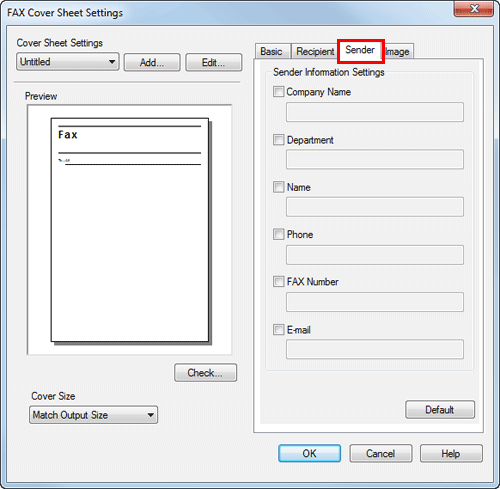
Enter the sender information in the [Sender] tab (using up to 80 characters for each entry).
To add an image, specify an image file in the [Image] tab.
You can place images such as company's logo and map on the cover sheet. BMP format can be specified.
Select the [Zoom] check box to zoom an image.
Set a position to add an image, using [X:] and [Y:] options.
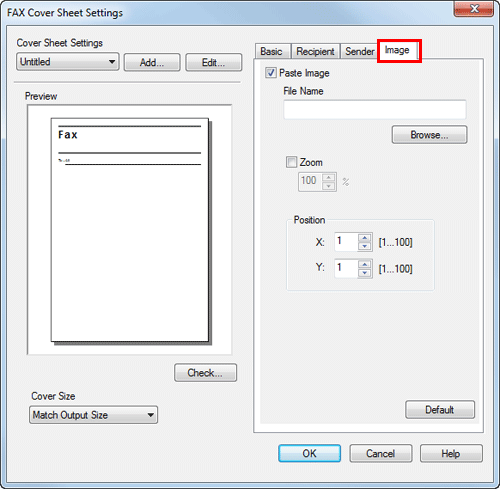
Check the layout image of cover sheet.
Click [Check...] to enlarge and check the layout image.
When you click [Add...], the cover sheet image is saved and you can recall it later by selecting [Cover Sheet Settings].
Click [OK].