
Quick Installation of the Fax Driver
Prepare the fax driver
Prepare the fax driver DVD disk
For details on the DVD, contact the administrator of this machine.
Check the operating system (OS) version that supports the fax driver
Ensure that the operation requirements of the fax driver are satisfied by the PC where you install the fax driver.
Install the fax driver on the PC
Install the fax driver on the PC using the installer
Insert the Driver & Utilities DVD into the drive, and install the software by following the on-screen instructions.
Performing a test print
If necessary, perform a test print to check that printing process works correctly.
Preparation finished
Prepare the fax driver DVD disk
The following types of DVD and CD-ROM are delivered with this machine.
DVD and CD-ROM types | Description |
|---|---|
Driver & Utilities DVD | Contains the printer driver (PCL/PS/FAX) for Windows, printer driver for the Mac OS, screen fonts, and TWAIN driver. This also contains the page for downloading utility software. |
User's Guide CD-ROM | Contains the User's Guide. |

In User's Guide manuals, location paths of folders or files may not contain the root directory.
To install the fax driver manually, specify the driver files in the EN (English) folder, and nothing elsewhere.
Check the operating system (OS) version that supports the fax driver
For details on the PC's Operating System (OS) that supports the fax driver, refer to Here.
Installation procedure
Install the fax driver on the PC by using the installer.
Administrator privileges are required to perform this task.
Insert the fax driver DVD into the DVD drive of the PC.
Make sure that the installer starts, and then go to Step 2.
If the installer does not start, open the printer driver folder on the DVD, double-click [Setup.exe] (in the 32-bit environment) or [Setup64.exe] (in the 64-bit environment), and then go to Step 3.
If the [User Account Control] window appears, click [Continue] or [Yes].
Select the [Agree the Software End User License Agreement.] check box.
Select [Install printers/MFPs] in [Select menu to setup], and click [Next].
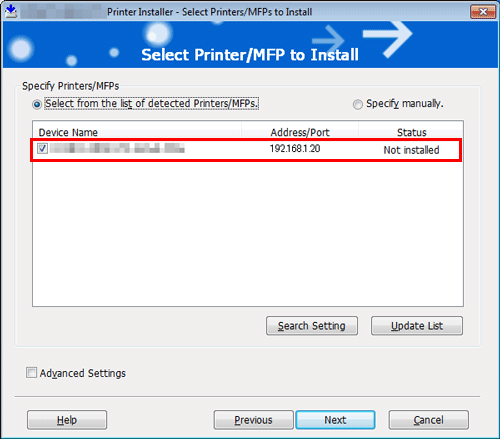
Connected printers are detected.
Select this machine from the list of detected printers.
If this machine is not detected, restart it.
Among the connected printers, only the target model is automatically detected and displayed. If multiple target models are displayed, check the IP addresses.
You can check the IP address of this machine in the screen that is displayed by tapping [Utility] - [Device Information].
If the connection to this machine cannot be recognized, it is not displayed in the list. In this case, select [Specify manually.] to manually specify the IP address and host name of this machine.
Select the [Advanced Settings] check box, and check that the [FAX] check box is selected in [Components to Be Installed].
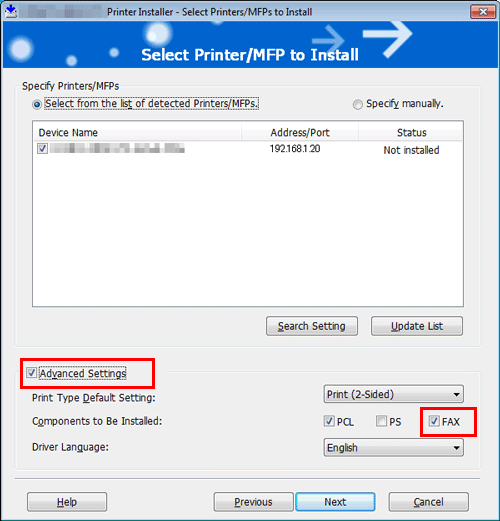
Click [Next].
Check the items to be installed, and click [Install].
Change the printer name or print a test page if necessary, then click [Finish].
The fax driver has been installed on the PC.
Settings
Description
[Review]
Displays the installed components for checking.
[Rename Printer]
Changes this machine name if necessary.
[Property]
Sets the optional operating environment of this machine. For details, refer to Here.
[Print Setting]
Changes the default print settings of this machine if necessary. For details, refer to Here.
[Print Test page]
Prints a test page to check the normal data transfer if necessary.

Be sure to initialize the fax driver after you have installed it. For details, refer to Here.