
Installation Using a Web Service Connection
Web service
The Web service function automatically detects devices on the network and installs the necessary printer drivers.
You can search for the printer compatible with the Web service print function on the network and install the printer drivers.

If this machine joins the Active Directory domain, you can use the "WSD Secure Print function" that can securely perform Web service printing in Windows 8.1/10.
Operations required to use this function (For administrators)
Configure the Web service operating environment.
How to configure the setting is explained using Web Connection. For details, refer to Here.
Installation methods
You can install the printer driver by automatically detecting the printer on the network or by specifying the IP address.
The procedure for installing the printer driver by automatically detecting the printer on the network is as follows:
In Windows 7/8.1/10/Server 2008 R2/Server 2012/Server 2012 R2/Server 2016, install the printer driver first, and then associate it with this machine through plug and play.
In Windows Server 2008, you can install the printer driver by creating a new port, even if the printer driver is not installed in advance.
Administrator privileges are required to perform this task.
To install a different printer driver in the computer where one has already been installed, you must uninstall the whole package of the currently installed printer driver.
Install the printer driver for this machine.
For details, refer to Here. The printer driver can be installed in any port.
Turn on the power of the machine while it is connected to the network.
In [Network and Sharing Center] on the computer, check that [Network Discovery] is enabled.
Open the [Network] window.
In Windows 8.1/10/Server 2012/Server 2012 R2/Server 2016, open [Control Panel], select the [Network and Internet] category, then click [View network computers and devices].
In Windows 7/Server 2008 R2, open [Computer] and click [Network].
If [Network] is not displayed, click the [Network and Internet] category on [Control Panel], then click [View network computers and devices].
In Windows Server 2008, open the Start menu, and click [Network].
Connected computers and devices are detected.
Select the device name of the machine, then click [Install] on the toolbar.
In Windows 8.1/10/Server 2012/Server 2012 R2/Server 2016, click [Network] - [Add devices and printers] on the toolbar. On the displayed window, select the device name of this machine, then click [Next].
To check the device name, select [Utility] - [Administrator Settings] - [Network Settings] - [DPWS Settings] - [DPWS Common Settings] on this machine.
The printer driver for this machine is detected and the machine is ready to print.
After finishing the installation, make sure that the icon for the installed printer is displayed in the [Printers] or [Devices and Printers] window.

If the printer driver is not correctly installed, the driver must be updated using [Update Driver...]. For details, refer to Here.
The procedure for installing the printer driver by specifying the IP address is as follows:
In Windows Server 2008, you can add a Web service device using the addition function of the printer after connecting this machine.
In Windows 7/8.1/10/Server 2008 R2/Server 2012/Server 2012 R2/Server 2016, the following installation procedure cannot be used. Use the installation procedure described in the previous section.
Administrator privileges are required to perform this task.
To install a different printer driver in the computer where one has already been installed, you must uninstall the whole package of the currently installed printer driver.
Turn on the power of the machine while it is connected to the network.
In [Network and Sharing Center] on the computer, check that [Network Discovery] is enabled.
Insert the printer driver DVD into the DVD drive of the computer.
From the Start menu, click [Control Panel].
Click [Printers] under [Hardware and Sound].
When [Control Panel] is displayed in Classic View, double-click [Printers].
The [Printers] window appears.
Click [Add a printer].
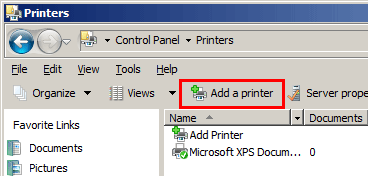
The [Add Printer] appears.
Click [Add a local printer].
The [Choose a printer port] dialog box appears.
Click [Create a new port:], then select [Standard TCP/IP Port].
Click [Next].
Select [Web Services Device], enter the IP address, and click [Next].
A printer of the entered IP address is located, then the [Found New Hardware] dialog box appears.
Click [Locate and install driver software (recommended)].
If a dialog box to confirm whether to search online appears, click [Don't search online].
Click [Browse my computer for driver software (advanced)].
Click [Browse...].
Select the folder on the DVD containing the desired printer driver, then click [Open].
Select the folder according to the printer driver, operating system, and language to be used.
Selectable printer drivers: PCL driver and PS driver
Click [Next].
Click [Close].
Follow the instructions on the pages that follow.
After finishing the installation, make sure that the icon for the installed printer is displayed in the [Printers] window.
Eject the DVD from the DVD drive.
This completes the installation process of the printer driver.