Punching File Holes in Copies: Punch
Set the Punch mode to punch file holes in printed sheets. Follow the procedure below to select the paper size (A4  , 8.5
, 8.5  11
11  ) and punch position. To select the punch hole type, change the die set to the desired one.
For detailed specifications of Multi Punch GP-501, refer to Multi Punch GP-501.
Available paper sizes are A4
 or 8.5
  11
11  only. A4
  , 8.5
, 8.5  11
11  cannot be used for this function.
A power switch is provided on the multi punch. Be sure to turn it on before turning on the main power switch and sub power switches of the main body.
The die set model currently mounted on the multi punch cannot be checked from the control panel. If required, open the front door of the multi punch to check it before the operation.
Position the original.
Press the [COPY] tab to display the [COPY] screen.
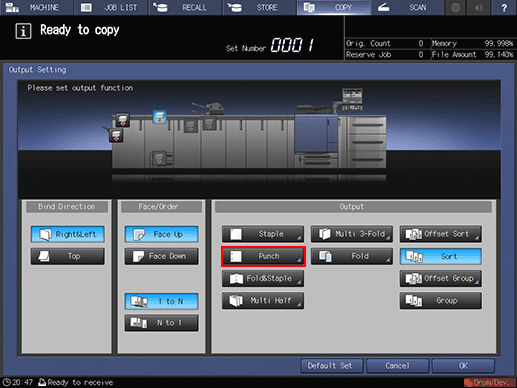
Press [Output Setting].
The [Output Setting] screen will be displayed.
Press [Punch].

The [Punch] screen will be displayed.
Select the desired punch position key provided under [Multi Punch].

Press [OK].
To restore the previous setting, press [Cancel].
To disable the function while keeping the current setting, press [Function OFF].
The [Output Setting] screen will be restored.
Press [OK] on the [Output Setting] screen to return to the [COPY] screen.
An icon representing specified output mode will be displayed under [Output Setting] on the [COPY] screen.

