How to Make a Basic Copy
Follow the procedure below to make a basic copy.
The following describes the basic procedure. It is not always applicable to the operations of set copy conditions. When using a specific function, be sure to follow the procedure described in each section.
Position the original.
Press the [COPY] tab to display the [COPY] screen.
The [MACHINE] screen shows up first at the default setting. To display the [COPY] screen, press the [COPY] tab on the [MACHINE] screen.
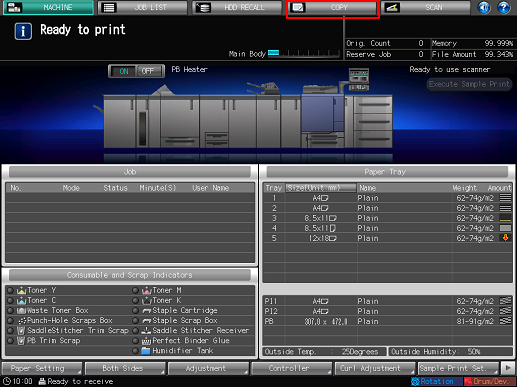
[Default Screen Setting] can be set to the [Hold Job] screen of the [JOB LIST] screen or the [Reserved Job] screen of the [JOB LIST] screen. To display the [COPY] screen, press the [COPY] tab in both cases.
If [Default Screen Setting] is set to the [COPY] screen, the [COPY] screen is displayed from the beginning.
For [Default Screen Setting], refer to Default Screen Setting: Selecting the First Screen to Be Displayed.
Set copy conditions as desired.
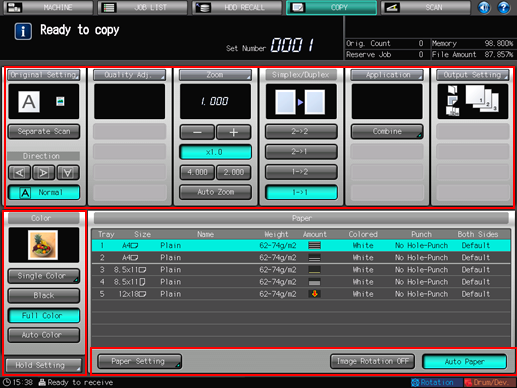
The following settings are available from the [COPY] screen.
[Original Setting]: Refer to Setting Originals.
[Separate Scan]: Refer to Separate Scan: Handling Original Scanned from ADF / Original Glass as Single Job.
[Quality Adj.]: Refer to Overview of Quality Adjustment.
[Zoom]: Refer to Setting Zoom.
[Simplex/Duplex]: Refer to 1-Sided/2-Sided Setting.
[Application]: Refer to Overview of Application.
[Output Setting]: Refer to Overview of Output Setting.
[Color]: Refer to Selecting Color Mode.
[Hold Setting]: Refer to Hold Setting: Temporarily Saving Scanned Job.
[Paper Setting]: Refer to Paper Setting.
[Image Rotation OFF]: Refer to Image Rotation OFF: Setting ON/OFF of Image Rotation.
[Auto Paper]: Refer to Auto Paper: Selecting Paper Size Automatically.
Enter the desired print quantity from the keypad on the control panel.

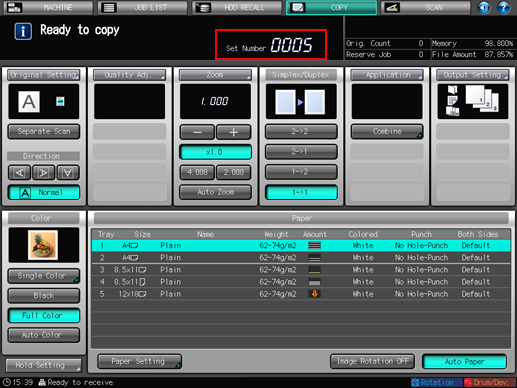
Entered quantity is displayed.
For details about entering the print quantity, refer to Setting Print Quantity.
Press Start on the control panel.


In order to start copying, make sure to display the [COPY] screen. If you press Start with any other screen displayed, you cannot start copy operations.
If you print from the [Hold Job] screen or the [HDD RECALL] screen, the [COPY] screen does not have to be returned.
When scanning the original for the job is started, a dialog is displayed on the [COPY] screen.
Press either [Yes] or [No] on the dialog.
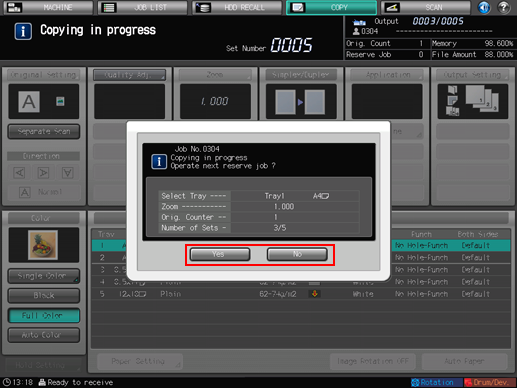
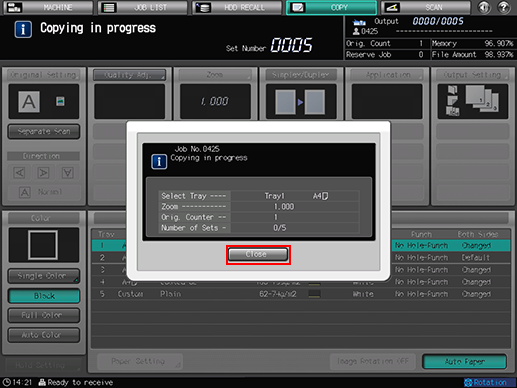
To return to the [COPY] screen, press [Yes].
If you set the [COPY] screen in [Default Screen Setting], only [Close] is displayed on the dialog. To return to the [COPY] screen, press [Close].
You are now ready to set reserve job.
To return to the screen set in [Default Screen Setting], press [No].
The count and set quantities are displayed at the upper right corner of both screens.
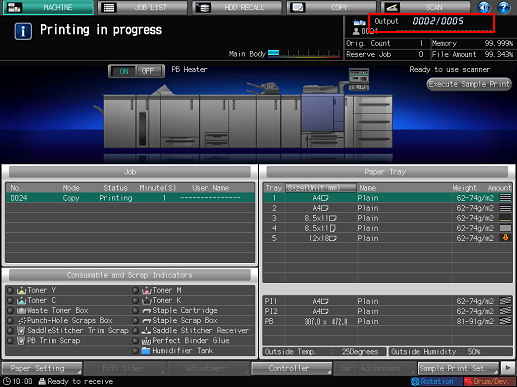
The current job is displayed in the job list in the [Reserved Job] screen of the [JOB LIST] screen.
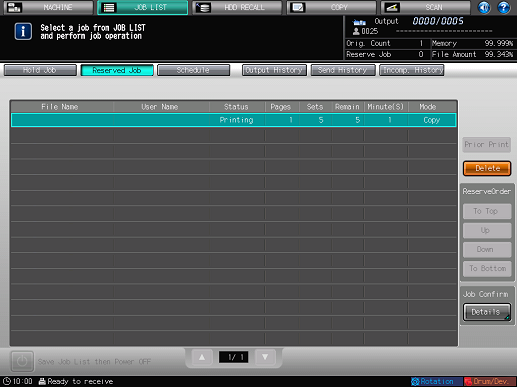
For selecting the default screen which is displayed when turning on the power, refer to Default Screen Setting: Selecting the First Screen to Be Displayed.
You can change the operation order of reserved jobs or cancel reserved jobs in the [JOB LIST] screen. For details, refer to Overview of the JOB LIST Screen.

