
Registering from Address Book
Registering an E-mail address
Register destination E-mail addresses.
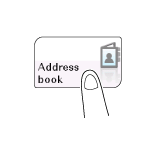
Tap [Address book] on the main menu.
Tap [New].
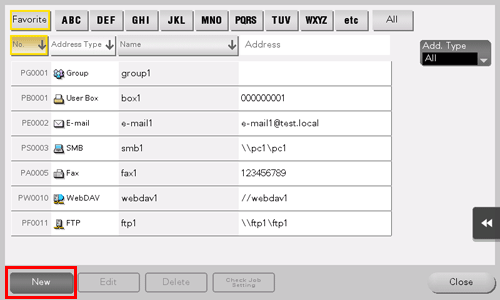
Select [E-mail] from [Address Type].
Enter destination information, then tap [Register].
The registered information is the same as that to be registered from the Utility. For details, refer to Here.

To check the settings for a registered destination, select its registered name, then tap [Check Job Setting].
To change the settings for a registered destination, select its registered name, then tap [Edit].
To delete a registered destination, select its registered name, then tap [Delete].

You can also register an E-mail address using Web Connection. For details, refer to Here.
Registering an SMB destination
Register a destination computer name (host name) or IP address. Also register a folder for saving a file or information for accessing a folder.
Tap [Address book] on the main menu.
Tap [New].
Select [SMB] from [Address Type].
Enter destination information, then tap [Register].
The registered information is the same as that to be registered from the Utility. For details, refer to Here.
To check the settings for a registered destination, select its registered name, then tap [Check Job Setting].
To change the settings for a registered destination, select its registered name, then tap [Edit].
To delete a registered destination, select its registered name, then tap [Delete].

You can also register an SMB destination using Web Connection. For details, refer to Here.
Registering an FTP destination
Register destination FTP server host names or IP addresses. Also register a folder for saving a file or account information.
Tap [Address book] on the main menu.
Tap [New].
Select [FTP] from [Address Type].
Enter destination information, then tap [Register].
The registered information is the same as that to be registered from the Utility. For details, refer to Here.
To check the settings for a registered destination, select its registered name, then tap [Check Job Setting].
To change the settings for a registered destination, select its registered name, then tap [Edit].
To delete a registered destination, select its registered name, then tap [Delete].
You can also register an FTP destination using Web Connection. For details, refer to Here.
Registering a WebDAV destination
Register destination WebDAV server host names or IP addresses. Also register a folder for saving a file or account information.
Tap [Address book] on the main menu.
Tap [New].
Select [WebDAV] from [Address Type].
Enter destination information, then tap [Register].
The registered information is the same as that to be registered from the Utility. For details, refer to Here.
To check the settings for a registered destination, select its registered name, then tap [Check Job Setting].
To change the settings for a registered destination, select its registered name, then tap [Edit].
To delete a registered destination, select its registered name, then tap [Delete].
You can also register a WebDAV destination using Web Connection. For details, refer to Here.
Registering a User Box destination
Register user boxes to save.
Tap [Address book] on the main menu.
Tap [New].
Select [User Box] from [Address Type].
Enter destination information, then tap [Register].
The registered information is the same as that to be registered from the Utility. For details, refer to Here.
To check the settings for a registered destination, select its registered name, then tap [Check Job Setting].
To change the settings for a registered destination, select its registered name, then tap [Edit].
To delete a registered destination, select its registered name, then tap [Delete].
You can also register a User Box destination using Web Connection. For details, refer to Here.