
How to Send
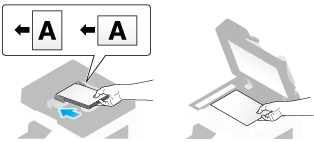
Load the original.
Tap [Scan/Fax].

Configure Scan option settings as necessary.
For details on configuring option settings, refer to the respective columns of the following table.
Purpose
Reference
To configure basic options such as color and original size
To configure options to scan various types of originals such as various sizes and books
To adjust the image quality level of the original such as colored background (newspaper, etc.) or light printing original
To print date/time and page number
Other option settings
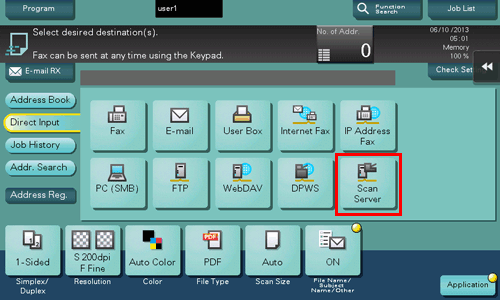
Select [Direct Input] - [Scan Server].
When sending data via a scan server, you cannot send data to other destinations simultaneously or use a fax/scan program.
Select a scan process.
A scan process is used to automate a preset scanning workflow such as a distribution destination from a scan server. This is created by the Windows Server 2008 R2/Server 2012/Server 2012 R2/Server 2016 application, and registered in Active Directory.
Up to 50 scan processes can be obtained. However, multiple scan processes cannot be selected as destinations.
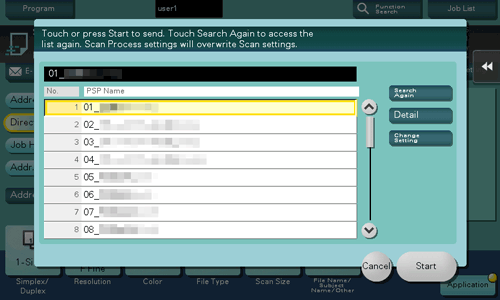
Tapping [Search Again] updates the scan process list.
Tapping [Detail] displays the details of the selected scan process.
By tapping [Change Setting], you can change option settings such as [Color] and [Scan Size].
Tap [Start].
Transmission begins.
However, transmission fails if no scan process is selected or no destination is set to a scan process.
