Wireless network troubleshooting

Wireless troubleshooting checklist

Before beginning to troubleshoot the wireless printer, verify the following:

Wireless configuration does not continue after the USB cable is attached

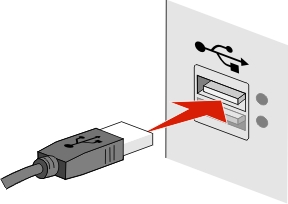
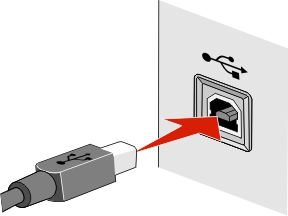
Check the USB cable

If the configuration software does not allow you to continue configuring your printer wirelessly after you attach the USB cable, there may be a problem with the cable. Try one or more of the following:

WEP key or WPA/WPA2 preshared key/passphrase not valid

Carefully retype the key

Make sure the key has the correct number and the right kind of characters

WEP key

A valid WEP key is:

WPA/WPA2 preshared key/passphrase

A valid WPA/WPA2 preshared key/passphrase is:

Note: ASCII keys are case-sensitive. Be sure to include any capital letters.

Network printer does not appear in the printer selection list during installation

Make sure the printer is on the same wireless network as the computer

The SSID of the printer must match the SSID of the wireless network.

Find the network SSID
  1. Open a Web browser, and then type the IP address of your access point in the address field.

    If you do not know the IP address of the access point (wireless router), then do the following.

    For Windows users:
    1. Click the start button or Start, and then click Run.

    2. In the Start Search or Run dialog, type cmd.

    3. Press Enter, or click OK.

    4. Type ipconfig, and then press Enter.

      • The Default Gateway entry is typically the IP address of the access point.

      • The IP address appears as four sets of numbers separated by periods, such as 123.123.123.123.

    For Macintosh users:
    Note: This is applicable only in Mac OS X version 10.5 or later.
    1. From the Apple menu, navigate to:

      System Preferences > Network

    2. Click Wi-Fi or AirPort.

    3. Click Advanced > TCP/IP.

      Note: The Router entry is typically the IP address of the access point.
  2. When prompted, type the user name and password for the access point.

  3. Click OK.

  4. Look for the SSID, security type, and WEP key or WPA/WPA2 preshared key/passphrase, and then write them down.

    Note: Make sure you copy them exactly, including any capital letters.
  5. Connect the printer to a wireless network. Do either of the following:

Network does not appear in the Wireless Networks list

Try one or more of the following:

Network does not broadcast its SSID

Some networks will not appear in the network list because they do not broadcast their SSIDs. Select the option to connect to another wireless network, and then follow the instructions on the computer screen..

The printer will be moved to a remote network

The printer or installing computer is too far away from the access point

The wireless network is not functioning

Confirm that the network equipment is functioning properly:

There is RF (Radio Frequency) interference between the wireless access point and the installing computer

Limit the sources of RF interference between the wireless access point and the installing computer by rearranging the network and items in the signal path. Sources of RF interference include:

There is an object blocking the signal between the printer and the access point

The wireless signal can also be distorted or blocked by objects in the path between the access point and the printer.

There are too many devices on the wireless network

A wireless device will communicate on the network only when no other device is communicating. Too many computers, printers, and other wireless devices can cause a wireless network to be so busy that a new device is unable to send or receive information.

Wireless Setup Utility stops responding during wireless configuration (Windows only)

If the Wireless Setup Utility stops responding during the wireless configuration process, then restart the computer, and then run the Wireless Setup Utility again. For more information, see Using the Wireless Setup Utility (Windows only).

Note: This program is applicable only in select printer models.

Cannot print after wireless configuration completes

Try one or more of the following:

Make sure the printer is turned on

Make sure the printer is ready

Disable third-party firewalls

Make sure the wireless network is working properly

Make sure the correct port or printer is selected

Make sure the printer driver is installed in the printer

All computers that print to the wireless printer must first have the printer driver installed.

Make sure Windows is working properly

Make sure the printer is working

Printer previously configured for an Ethernet connection does not work wirelessly

The printer supports only one type of network connection at a time.

Disconnect the Ethernet cable

If the printer is still connected to an Ethernet network, then disconnect the Ethernet cable from the printer. Turn off the printer, and then turn it back on. It should then join the wireless network.

Set the wireless network adapter of the printer as the active network card

  1. From the printer control panel, navigate to:

    Network/Ports > TCP/IP > Active NIC > Auto

    Note: If the printer you are configuring wirelessly does not have a control panel, then see the User’s Guide.
  2. Connect the printer to a wireless network. Do either of the following:

Turn off the printer, and then turn it back on

Network settings are correct but printer does not print wirelessly

If the printer is configured to print wirelessly and all of the settings appear to be correct, but the printer does not print, try one or more of the following:

Allow the wireless installation to finish

Do not attempt to print, remove the Software CD, or detach the installation cable until you see the Wireless Setup Successful screen.

Enable the printer

  1. Click vista start button, or click Start and then click Run.

  2. In the Start Search or Run box, type control printers.

  3. Right-click the new printer. If Use Printer Online appears in the menu, select it.

  4. Close the Printer, Printers and Faxes, or Printers window and try printing again.

Select the wireless printer

If the printer was first configured as a locally attached printer, it may be necessary to select the wireless printer to use the printer wirelessly.

  1. Click vista start button, or click Start and then click Run.

  2. In the Start Search or Run box, type control printers.

  3. Check for a printer called Copy 1 in the folder. If there is, right-click the Copy 1 printer and click Use Printer Online from the menu.

  4. Close the Printer, Printers and Faxes, or Printers window and try printing again.

Select the wireless port

If the printer was first configured as a locally attached printer, it may be necessary to select the wireless printer port to use the printer wirelessly.

  1. Click vista start button, or click Start and then click Run.

  2. In the Start Search or Run box, type control printers.

  3. Right-click the printer and select Properties from the menu.

  4. Click the Ports tab.

  5. Locate the selected port. The selected port has a check in the Port column.

  6. If the Description column of the selected port indicates that it is a USB port, scroll through the list and select the port with Printer Port in the Description column.

  7. Click OK, and then try to print again.

Printer no longer works wirelessly

If the printer was working but no longer works wirelessly, then verify that:

Check the access point settings

Make sure the wireless network is functioning properly

Check the printer configuration

Why did the printer fail to join the network?

After the Wireless Setup Utility completes the installation process, the printer may fail to join the network for several reasons. If the printer does not join the wireless network immediately after running the Wireless Setup Utility, then do the following:

  1. Print a network setup page. For more information, see the User’s Guide.

  2. Examine the TCP/IP section.

Setup did not complete and printer did not join the network

Print a network setup page before continuing to troubleshoot the printer. For more information, see the User’s Guide.

Data entry issues

Computer configuration issues

Network configuration and access issues

Printer configuration issues

Setup completed but printer did not join the network

Print a network setup page before continuing to troubleshoot the printer. For more information, see the User’s Guide.

Printer configuration issues

Network configuration and access issues

Network security issues

Location issues

Printer is configured correctly, but cannot be found on the network

Verify that: