
Registering the Print Setting to Hot Folder
Register a print setting when printing to Hot Folder.
The example below creates a print setting that the original PDF file of 32 A4 pages is reduced and printed 2 in 1 on both sides of A4 paper.
In the example, the following settings are made.
Setting items:
Paper Tray Setting
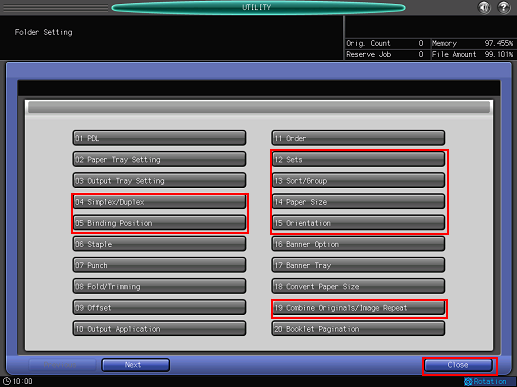
Simplex/Duplex
Binding Position
Sets
Sort/Group
Paper Size
Orientation
Combine Originals/Image Repeat

You can also register the print setting of Hot Folder by using PageScope Web Connection. For details about PageScope Web Connection, refer to Hot Folder Setting.
The setting items may differ depending on the printer type used and the configuration of options.
Each printer can contain multiple job settings.
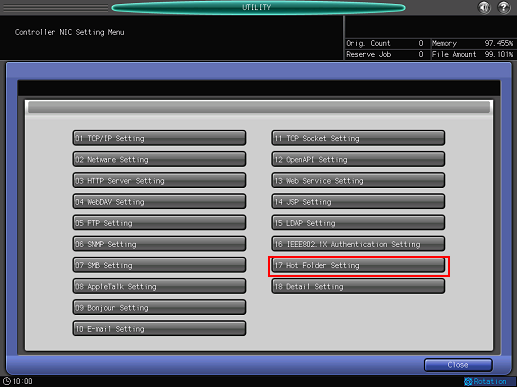
Follow the procedure on Registering a User Setting to display the [Administrator Setting Menu] screen.
Press [Network Setting] on the [Administrator Setting Menu] screen, and then press [NIC Setting] and [Hot Folder Setting] in sequence.
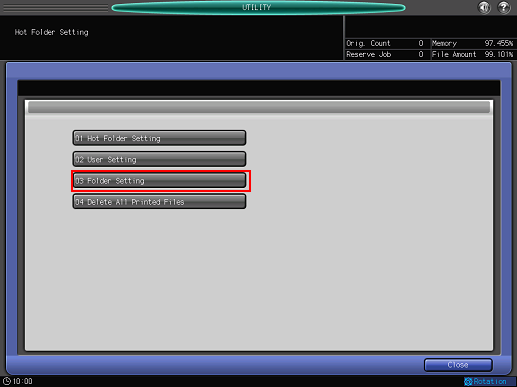
The [Hot Folder Setting] screen is displayed.
Press [Folder Setting].
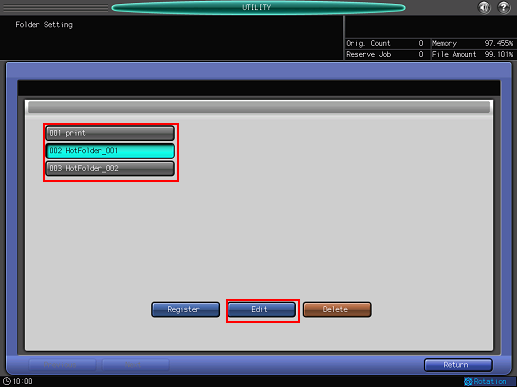
The [Folder Setting] screen is displayed.
Select a Hot Folder to register a print setting, and then press [Edit].
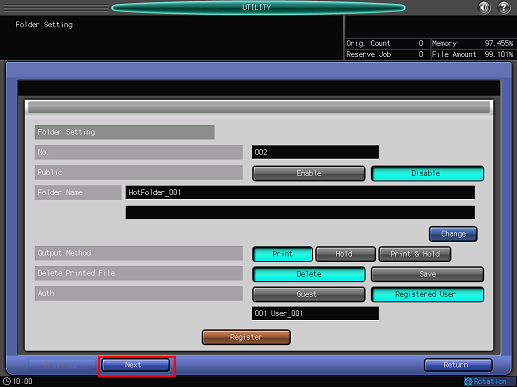
Press [Next].
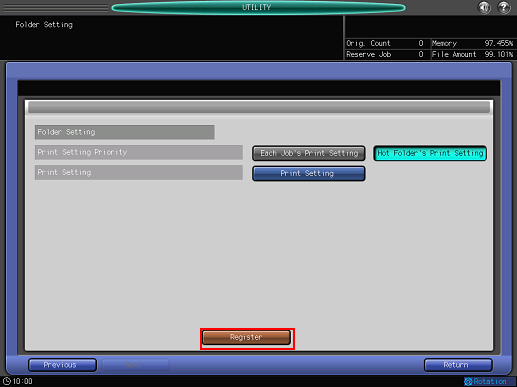
Press [Hot Folder's Print Setting] for [Print Setting Priority].
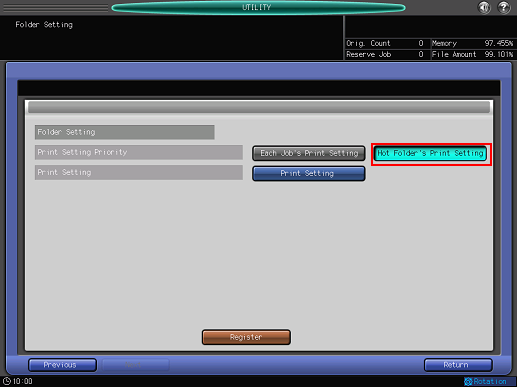
Press [Print Setting].

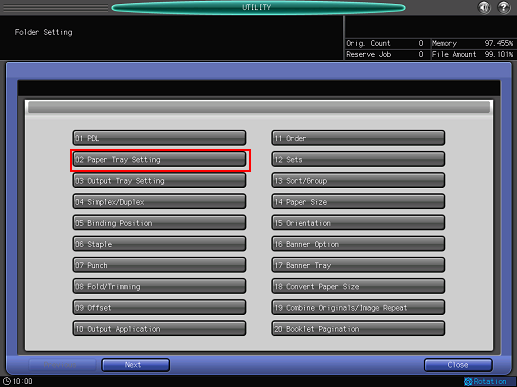
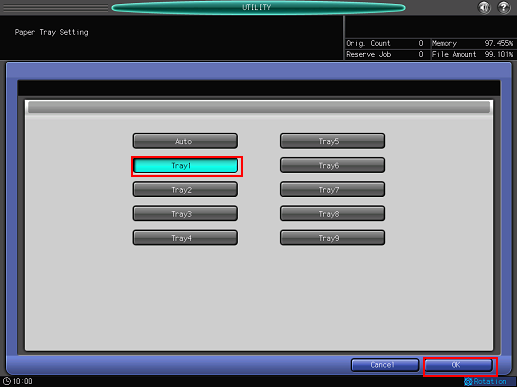
Press [Paper Tray Setting].
Select [Tray1], and then press [OK].
Make sure that A4 paper is loaded in the tray 1.
Set the following items in the same manner.
Item
Setting
[Simplex/Duplex]
[2-Sided]
[Binding Position]
[Top Bind]
[Sets]
10
[Sort/Group]
[Sort]
[Paper Size]
[A4]
[Orientation]
[Portrait]
[Combine Originals/Image Repeat]
[2 in 1]
After setting the items, press [Close].
Press [Register].
Press [Close].
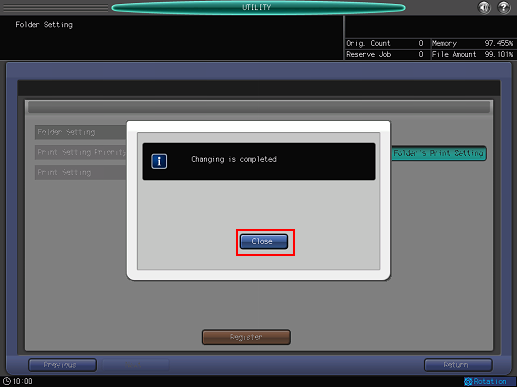
The print setting is registered to Hot Folder.