
Paper Profile: Setting and Registering the Paper in the Register/Delete Paper Setting Screen
This section describes the procedure to register a paper profile from the [Register/Delete Paper Setting] screen. You can also register a paper profile with a paper size that is not currently used in the tray. You also find how to call and set a profile when necessary.
• Examples Introduced in This Section
If you register a frequently used paper setting as a paper profile, you can call it when necessary and easily make settings. A maximum of 500 paper profiles can be registered.
You can register, edit, delete or call a paper profile on the [Register/Delete Paper Setting] screen.
You can set [Paper Type] / [Paper Profile Name] / [Paper Size] / [Weight] / [Colored Paper] / [Punch] / [Both Sides Adj.][Curl Adjustment] / [Thickness] / [Color Density].

A paper profile can also be registered in the [Change IndividualSet] screen. (Refer to Paper Profile: Setting and Registering the Paper in the Change Individual Set Screen.)
In the [Register/Delete Paper Setting] screen, you can also set [Paper Size], which is not available on the [Change IndividualSet] screen. (On the [Change IndividualSet] screen, you can only use the paper size currently specified for the tray.)
You can edit the setting by selecting the registered paper profile and pressing [Add/Edit]. To delete the paper profile, press [Delete].
• Intended Environment
Image Controller | Image Controller IC-602 |
* The sample screen may be different from the actual display depending on your system environment and application version/revision.
•Work Flow
STEP 1: Registering a paper profile in the Register/Delete Paper Setting screen
STEP 2: Calling and setting the paper profile
• Related Section
Registering a paper profile in the Register/Delete Paper Setting Screen
On the touch panel of the main body, press [
 ] in the lower right of the [MACHINE] screen.
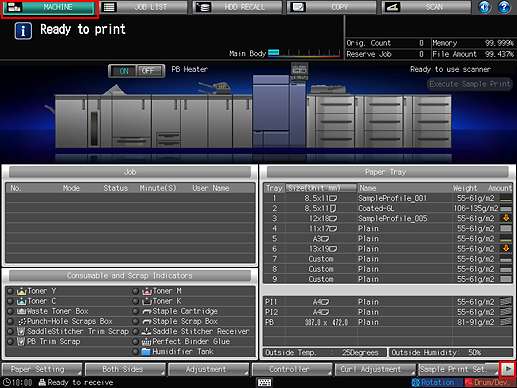
Press [Reg./Del.PaperSet.].
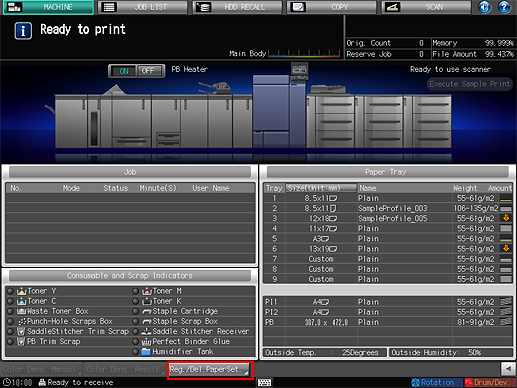
The [Register/Delete Paper Setting] screen is displayed.
Press the No. to register the paper profile and press [Add/Edit].
To add a new profile, press a number where no paper profile is registered.
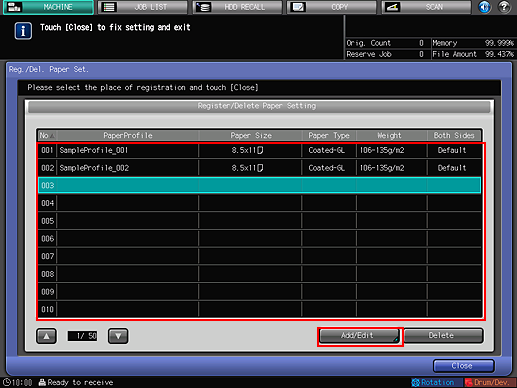
The [Register/Delete Paper Setting] screen is displayed.
Paper profiles registered in the [Change IndividualSet] screen are also displayed in the [Reg./Del. Paper Set.] screen. (Refer to Paper Profile: Setting and Registering the Paper in the Change Individual Set Screen.)
You can edit the setting by selecting the registered paper profile and pressing [Add/Edit]. To delete a registered paper profile, press [Delete].
After setting the items, press [OK].
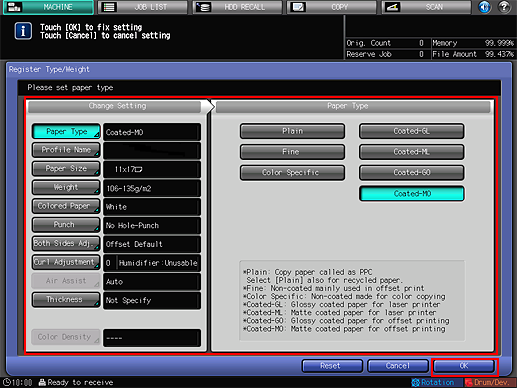
You can set [Paper Type] / [Paper Profile Name] / [Paper Size] / [Weight] / [Colored Paper] / [Punch] / [Both Sides Adj.][Curl Adjustment] / [Thickness] / [Color Density].
You can also use a [Paper Size] that is not specified for the tray, unlike the [Change IndividualSet] screen.
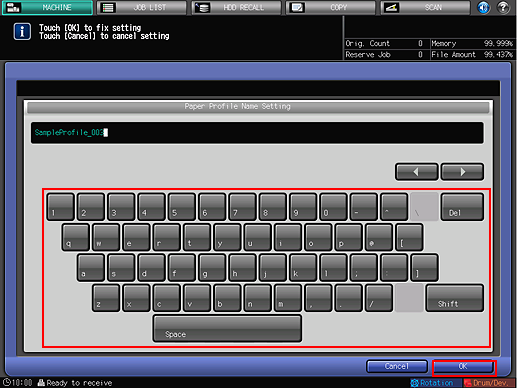
Enter the paper profile name and press [OK].
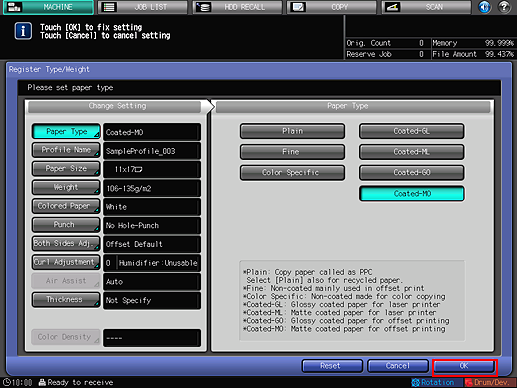
Press [OK].
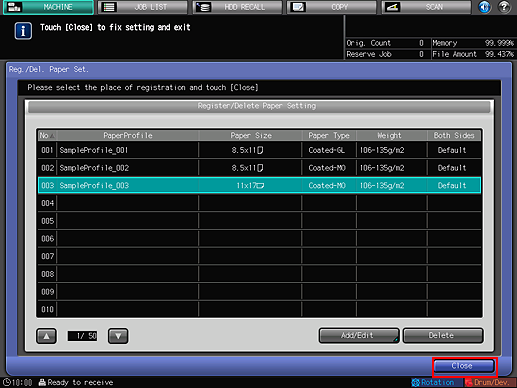
Check that the paper profile has been registered and press [Close].
Calling and setting the paper profile
Call a paper profile to set.
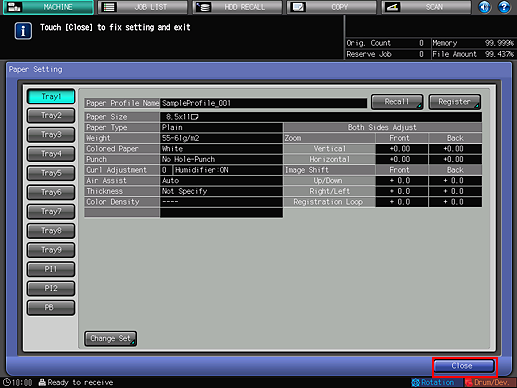
On the touch panel of the main body, press [Paper Setting] on the [MACHINE] screen.
You can also press [Paper Setting] on the [COPY] screen to reach the same screen.
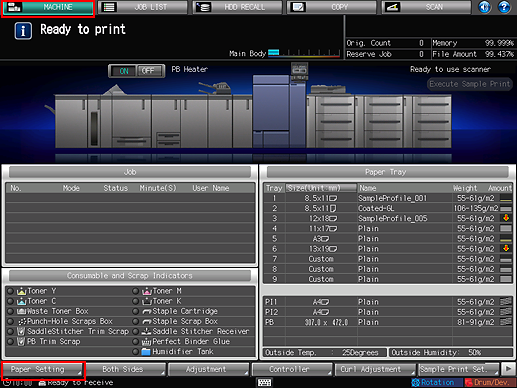
Press the tray to make the settings.
Example: [Tray 1] is pressed.
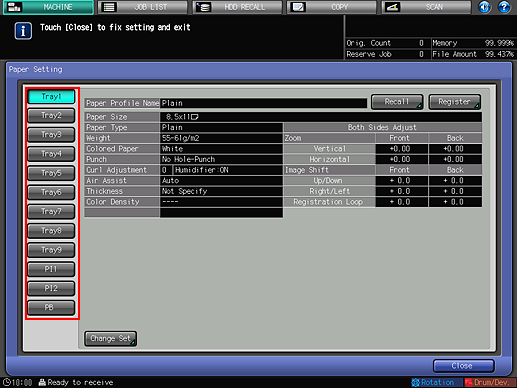
Press [Recall].
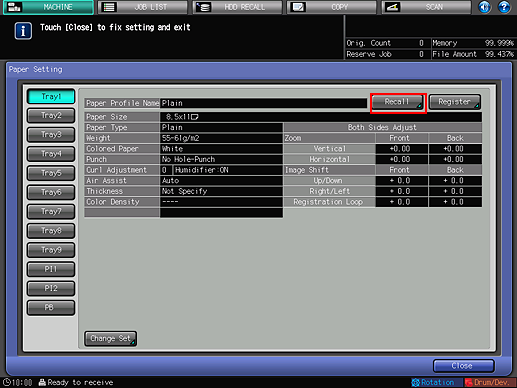
The [Recall] screen is displayed.
Press the paper profile to call and press [OK].
You can only select a paper profile whose setting matches with the tray. If the registered paper setting does not match with that of the selected tray, the paper setting is grayed out and cannot be selected. In this case, change the tray to be used.
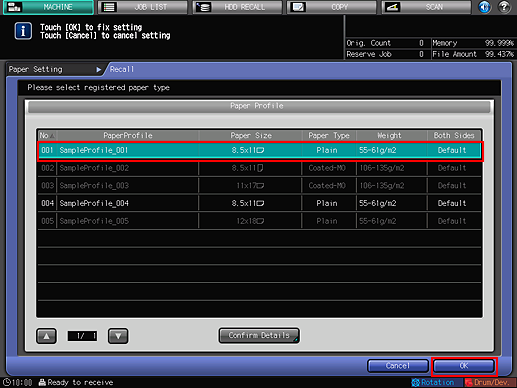
Check the setting and press [Close].
The paper profile is called and set.