
[Chart Adjustment]
You can output a chart for [Both Sides Adjust] to measure the measuring point with the scale, and then enter the measurement value to make adjustment.
Because the positions of both sides can be adjusted by only entering measurement values, this adjustment is useful for 2-sided printing with a new paper type or when the amount of misalignment between both sides is unknown after changing the paper in the tray.
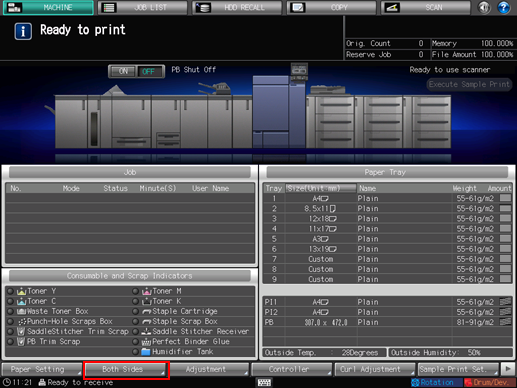
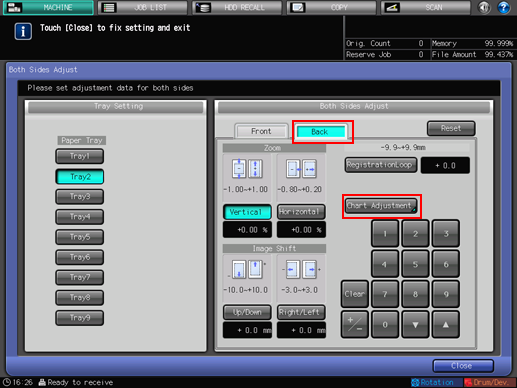
Press [Both Sides] on the [MACHINE] screen.
Select the tray in which the papers to be adjusted have been set.
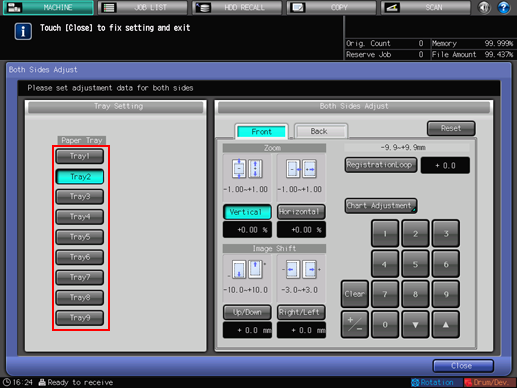
Press [Front], and then press [Chart Adjustment].

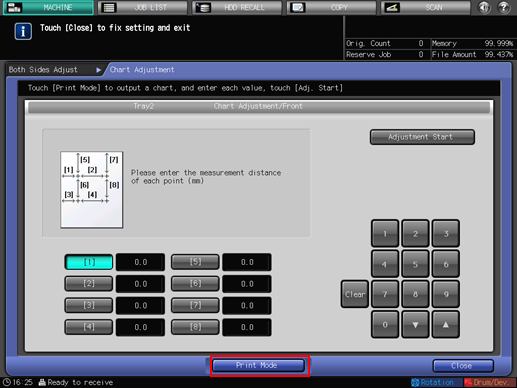
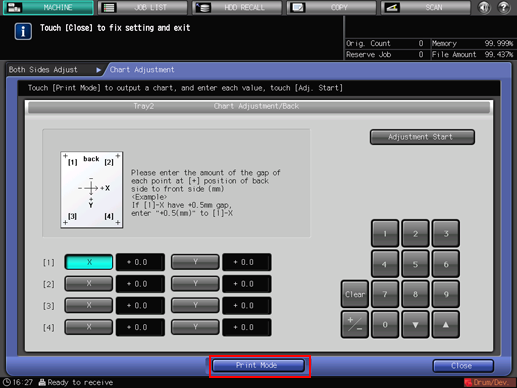
Press [Print Mode].
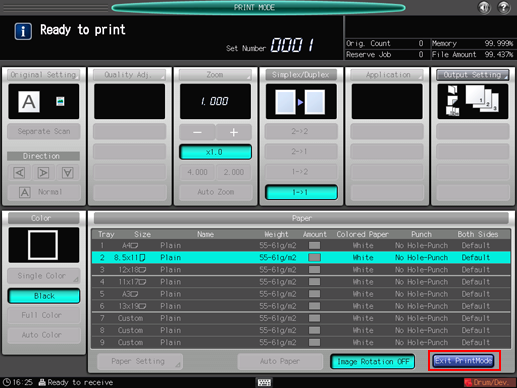
Press Start on the control panel.
A test chart is printed.
Press [Exit PrintMode].
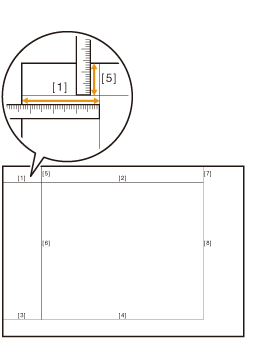
Measure the line length of each point from [1] to [8] in the output chart.
The figure shows an example where [1] and [5] are measured.
You can enter a value in 0.1 mm increments.
Be sure to make note of the measurement lengths.
Press the number of each point, and use the touch panel keypad or [
 ][
][ ] to enter the measured length.
Press [Clear] to reset the value.
To start the adjustment, press [Adjustment Start].

In the next step, adjust the back side.
Press [Back], and then press [Chart Adjustment].
Press [Print Mode].
Press Start on the control panel.
A test chart is printed.
Press [Exit PrintMode].
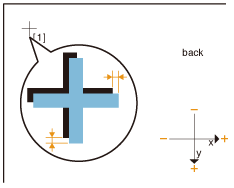
Measure the misalignment between the
 marks [1] to [4] on the [back] side ([Back] side) and the marks on the [front] side ([Front] side) of the output chart.
The black
marks in the figure indicate the [Front] side and the blue marks indicate the [Back] side.
Measure the misalignment of printing position in the horizontal (X axis) and the vertical (Y axis) directions.
You can enter a value in 0.1 mm increments.
Be sure to make note of the measurement values.
For example, as shown in the figure, if the
mark [1] is misaligned rightward by 0.5 mm and downward by 0.3 mm from that on the [Front] side, the position needs to be corrected and moved by 0.5 mm and 0.3 mm in the X and Y direction, respectively.
Press [X] or [Y] of each point, and use the touch panel keypad or [
][] to enter the measurement value.If the print position is misaligned rightward or downward, enter a positive value. If misaligned leftward or upward, enter a negative value.
Use [+/-] to specify the value to be positive or negative.
Press [Clear] to reset the value.
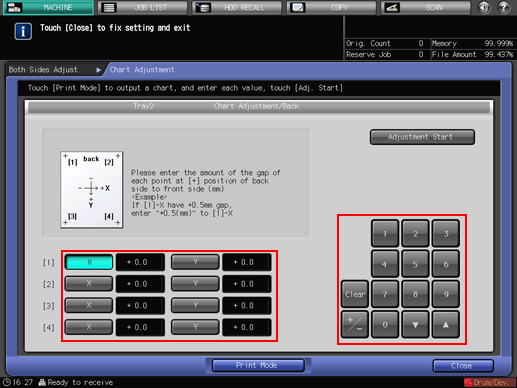
To start the adjustment, press [Adjustment Start].

Press [Close].

Now, the [Chart Adjustment] is completed.
For fine adjustment of the adjusted value, adjust Zoom/Image Shift Adjustment.