
Making 2-Sided Copies Using Original Glass
This section describes how to make 2-sided copies from the original scanned from the original glass.
The [Separate Scan] mode is activated automatically.
Select [Direction] according to the direction of the original loaded in the original glass.
The machine is set to match the [Bind Direction] in [Output Setting] of copies to that of the original automatically.
Position the original on the original glass.
Open the ADF. Position the first page of the original face down, then close the ADF.
When using the [Book Copy], [Image Centering] or [No Image Area Erase] function under [Application], do not close the ADF.
Press the [COPY] tab to display the [COPY] screen.
Select [1->2] copy mode.
[Separate Scan] is automatically selected.
Do not press Reset on the control panel at this point, otherwise the machine is disabled for scanning the original positioned on the original glass.

Select [Direction].
Select a Direction key provided under [Original Setting] according to the actual direction of the original.
For details about setting Direction, refer to Direction: Setting Direction of Original.
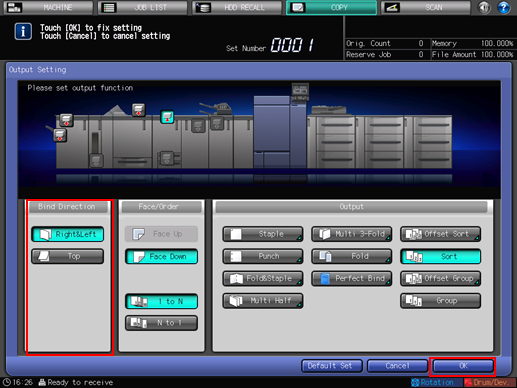
Specify the bind direction of 2-sided copies.
To display the [Output Setting] screen, press [Output Setting] on the [COPY] screen.
Press the desired bind direction key under [Bind Direction].
To make top-bound 2-sided copies (printed upside down on back pages), select [Top] under [Bind Direction].
Press [OK].
For details about setting a bind direction of 2-sided copies, refer to Setting Bind Direction for 2-Sided Copies
Select additional copy conditions, as desired.
Press Start on the control panel.
The original of the front side for the output is scanned.
Replace the original on the original glass with that of the back side for the output, then press Start on the control panel.
When scanning is completed, press [Separate Scan] to deselect the key.
The message [Press [Start] to copy] is displayed.
To delete the scanned data without printing, or to suspend the printing job, press Stop on the control panel.
Press Start on the control panel.
All the data in memory will be output.
Printing does not start without returning to the [COPY] screen. Be sure to display the [COPY] screen.