Managing the font/macro data
You can add or delete font/macro data using Data Managing Utility.
In the Web Connection login page, start the [Manage Font/Macro].
The font/macro data list registered on this machine appears.
To add font or macro data, click [Add].
 The lists of font and macro can be switched by [Font/Macro].Clicking [Delete] deletes the selected font or macro data.
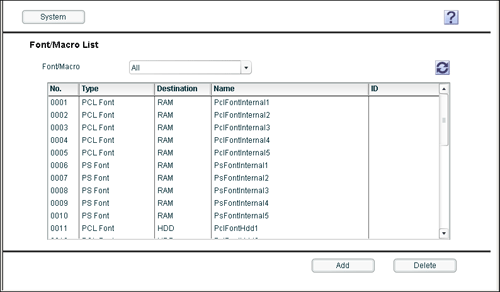
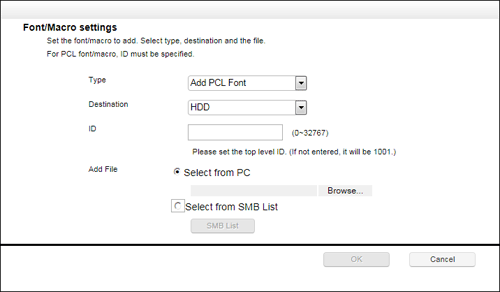
Specify the font or macro to be added, and click [OK].
Settings
Description
[Type]
Select a type of font or macro to be added.
[Destination]
Select where to save font or macro.
 [HDD]: Save the font or macro to the hard disk on this machine.
- [RAM]: Save the font or macro to the memory on this machine. When you turn off the power of the machine, the saved font/macro will be erased.
To continuously use font or macro data, save it in the HDD.
Save the OOXML font in the hard disk (HDD).
[ID]
Enter a font or macro ID number for PCL font or PCL macro.
If it is not entered, the available ID is assigned automatically.
[Add File]
Select a font file or macro file to be added.
- [Select from PC]: Click [Browse...], then select a file to be added from your computer.
- [Select from SMB List]: Click [SMB List], then select a file to be added from the SMB sharing folder.
 Tips
TipsClicking [System] displays the system menu. The following menu items are available in the system menu.
- [Auto Protect Setting]: Lock the computer screen if a specified amount of time has elapsed without the machine being operated. You can change the time until the screen is locked.
- [Exit]: Exit the utility.