Settings to Scan Various Types of Originals (Application Settings)
- Scanning originals of different sizes at one time (Mixed Original)
- Scanning an original that is thinner than plain paper (Thin Paper Original)
- Scan originals with folds (Z-Folded Original)
- Scan a long original (Long Original)
- Specifying the original loading direction (Original Direction)
- Specifying the original binding position (Binding Position)
- Scanning while removing dust in the slit glass (Despeckle)
- Splitting the left and right pages of a book and catalog (Book Original)
- Scanning the number of originals in several batches (Separate Scan)
Scanning originals of different sizes at one time ([Mixed Original])
Even for an original with pages of different sizes, by using the ADF, you can scan data while detecting the size of each page.
For details, refer to [Mixed Original] .
 NOTICE
 Load all the original pages into the ADF so that the tops of the pages are at the back or left side of the machine.

Scanning an original that is thinner than plain paper ([Thin Paper Original])
Reduce the original feed speed of the ADF to prevent thin paper from getting caught.
For details, refer to [Thin Paper Original] .

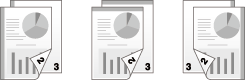
Scan originals with folds ([Z-Folded Original])
Even the original sizes of folded originals can be detected accurately.
If a folded original is loaded into the ADF, its size may not be detected correctly. To scan a folded original through the ADF, use [Z-Folded Original].
For details, refer to [Z-Folded Original] .
NOTICE- Unfold folded originals before loading them into the ADF. If a folded original is not unfolded before scanning, a paper jam may occur or the size may not be correctly detected.

Scan a long original ([Long Original])
Load a long original that cannot be placed on the Original Glass and that is larger in the feeding direction than the full standard size (11  17 or A3) into the ADF. There is no need to enter the original size in advance, ADF will detect the size automatically.
For details, refer to [Long Original] .

 Tips
Tips- This function is available when the Web browser function is disabled. When the optional Extension Memory is installed, this function is available regardless of whether the Web browser function is enabled or disabled. bizhub C658/C558/C458 provides Extension Memory as standard.
Specifying the original loading direction ([Original Direction])
When scanning a double-sided original etc., you can specify the direction in which the original is loaded so that the vertical direction is set correctly.
For details, refer to [Original Direction] .
Specifying the original binding position ([Binding Position])
When scanning a double-sided original, specify the binding position of the original in [Binding Position] to prevent the binding position from being reversed.
For details, refer to [Binding Position] .
Scanning while removing dust in the slit glass ([Despeckle])
When scanning an original through ADF, scanning of original and dust removal from the Slit Scan Glass are performed alternately, so that the original is always scanned using clean Slit Scan Glass.
It takes longer to finish scanning of originals, compared to the normal operation.
For details, refer to [Despeckle] .
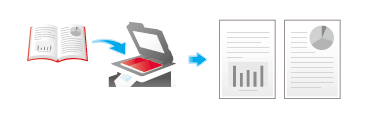
Splitting the left and right pages of a book and catalog ([Book Original])
You can scan two-page spreads such as books and catalogs separately into the left and right pages, or scan them as one page. If you place a book or catalog on the Original Glass, you do not need to close the ADF to scan it.
For details, refer to [Book Original] .
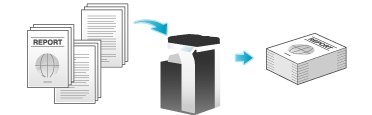
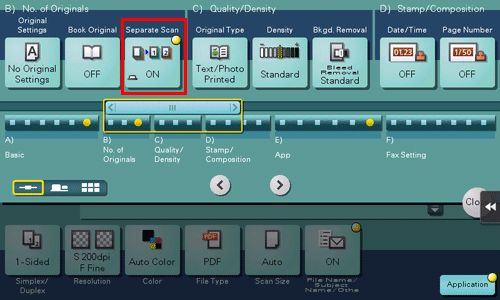
Scanning the number of originals in several batches ([Separate Scan])
If the number of original sheets is so large that they cannot be loaded into the ADF at the same time, you can load them in several batches and handle them as one job.
In [Separate Scan], you can switch between the ADF and Original Glass to scan the originals.
Load the original.
NOTICE- bizhub C658/C558/C458:
Do not load more than 300 sheets (21-1/4 lb (80 g/m)) at a time into the Original Tray, and do not load the sheets up to the point where the top of the stack is higher than the mark. Doing so may cause an original paper jam, damage the originals, and/or cause an ADF failure.
 - bizhub C368/C308/C258:
Do not load more than 100 sheets (21-1/4 lb (80 g/m)) at a time into the Original Tray, and do not load the sheets up to the point where the top of the stack is higher than the mark. Doing so may cause an original paper jam, damage the originals, and/or cause an ADF failure.
Tap [Application] - [No. of Originals] - [Separate Scan], and set to [ON].
Press the Start key.
The original is scanned.
Load the next original, then press the Start key.
 Tap [Change Setting] to change the option settings according to the new original as necessary.
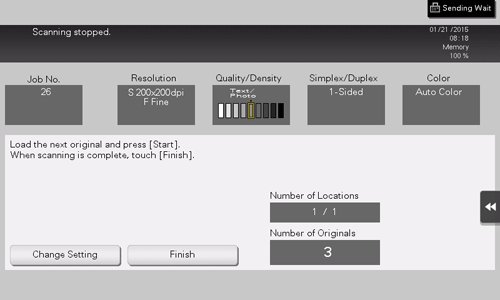
Repeat Step 4 until all originals are scanned.
After all originals have been scanned, tap [Finish] and press the Start key.
Transmission begins.
 Related setting
- Select whether to always scan originals continuously without specifying [Separate Scan] when scanning originals using the Original Glass (Default value: [No]). For details, refer to [Separate Scan from Platen] .