User's Guide

Making a copy
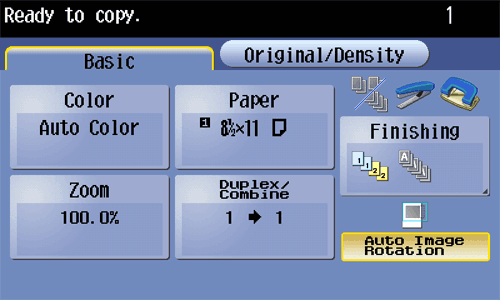
Making a copy (basic operation flow)
This section explains the basic procedure to make a copy in Enlarge Display mode.
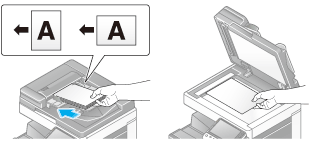
- Load the original.
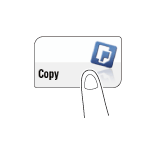
- Tap [Copy].
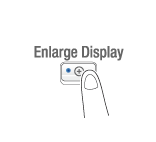
- Press the Enlarge Display key.
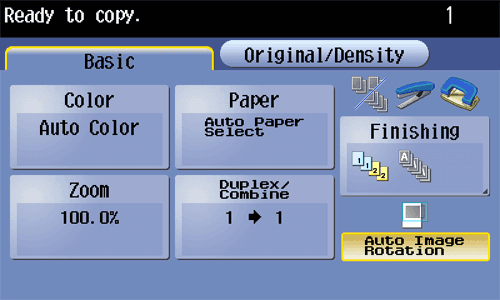
- If necessary, configure copy settings.
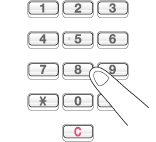
- If necessary, enter the number of copies using the Keypad.
- To use the Keypad, slide the Control Panel to the left.
- If [10 Keypad] is assigned to the Register key, you can press the Register key to display the keypad on the Touch Panel and enter data.
- To correct the number of copies, press C (Clear).
- Press the Start key.
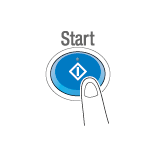
The original is scanned, and copying starts.
- If you press the Stop key while scanning or printing an original, processing is stopped, and a list of stopped jobs is displayed. To cancel the operation, delete the stopped jobs from the list.
- If [Ready to accept another job.] appears while printing a job, you can scan the next original.
Reference
- If necessary, you can change or specify the default values of Enlarge Display. For details, refer to Here.
Making a Trial Printing (Proof Copy)
Before beginning actual copying, do a single test copy and check it is acceptable.
When making a large number of copies, use the proof copy function to prevent a large number of copy errors from occurring.
- Load the original.
- Tap [Copy].
- Press the Enlarge Display key.
- If necessary, configure copy settings.
- Using the Keypad, enter the number of copies.
- To use the Keypad, slide the Control Panel to the left.
- If [10 Keypad] is assigned to the Register key, you can press the Register key to display the keypad on the Touch Panel and enter data.
- To correct the number of copies, press C (Clear).
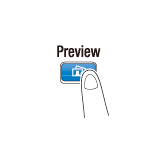
- Press Preview.
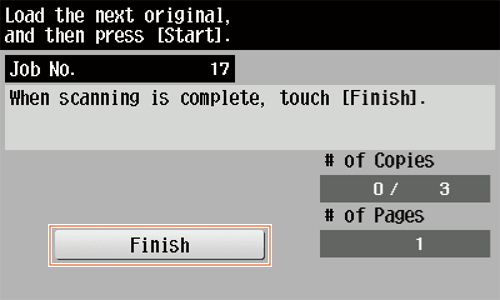
- If the original is loaded into the ADF, one copy is made. Go to Step 10.
- If the original is loaded on the Original Glass, go to step 7.
- Load the next batch of the original, then press the Start key.
- After all original pages have been scanned, tap [Finish].
- Press the Start key.
Copying begins for only one copy.
- Check the proof copy.
- To redo the settings, press C (Clear) or Reset.
- When making the remaining copies, tap [Print].
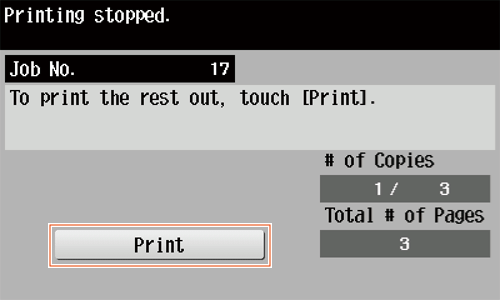
Copying begins for the remaining copies.