User's Guide

Configuring Authentication Settings of This Machine
First, configure the authentication function of this machine (ON (MFP)).
Tips
- This machine does not support external server authentication.
- Tap [Utility] - [Administrator Settings] - [User Authentication/Account Track] - [General Settings] - [User Authentication].
- Set [General Settings] to [ON (MFP)], then tap [OK].
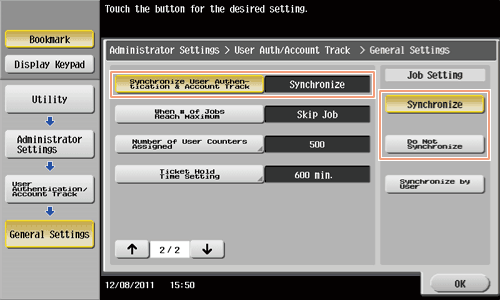
- When combining account track settings, press [Utility] - [Administrator Settings] - [User Authentication/Account Track] - [General Settings], and set [Synchronize User Authentication & Account Track] to [Synchronize]. When separately managing the user authentication and account track, set to [Do Not Synchronize].

- When combining account track settings, press [Utility] - [Administrator Settings] - [User Authentication/Account Track] - [General Settings], and set [Synchronize User Authentication & Account Track] to [Synchronize]. When separately managing the user authentication and account track, set to [Do Not Synchronize].
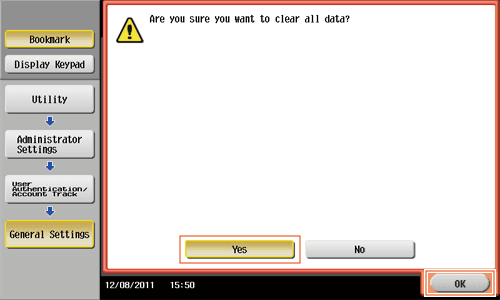
- Tap [OK].
- Select [Yes], then tap [OK].
- Press [Authentication Device Settings] - [General Settings] - [Bio Authentication], and configure the following setting.
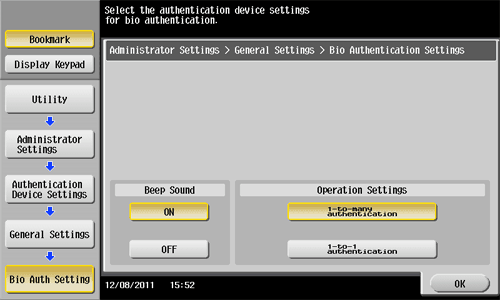
Settings Description [Beep Sound]Select whether to give a "blip" sound when the finger vein pattern is scanned successfully.[ON] is selected by default.[Operation Settings]Select how to log in to this machine.- [1-to-many authentication]: Simply place his or her finger to log in.
- [1-to-1 authentication]: Enter the user name and position his or her finger to log in.
[1-to-many authentication] is specified by default. - Tap [OK].
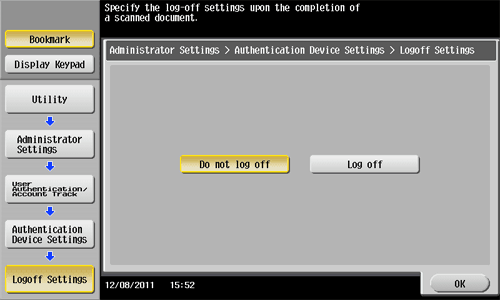
- If desired, tap [Logoff Settings] to configure automatic logout settings.
- Select whether to automatically log out when original scanning has been completed (default: [Do not log off]).
- Select whether to automatically log out when original scanning has been completed (default: [Do not log off]).
- Tap [Close] to exit the authentication settings of this machine.