
Loading Paper into the Bypass Tray
How to load paper into the Bypass Tray
When selecting a paper size other than for paper trays or printing on envelopes or transparencies, use the Bypass Tray.
To use the Bypass Tray, load paper and specify the paper type.
- Open the Bypass Tray.
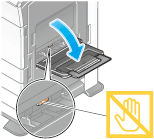
- To load large-sized paper, pull out the Tray Extension.
- With the side to be printed on facing down, insert the paper as far as possible into the feed slot.
- When printing on letterhead (paper where company names, preset text, and other text or images are already printed), load it with the print side facing up.
- Slide the Lateral Guide to fit the size of the loaded paper.
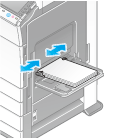
- When loading paper other than plain paper, change the paper type setting. When loading custom sized paper, also specify the paper size.
- For details, refer to Here.
Loading postcards
Up to 20 postcards can be loaded into the tray. The following example explains how to load a postcard of 4  6 (A6 Card).
- With the print side facing down, load a postcard in the
 direction as shown in the figure.
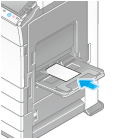
- Slide the Lateral Guide to fit the size of the loaded paper.
- Change the paper size setting.
- Select [Paper] - [
 ] - [Change Tray Settings] - [Paper Size] - [Standard Size] - [4
  6] ([A6 Card]). Selecting [4
  6] ([A6 Card]) sets [Paper Type] to [Thick3].
 - When using a postcard other than 4
 6 (A6 Card), confirm its size, and select [Paper Size] - [Custom Size] to specify the size.
- Select [Paper] - [
Reference
- When printing data stored in a computer onto a postcard, use the [Basic] tab of the printer driver to configure settings. For details, refer to Here.
Loading transparencies
Transparency is a transparent film to project an enlarged image on the screen.
Up to 20 transparencies can be loaded into the tray.
- With the print side facing down, load a transparency in the
 direction as shown in the figure.
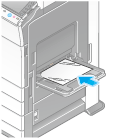
- Slide the Lateral Guide to fit the size of the loaded paper.
- Change the paper type setting.
- Select [Paper] - [
 ] - [Change Tray Settings] - [Paper Type] - [Transparency].
 - Transparencies can only be printed in black. When the color function is other than black and [Transparency] is selected, check the displayed message, and tap [Yes].
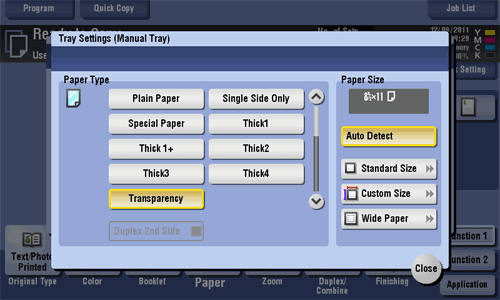
- Select [Paper] - [
Loading envelopes
Up to 10 envelopes can be loaded into the tray.
- Face up the flap part, and load an envelope as shown in the figure.
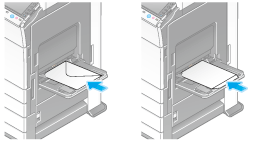
- The flap side of envelopes cannot be printed on.
- Slide the Lateral Guide to fit the size of the loaded paper.
- Change the paper type setting.
- Select [Paper] - [
 ] - [Change Tray Settings] - [Paper Type] - [Envelope].
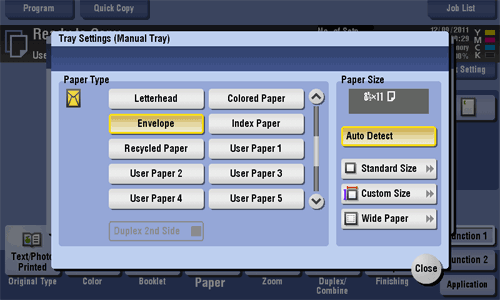
- Select [Paper] - [
Loading label sheets
A label sheet consists of the printing surface, sticking layer, and pasteboard. Peel off the pasteboard, then you can stick the label to other objects.
Up to 20 label sheets can be loaded into the tray.
- With the print side facing down, load a label sheet in the
 direction as shown in the figure.
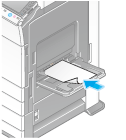
- Slide the Lateral Guide to fit the size of the loaded paper.
- Change the paper type setting.
- Select [Paper] - [
 ] - [Change Tray Settings] - [Paper Type] - [Thick 1+].
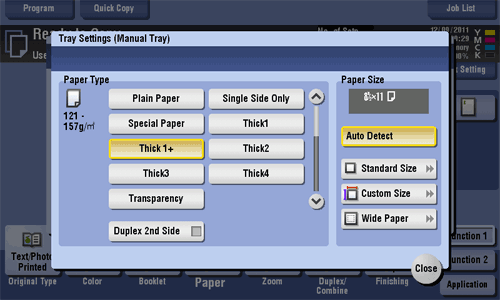
- Select [Paper] - [
Loading index papers
Up to 20 index papers can be loaded into the tray.
- With the print side facing down, align the tab side to the opposite side of this machine.
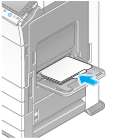
- Slide the Lateral Guide to fit the size of the loaded paper.
- Change the paper type setting.
- Select [Paper] - [
 ] - [Change Tray Settings] - [Paper Type] - [Index Paper].
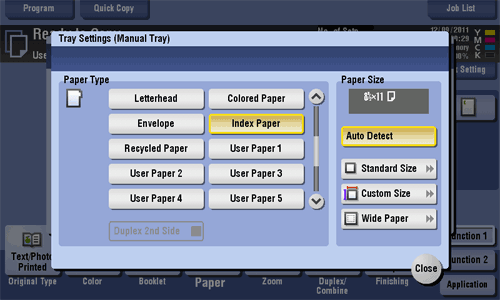
- Select [Paper] - [
Loading banner papers
This machine prints data stored in a computer on banner paper that is up to 47-1/4 inches (1200 mm) in length. Up to 10 banner sheets can be loaded into the Bypass Tray.
- Install the Mount Kit MK-730 into the Bypass Tray.
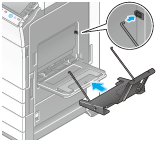
- Set the Guidance of the Mount Kit MK-730.
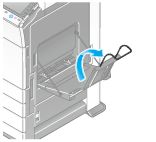
- With the print side facing down, load paper into the tray.
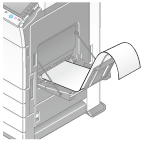
- Slide the Lateral Guide to fit the size of the loaded paper.
