User's Guide

Registering an SMB Destination
An SMB destination can be registered or edited using Web Connection. Although character input is a difficult process using the Touch Panel, it can be carried out easily if you use the computer.
In the administrator mode, select [Store Address] - [Address Book] - [New Registration] - [SMB], then click [OK] to configure the following settings.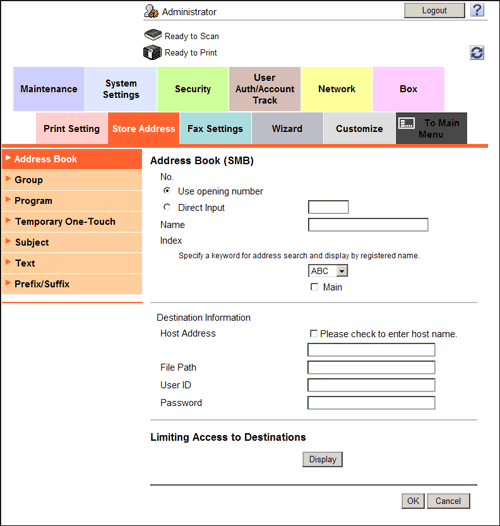
| Settings | Description |
|---|---|
[No.] | Destination registration number. [Use opening number] is automatically registered from a lower number that is not used. When specifying a number, select [Direct Input], and enter a value between 1 and 2000. |
[Name] | Enter the destination name using up to 24 characters. Assign a name that helps you easily identify the destination. |
[Index] | Select a corresponding character so that the destination can be index searched by registration name.
|
[Host Address] | Enter the destination computer name (host name) or IP address (using up to 253 characters).
To specify the host name, use uppercase letters. |
[File Path] | Enter the shared folder name of the computer specified in [Host Address] (using up to 255 characters). The shared folder name is generally referred to as a share name.
When specifying a folder in the shared folder, insert a symbol, "\", between folder names.
|
[User ID] | Enter the name of a user who is authorized to access the folder specified in [Host Address] (using up to 64 characters). |
[Password] | Enter the password of the user you entered into [User ID] (using up to 64 characters, excluding"). |
[Limiting Access to Destinations] | Limit access to this destination, if necessary. For details, refer to Here. |