User's Guide

Configuring the TWAIN Scan Environment
Overview
Using the TWAIN driver enables you to use this machine as a scanner by controlling it from a computer connected to the network.
When using the TWAIN scan, follow the below procedure to configure the settings.
- Configure settings for connecting to the network such as setting of the IP address of this machine
- For details on configuring the setting, refer to Here.
- Configure the basic settings for the TWAIN scan
- For details on configuring the setting, refer to Here.
- If necessary, configure the following options.
Purpose Reference Change the time for locking the Control Panel while the TWAIN scan is running.
Configuring the basic settings for the TWAIN scan
On the computer on the network, configure settings necessary for controlling this machine.
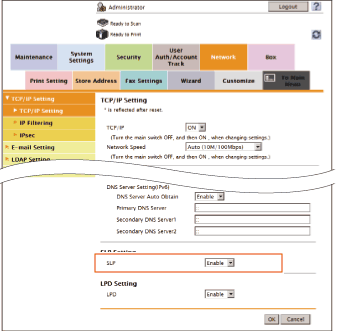
- In the administrator mode, select [Network] - [TCP/IP Setting] - [TCP/IP Setting], and set [SLP] to [Enable] (Default: [Enable]).
- In the administrator mode, select [Network] - [TCP Socket Setting], then configure the following settings.
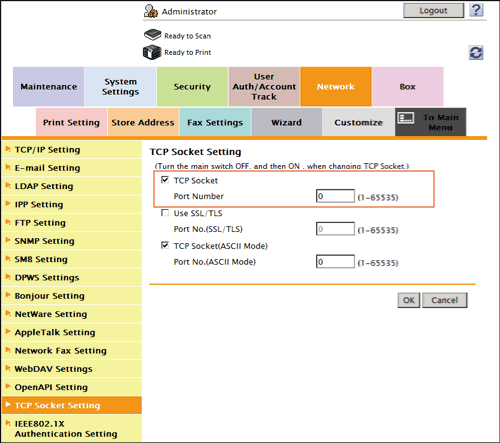
Settings Description [TCP Socket]Select this check box to use the TWAIN scan function.[ON] (selected) is specified by default.[Port Number]If necessary, change the TCP Socket port number.Normally, you can use the original port number.[59158] is specified by default.
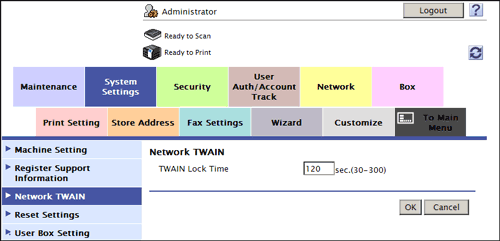
Changing the Control Panel lock time
While the TWAIN scan is running, the Control Panel of this machine is automatically locked. If necessary, change the time period before the control panel is unlocked.
In the administrator mode, select [System Settings] - [Network TWAIN], and change the value of [TWAIN Lock Time] (Default: [120] sec.).