
Inserting Paper into the Original
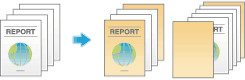
Inserting front/back covers ([Front Cover:]/[Back Cover:])
You can insert cover sheets, which may be different from those used for the body, before the first page and after the end page of the original.
The front and rear cover sheets can be a paper different from body pages (in paper color and thickness). You can print them at a time.
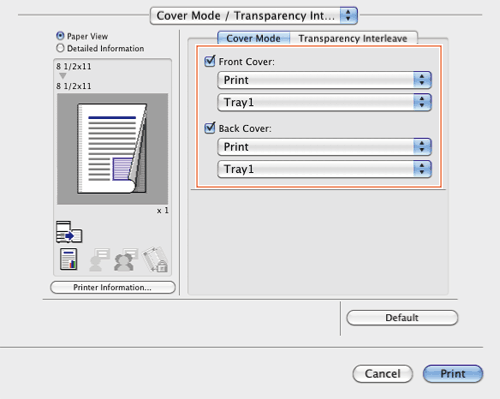
- In [Paper Tray:] in [Paper Tray / Output Tray], select the paper tray for printing the body.
- You cannot select [Auto].

- You cannot select [Auto].
- In [Cover Mode / Transparency Interleave], select the [Front Cover:] and [Back Cover:] check boxes.
- If necessary, you can select whether to print the original on the inserted sheets or to leave them blank. When the inserted sheets are printed, the first page of the original is printed on the front cover and the last page of the original is printed on the back cover.
- Select the paper trays for paper to be inserted as the front and back covers.
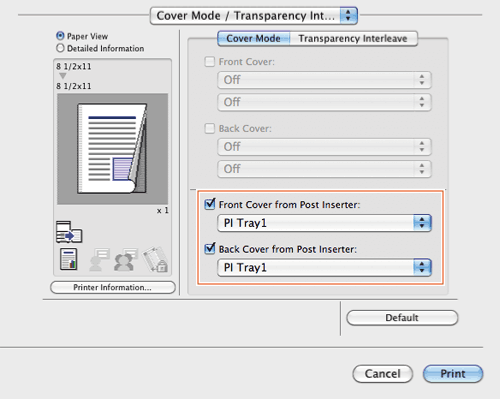
Inserting front/back covers ([Front Cover from Post Inserter]/[Back Cover from Post Inserter])
In bizhub C554, you can insert a sheet of the Post Inserter into the first page and the last page of the original as an outer front cover.
- In [Paper Tray:] in [Paper Tray / Output Tray], select the paper tray for printing the body.
- You cannot select [Auto].
- You cannot select [Auto].
- In [Cover Mode / Transparency Interleave], select the [Front Cover from Post Inserter] and [Back Cover from Post Inserter] check boxes.
- Select the PI trays for paper to be inserted as the front and back covers.
- Select the PI trays for paper to be inserted as the front and back covers.
Tips
- To use [Front Cover from Post Inserter:] or [Back Cover from Post Inserter:]:
- The Finisher FS-535 and Post Inserter PI-505 are required (bizhub C554 only).
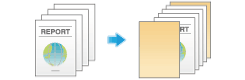
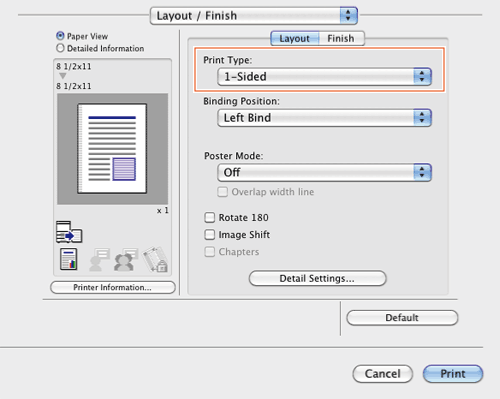
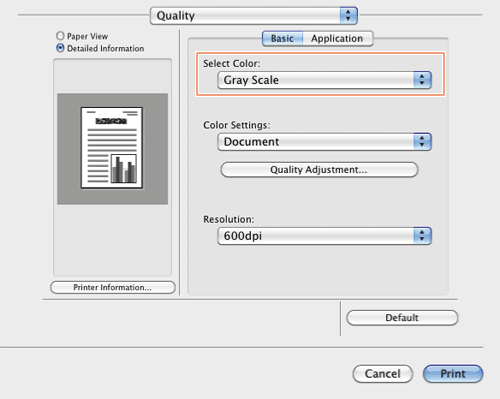
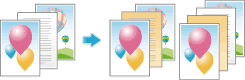
Inserting paper between transparencies ([Transparency Interleave:])
When printing on multiple OHP transparencies, you can insert the specified paper between the OHP transparencies. These sheets of paper prevent the OHP transparencies from sticking together due to heat generated during printing or static electricity.
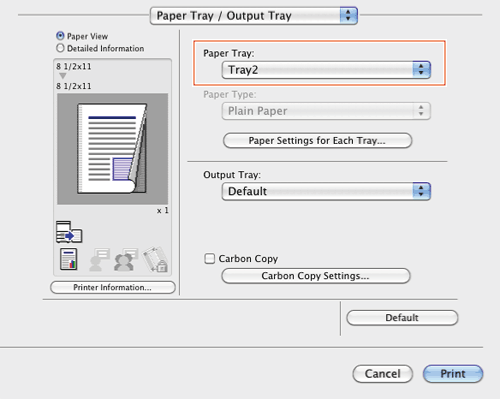
- In [Print Type:] in [Layout / Finish], select [1-Sided].
- In [Select Color:] in [Quality], select [Gray Scale].
- In [Paper Type:] in [Paper Tray / Output Tray], select [Transparency].
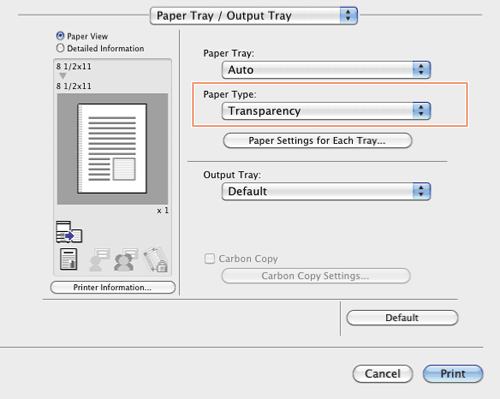
- In [Cover Mode / Transparency Interleave], select [Transparency Interleave:].
- Select the paper tray for the paper to be inserted between OHP transparencies.
- OHP interleaves are inserted as blank sheets.

Inserting paper into the specified pages ([Per Page Setting:])
Paper different from other pages is inserted into the specified pages.
You can select color paper and thick paper as paper to be inserted. You can also select whether to print the original on the inserted paper.
Create in advance a list that specifies the paper and print settings for each page. When printing on inserted paper, select the list you want to apply to printing.
- In [Per Page Setting], select the [Per Page Setting:] check box, and the click [Add...].
- If nothing is registered in the list, selecting the [Per Page Setting:] check box automatically displays the setting window.
- When you have already prepared a list, select the list you want to apply to printing.
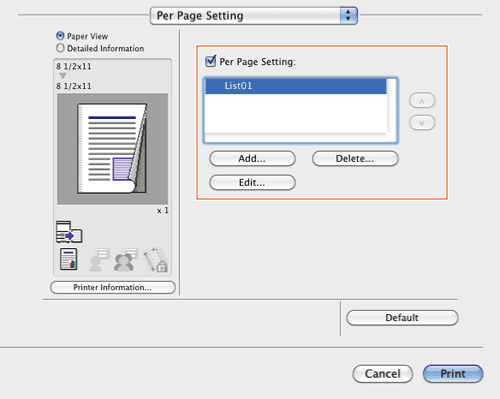
- Create a list by specifying the paper and print settings for each page.

Settings Description Setting ListThe settings for each page are displayed in a list.[List Name:]Enter the name of the list to be created.[ ]/[
]/[ ]These buttons move the order of settings in the list. They do not change the settings.[Add]This button adds the setting to the list.[Delete]This button deletes the setting selected in the list.[Add/Edit]You can add settings to the Setting List or edit settings.[Page Number:]Enter the page numbers you want to add.To specify multiple page numbers, separate each number with a comma (for example, "2,4,6") or connect the numbers using a hyphen (for example, "6-10").[Print Type:]Select the print type applied when printing the specified pages.[Paper Tray:]Select the paper tray for printing the specified pages.[Staple:]Select the staple position applied when the specified pages are stapled.
 - Click [OK].