Cleaning the Laser Lenses
This machine has four laser lenses. Follow the steps shown below to clean all the laser lenses.
The Laser Lens Cleaning Tool is stored in the Front Cover.
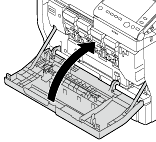
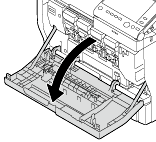
Open the Front Cover.
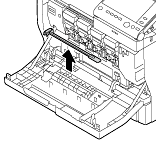
Take out the Laser Lens Cleaning Tool.
Pull out the Waste Toner Bottle as well as the Toner Cartridge and Imaging Unit of the target color.

For information on how to remove a Toner Cartridge, refer to Here. Inclining the Toner Cartridge may cause toner to spill.
For information on how to remove a Waste Toner Bottle, refer to Here. Inclining the Waste Toner Bottle may cause toner to spill.
For information on how to remove an Imaging Unit, refer to Here. Cover the removed Imaging Unit with a cloth to keep from being affected by light.
Align to the Print Head Glass, then insert the Laser Lens Cleaning Tool inside with the sponge side facing downward, then move it back and forth several times.
Repeat this operation for all the Print Head Glass.

Install all the Toner Cartridge, Waste Toner Bottle, and Imaging Unit.

Do not touch the copper terminals of the Toner Cartridge and Imaging Unit. Doing so may lead to static electricity damaging the product.

For information on how to install a Toner Cartridge, refer to Here.
For information on how to install a Waste Toner Bottle, refer to Here.
For information on how to install an Imaging Unit, refer to Here.
Return the Laser Lens Cleaning Tool to the holder.
The Laser Lens Cleaning Tool is an accessory of this machine. Return the Laser Lens Cleaner to the laser lens cleaner holder so that you do not lose it.
Close the Front Cover.