Basic Copy Settings
Selecting a copy color ([Color])
Select a copy color.
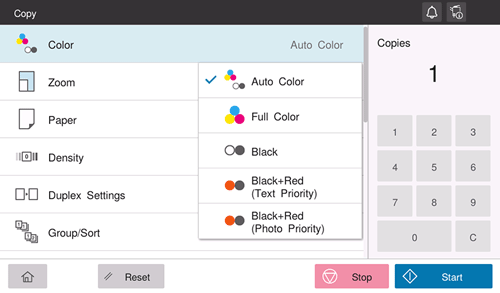
Setting | Description |
|---|---|
[Auto Color] | Makes copies with color settings to suit the colors of the scanned original. |
[Full Color] | Makes a copy in full color regardless of whether the scanned original is in color or in black and white. |
[Black] | Makes a copy in black and white regardless of whether the scanned original is in color or in black and white. |
[Black + Red (Text Priority)] | Copies an original, which primarily consists of texts, in two colors: black and red. The area to be colored in the scanned original is copied in red. |
[Black + Red (Photo)] | Copies an original, which primarily consists of photos, in two colors: black and red. The area to be colored in the scanned original is copied in red. |
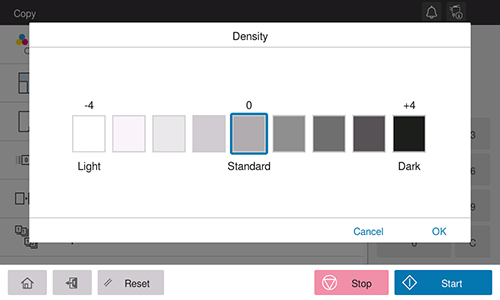
Adjusting the copy density ([Density])
Adjust the density of a copy image.
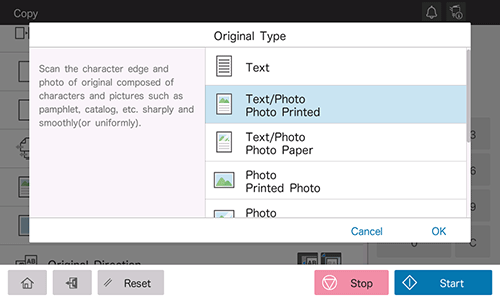
Selecting the appropriate image quality level for the original ([Original Type])
Select the optimum settings for the original to copy it at the optimum image quality.
Setting | Description |
|---|---|
[Text] | Copies an original, which consists primarily of text, at the optimum image quality level. This function sharpens the edges of each character, creating easy-to-read images. |
[Text/Photo - Printed Photo] | Copies the original, which consists of text and photos, at the optimum level of image quality. This function sharpens the edges of each character and reproduces smoother photos. Select this option to scan printed originals such as brochures and catalogs. |
[Text/Photo - Photo Paper] | Copies the original, which consists of text and photos, at the optimum level of image quality. This function sharpens the edges of each character and reproduces smoother photos. Select this option to scan originals that include photos printed on photographic paper. |
[Photo - Printed Photo] | Copies an original consisting only of photos at the optimum image quality level. Select this option to scan printed originals such as brochures and catalogs. |
[Photo - Photo Paper] | Copies an original consisting only of photos at the optimum image quality level. Select this option to scan originals printed on photographic paper. |
[Dot Matrix Original] | Copies an original, that primarily consists of text such as thin or faint characters, at the optimum image quality level. This function reproduces text using high pixel density, creating easy-to-read text. |
[Map] | Copies an original that has a colored background such as a map or that has been drawn by pencil or colored thin line, at the optimum level of image quality. A sharp copy image is produced. |
[Copied Paper] | Copies the original, which is output with an even density from the copier or printer, at the optimum image quality level. |
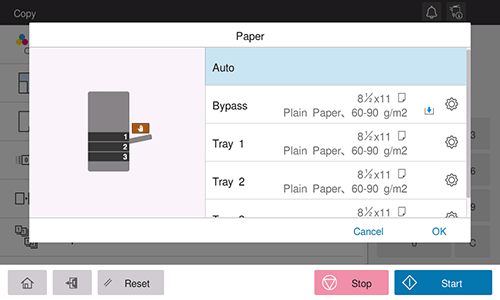
Specifying the paper tray ([Paper])
Selecting [Auto] automatically selects a tray that contains paper of the same size as the original.
When you want to make a copy on paper of a size different from the original or make a copy on paper in the Bypass Tray, specify the desired tray manually.
 Tips
Tips You can change tray paper settings as needed. For details, refer to [Tray Paper Setting] .
Enlarging or reducing an original image ([Zoom])
Copy an original image enlarged or reduced by an arbitrary zoom ratio.
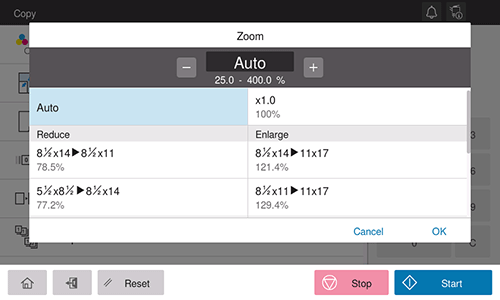
Setting | Description |
|---|---|
Manual Input | Enter the zoom ratio manually. |
[Auto] | Automatically copies an image in the original with the optimal zoom ratio to suit the paper size. This is convenient because you do not need to specify the zoom ratio. |
[x 1.0] | Copies an image in the original with the same size as for the original (x1.0). |
Fixed Zoom | Select a preset zoom ratio when copying a standard-size original onto standard-size paper. The paper tray is automatically exchanged depending on the selected zoom ratio. |
[Manual] | Manually specify the zoom ratios that are different in the vertical and horizontal directions. |