
Basic Options such as Color and Original Size
- Scanning a 2-sided original (Simplex/Duplex)
- Specifying the resolution of an original for scanning (Resolution)
- Selecting the color mode to scan the original (Color)
- Specifying the file type used to save the scanned original data (File Type)
- Specifying the original size for scanning (Scan Size)
- Changing a file name (File Name/Subject Name/Other)
- Changing a subject and message text of an E-mail (File Name/Subject Name/Other)
- Scanning a number of originals (Separate Scan)
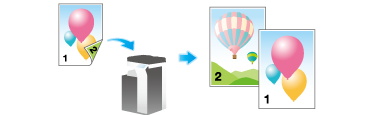
Scanning a 2-sided original ([Simplex/Duplex])
Using the ADF, you can automatically scan the front and back faces of an original. Also, you can scan only one side of the first page, then scan both sides of the remaining pages.
For details, refer to Here.
Specifying the resolution of an original for scanning ([Resolution])
Select the resolution of the original for scanning.
For details, refer to Here.
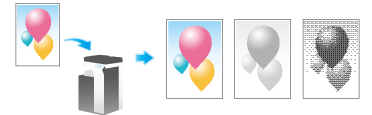
Selecting the color mode to scan the original ([Color])
The original is scanned using the selected color mode.
There are four color modes: [Auto Color] to scan based on the original color, [Full Color], [Gray Scale], and [Black].
For details, refer to Here.
Specifying the file type used to save the scanned original data ([File Type])
The available file types are PDF, TIFF, JPEG, XPS, PPTX, DOCX, XLSX, and other types. You should use the password encrypted PDF file format to store important original data.
For details, refer to Here.

The optional i-Option LK-110 v2 is required to specify DOCX or XLSX for the file type.
Specifying the original size for scanning ([Scan Size])
Select the size of the original to be scanned.
There are various scan sizes, including [Auto] for scanning in the same size as the original size, [Inches], [Metric Sizes], and [Photo Size].
For details, refer to Here.
Changing a file name ([File Name/Subject Name/Other])
If necessary, change the file name of the scanned original. For details, refer to Here.
When you do not change the file name, the file name is automatically assigned according to the rule of "Initial of the function" + "Device Name" + "Date" + "sequential number" + "Page Number" + "File extension". A file name consists of the following information:
Item | Description |
|---|---|
Initial of the function | Indicates the mode used for scanning data.
|
Device Name | The name of this machine registered in [Utility] - [Administrator Settings] - [Administrator/Machine Settings] - [Input Machine Address] - [Device Name]. |
Date | Indicates the year, month, date, time, and minute that the original is scanned. For example "11050115230" means that the file was scanned on May 1, 2011, 15:23. The last digit (0) indicates the order when file conversion is performed multiple times in a certain minute. If file conversion is performed twice between 15:23 and 24, the last digit appears as 231 and 232. |
Sequential number | A sequential number is given when a multi-page original is converted by page, and the number indicates the page number of the original. Page numbers are automatically included in the file name when the file is saved or sent. Consider this part for FTP or other transmission when a FTP server has restriction regarding file names. |
File extension | Extension of the file to be saved. An extension is automatically included in the file name when the file is saved or sent. |
The following characters may be garbled depending on the destination environment; therefore, we recommend that you do not use them in a file name.
< > : * ? " / \ |


Changing a subject and message text of an E-mail ([File Name/Subject Name/Other])
The default subject name and message text are automatically inserted into an E-mail. If multiple E-mail subjects and message text are registered, subject and message text can be changed using the default.
When necessary, you can change the sender E-mail address ("From" address).
For details, refer to Here.
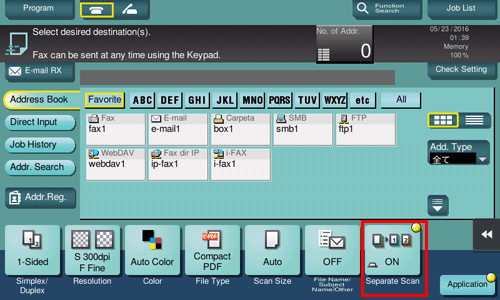
Scanning a number of originals ([Separate Scan])
If the number of original sheets is so large that they cannot be loaded into the ADF at the same time, you can load them in several batches and handle them as one job.
In [Separate Scan], you can switch between the ADF and Original Glass to scan the originals.
Load the original.

Do not load more than 300 sheets (21-1/4 lb (80 g/m2)) at a time into the Original Tray, and do not load the sheets up to the point where the top of the stack is higher than the
 mark. Doing so may cause an original paper jam, damage the originals, and/or cause an ADF failure.
Tap [Separate Scan], and set to [ON].
Press the Start key.
The original is scanned.
Load the next original, then press the Start key.
Tap [Change Setting] to change the option settings according to the new original as necessary.
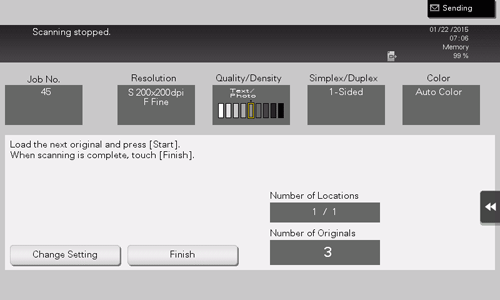
Repeat Step 4 until all originals are scanned.
After all originals have been scanned, tap [Finish] and press the Start key.
Transmission begins.