
Changing the Paper Size or Type
Enlarging or reducing by the desired zoom ratio ([Scale:])
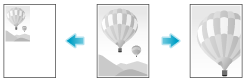
You can print the original image after it has been enlarged or reduced by the desired zoom ratio.
In [Scale:] in [Page Attributes] , specify the zoom ratio.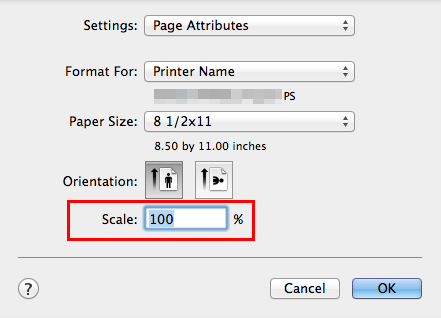
Printing on custom size paper ([Page Setup])
Print a special size of original on custom sized paper.
In [Paper Size:] under [Page Attributes], select [Manage Custom Sizes...], and specify the desired width and length.
In the [File] menu, click [Page Setup].
You can configure the same setting in [Format for:] in the [Print] window.
Open the window for registering a custom size.
Select [Manage Custom Sizes...] from the Paper Size list.
Click [+].
Enter the name of the paper size you are registering.
Be sure to use paper size names other than existing names, such as A4 and Custom.
Specify the width and length as desired.
If necessary, set the top, bottom, right, and left margins of the paper in [Non-Printable Area:].
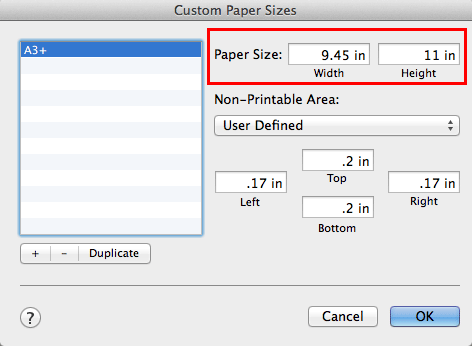
Click [OK].
This saves the custom paper size, which can be selected from the [Paper Size:] drop-down list in [Page Attributes].

Specifying the paper type ([Paper Type:])
[In Paper Type:] in [Paper Tray / Output Tray], select the type of paper for printing.
When [Paper Settings for Each Tray] is enabled on the [Installable Options] page of the printer driver, select [Paper Tray / Output Tray] - [Paper Settings for Each Tray...], and specify the paper type for each tray.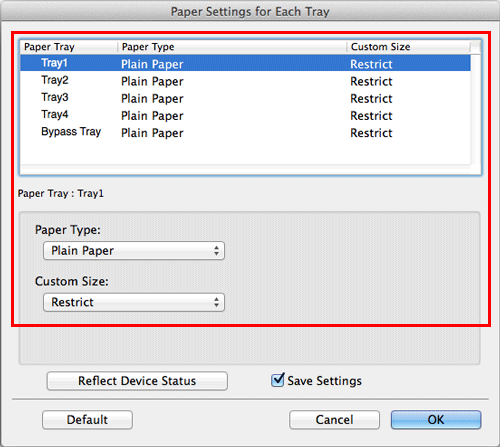
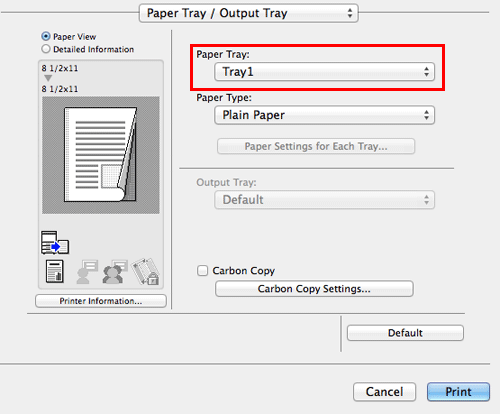
Specifying the paper tray ([Paper Tray:])
In [Paper Tray:] in [Paper Tray / Output Tray], select the paper tray for printing.

If you select [Auto], the paper tray for the paper you have selected in [Paper Size:] is automatically selected.
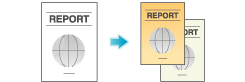
Printing on paper in multiple trays ([Carbon Copy])
You can print the original on different sheets of paper loaded in multiple trays. Because you can obtain printing results that look like carbon-copied slips using the print command once, this function is called Carbon Copy.
For example, by using the print command once, you can print a submission document on high-quality color paper loaded in Tray1 and print your copy on recycled paper loaded in Tray2.
This function is useful when you want to create a submission document and its copy at one time.
In [Paper Tray:] in [Paper Tray / Output Tray], select the paper tray for printing the original.
You cannot select [Auto].
Select the [Carbon Copy] check box.
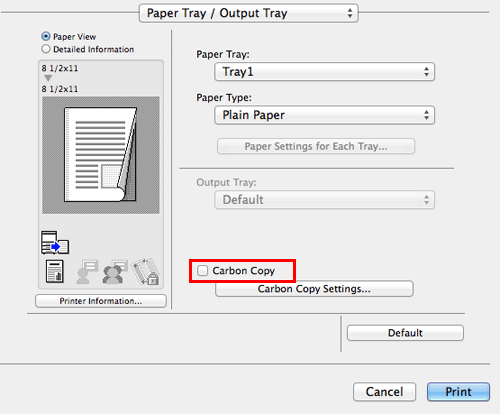
The [Carbon Copy Settings] window appears.
Specify the paper tray for carbon copies and output order, and click [OK].
Settings
Description
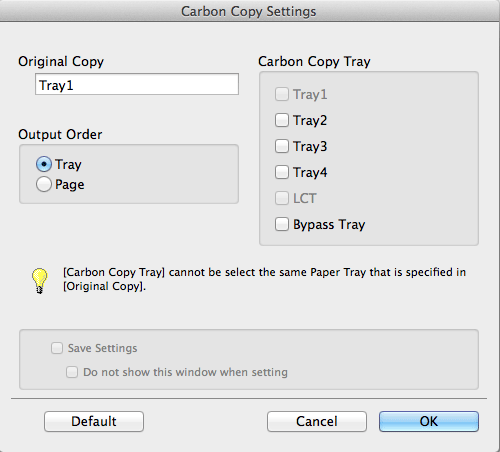
[Original Copy]
The paper tray for printing the original is displayed.
[Carbon Copy Tray]
Select the paper tray for carbon copies. Select the check boxes for all paper trays to be used.
[Output Order]
Select the order of outputting carbon copies.
[Tray]: Carbon copies are printed in order of selected trays. When an original of multiple pages is printed, all pages are printed on paper from one tray, then the next tray is used.
[Page]: Carbon copies are printed page by page. When an original of multiple pages is printed, each page is printed on paper from all the selected trays.
[Save Settings]
When the Save Setting check box is selected, the settings are saved.
When the [Do not show this window when setting] check box is selected, this dialog box is not displayed when [Carbon Copy] is enabled. Using this function, you can save steps to configure settings the next time and after if you always specify the same carbon copy tray settings to execute a print job.
If [Page] is selected in [Output Order], multiple copies cannot be printed.