
Inserting a Cover Sheet or Blank Sheet into Copied Documents
- Inserting front and back covers (Cover Sheet)
- Inserting paper between transparencies (Transparency Interleave)
- Inserting a different sheet into the specified page (Insert Sheet)
- Arranging the first page of the chapter on the front side (Chapters)
- Inserting an original into the specified page (Insert Image)
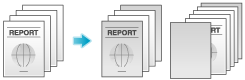
Inserting front and back covers ([Cover Sheet])
You can insert cover sheets, which may be different from those used for the body, before the first page and after the end page of the original. The paper used for the front and back cover sheets can be different from that used for body pages (in paper color and thickness). They can be printed at the same time.
For details, refer to Here.

Use the cover and text sheets of the same size, and stack them in the same direction.
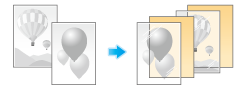
Inserting paper between transparencies ([Transparency Interleave])
When copying onto multiple transparencies, you can insert the specified paper between the transparencies. These sheets of paper prevent the transparencies from sticking together due to heat generated during copying or static electricity.
For details, refer to Here.

Load transparencies into the Bypass Tray. For details on how to load transparencies , refer to Here.

Do not use a transparency that has been through the machine even once. Doing so may lead to reduced print quality, a paper jam, or damage to the machine. Even if a transparency has been discharged without being printed, it cannot be reused.
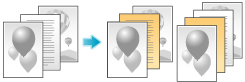
Inserting a different sheet into the specified page ([Insert Sheet])
You can insert a different sheet from other pages into a specified page.
You can insert a color paper and a thick paper. Also, you can print or not print the original data on the inserted sheet.
For details, refer to Here.
Use the insert sheets and text papers of the same size, and stack them in the same direction.
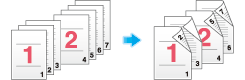
Arranging the first page of the chapter on the front side ([Chapters])
When an original is copied onto both sides of sheets of paper, the first page of each chapter is always printed on the front side of paper.
The first page of each chapter and the text are copied on the same paper. Also, you can use a different sheet from text pages for the first page of each chapter.
For details, refer to Here.
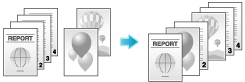
Inserting an original into the specified page ([Insert Image])
The original scanned using the Original Glass is inserted after the page you have specified in the original scanned using the ADF.
Even for originals that cannot be loaded into the ADF, such as books, you can collectively copy without the need of scanning separately with single operation.
Load the original into the ADF.
Select [Application] - [Tailoring] to set [Insert Image] to [ON], and specify the page of the original scanned using the ADF to which you want to insert an original.
For details, refer to Here.
Press the Start key.
An original loaded into the ADF is scanned.
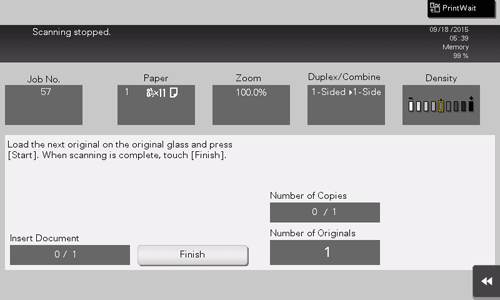
Place the original to be inserted on the Original Glass, then press the Start key.
The original on the Original Glass is scanned using the same settings as for the original scanned in the ADF.
If you want to insert originals of multiple pages, repeat Steps 3 and 4, and scan these originals according to the page order to be inserted.
If the number of original pages to be inserted is larger than the setting, the excess pages are printed after the final page of the original.
After the original to be inserted is scanned, tap [Finish] and the Start key.
Copying begins.