
Computer Side: Steps Required to Use this Function
In Windows 7/8.1/10:
Carry out preparations to send original data scanned by this machine to your computer.
First, check the name of your computer and that of the login user.
Administrator privileges are required to perform this task.
From the Start menu, click [Computer] - [System properties].
In Windows 8.1/10, while pressing the [Windows] (
 ) key, press the [X] key, and then click [System properties] in the displayed menu.
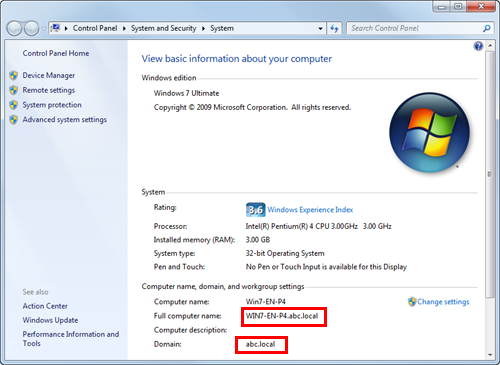
Check [Computer name].
The computer name is required to specify a destination. Write down the computer name.
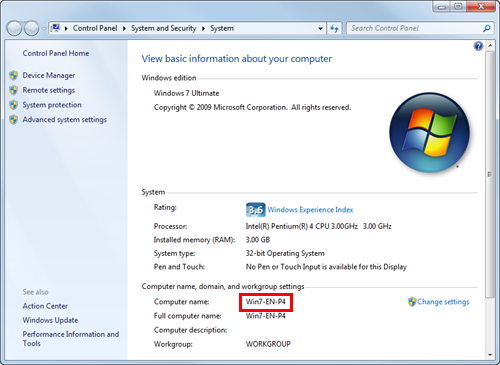
For domain user, the domain name is required to specify a destination along with the user name. Write down the domain name.
Then, close the window.
From the Start menu, click [All Programs] - [Accessories] - [Command Prompt].
In Windows 8.1/10, while pressing the [Windows] (
) key, press the [X] key, and then click [Command Prompt] in the displayed menu.
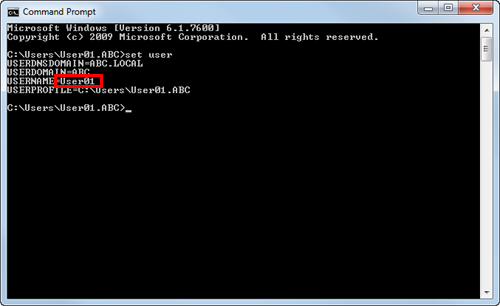
Check the name of the user who logs in to the computer.
The user name is required to configure folder sharing settings and specify destinations. Write down the user name.

For domain users, type in "set user", and check the user name.
Then, close the window.
Next, create a folder where to send the scanned original data, and start sharing.
From the Start menu, click [Control Panel] - [Network and Internet] - [Network and Sharing Center] - [Change advanced sharing settings].
In Windows 8.1/10, while pressing the [Windows] (
) key, press the [X] key, and then click [Control Panel] - [Network and Sharing Center] - [Change advanced sharing settings] in the displayed menu.
In the [Advanced sharing settings] screen, click [Turn on file and printer sharing].
Click [Save Changes], and close the window.
Create a new folder in any place, and name it.
The folder name is required to specify a destination. Write down the folder name.
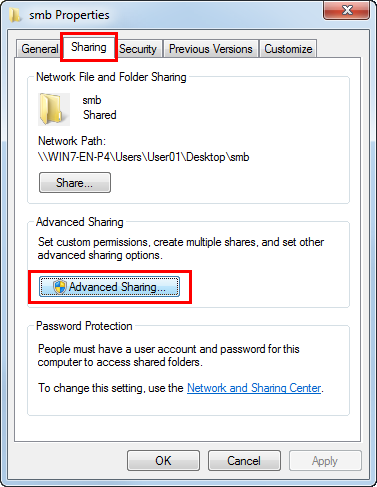
Right-click on the folder, then click [Properties].
Click the [Sharing] tab, and also click [Advanced Sharing].
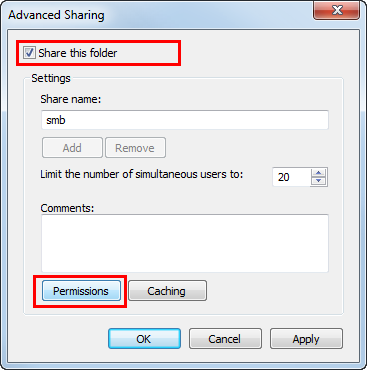
Select the [Share this folder] check box, then click [Permissions].
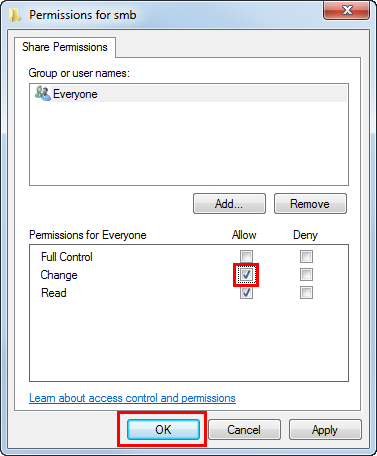
In [Group or user names], click [Everyone].
Select the check box to permit [Change], then click [OK].
Click [OK] or [Close], and close each screen.
The settings on the computer are then completed. The computer, user, and folder names you wrote down in this procedure are required to specify a destination.
In Mac OS 10.8 or later:
Carry out preparations to send original data scanned by this machine to your computer.
First, create a shared folder that is only to be used to receive scanned original data. Then, check the IP address and user name, and start sharing.
Administrator privileges are required to perform this task.
Create a new folder in any place, and name it.
The folder name is required to specify a destination. Write down the folder name.
Select [About This Mac] in the Apple menu.
The [About This Mac] screen appears.
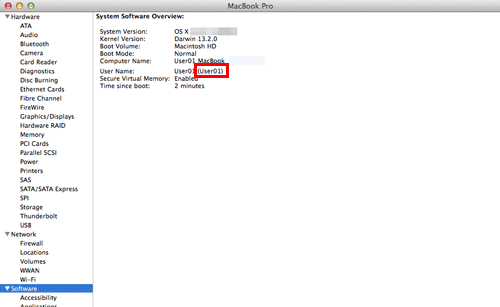
Click [System Report...].
In Mac OS 10.8/10.9, click [More Info...], then click [System Report...].
Check the IP address and the name of the user who logs in to the computer.
The IP address and user name are required to configure folder sharing settings and specify destinations. Write them both down.

Then, close the window.
Select [Preferences...] in the Apple menu.
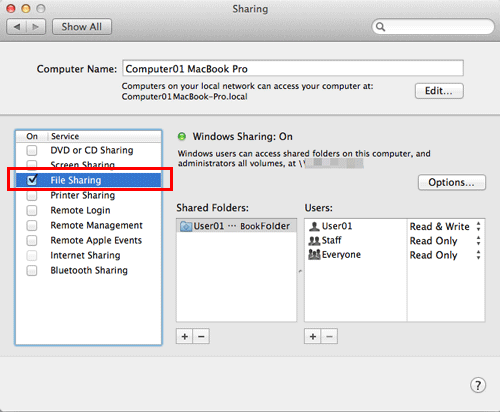
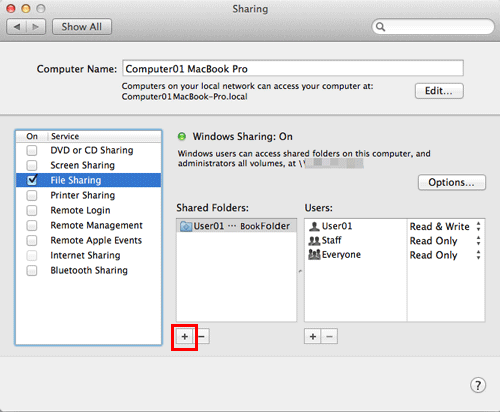
In the [Preferences...] screen, click [Sharing].
Select the [File Sharing] check box.
Click [Options], and select the [Share files and folders using SMB]. Then, select the log-in user name (displayed name) check box.
When [Authentication] screen appears, enter the password of the login user, then click [OK].
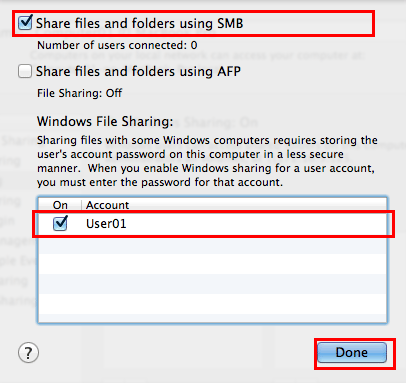
Click [Done], and close the window.
Under [Shared Folders:], click [+].
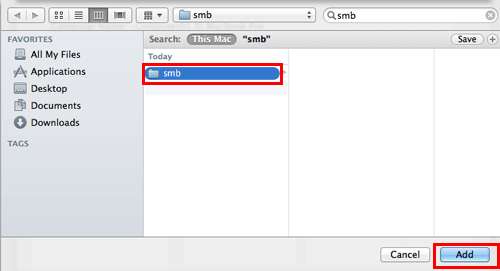
On the displayed window, select the created folder, then click [Add].
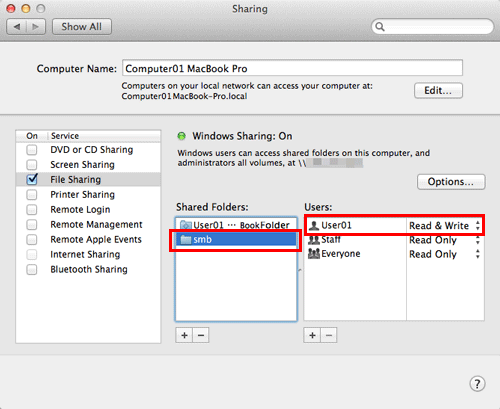
Check the user name and access rights of the created folder.
Check that the user name you wrote down in a previous step is displayed and the access rights are set to [Read & Write].
The settings on the computer are then completed. The IP address, user name, and folder name you wrote down in this procedure are required to specify a destination.