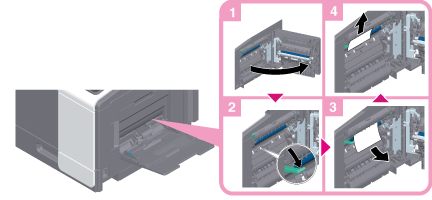
Paper Jam in Bypass Tray or Transfer Roller
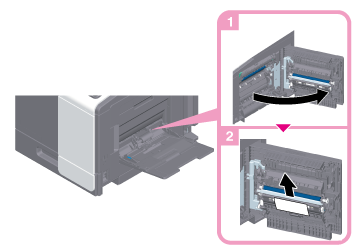
 CAUTION
 The inside of this product has areas subject to high temperature, which may cause burns. When checking the inside of the unit for malfunctions such as a paper misfeed, do not touch the locations (around the fusing unit, etc.) which are indicated by a "Caution HOT" caution label. A burn could result.
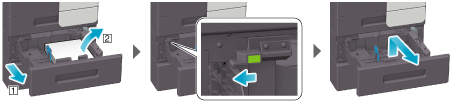
Paper Jam in Tray 1
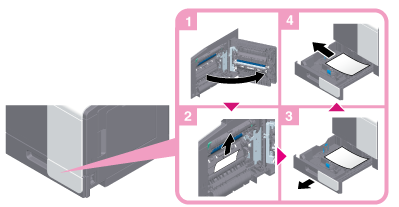
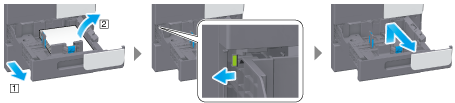
When removing pieces of paper in the paper tray (Tray 1)
Release the lock as shown in the figure, pull out the paper tray, then remove any unnecessary pieces of paper.
 CAUTION
- The inside of this product has areas subject to high temperature, which may cause burns. When checking the inside of the unit for malfunctions such as a paper misfeed, do not touch the locations (around the fusing unit, etc.) which are indicated by a "Caution HOT" caution label. A burn could result.
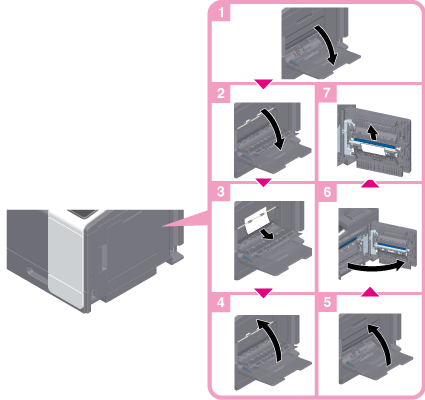
Paper Jam in Tray 2 or Tray 3
Tray 2 or Tray 3 is available when the optional Paper Feed Unit is installed on this machine.
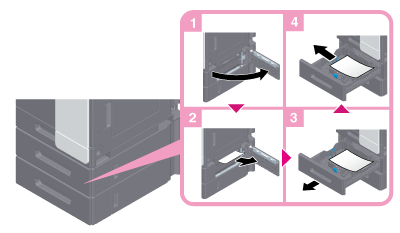
When removing pieces of paper in the paper tray (Tray 2/3)
Release the lock as shown in the figure, pull out the paper tray, then remove any unnecessary pieces of paper.
 NOTICE
- Be careful not to touch the surface of the Transport Roller with your hand.
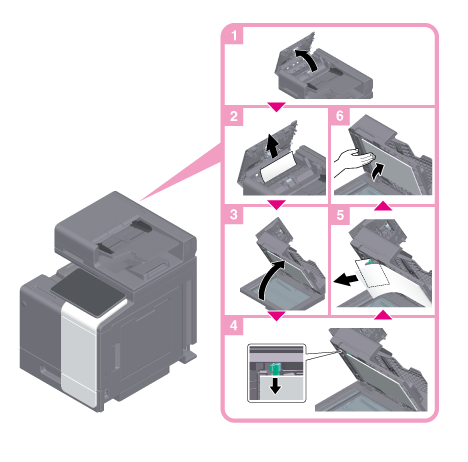
Paper Jam in ADF
Paper Jam in 2-Sided Print Unit
 NOTICE
- Be careful not to touch the surface of the Transport Roller with your hand.
CAUTION- The inside of this product has areas subject to high temperature, which may cause burns. When checking the inside of the unit for malfunctions such as a paper misfeed, do not touch the locations (around the fusing unit, etc.) which are indicated by a "Caution HOT" caution label. A burn could result.
Paper Jam in Fusing Unit
 CAUTION
- The inside of this product has areas subject to high temperature, which may cause burns. When checking the inside of the unit for malfunctions such as a paper misfeed, do not touch the locations (around the fusing unit, etc.) which are indicated by a "Caution HOT" caution label. A burn could result.