Address Book
Registering a frequently used destination on this machine will save you the trouble of having to enter it each time you send data. A destination registered on this machine is called an "Address Book".
You can register up to 2000 one-touch destinations in the address book. The destination types that can be registered are E-mail address, computer name, etc. depending on the transmission mode.
 Tips
Tips Select whether to allow the user to register or change destinations (default: [Allow]). For details, refer to [Registering and Changing Addresses] .
Registering from the Utility
Registering an Internet fax destination
Register destination E-mail addresses.
Tap [Utility] - [One-Touch/User Box Registration] - [Create One-Touch Destination] - [Address Book (Public)] - [Internet Fax] - [New].
 The administrator can perform the same actions by selecting [Administrator Settings] - [One-Touch/User Box Registration].
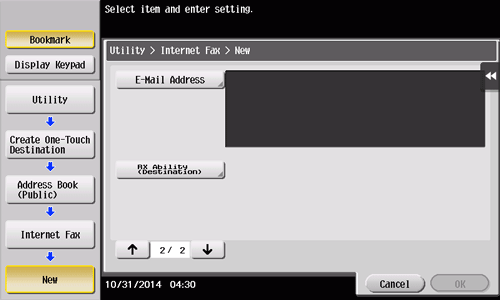
Enter destination information, then tap [OK].
For details on registration information, refer to [Internet Fax] .
Tips- To check the settings for a registered destination, select its registered name, then tap [Check Job Set.].
- To change the settings for a registered destination, select its registered name, then tap [Edit].
- To delete a registered destination, select its registered name, then tap [Delete].
 Reference
- You can also register Internet fax destinations using Web Connection. For details, refer to [Registering an Internet Fax Address] .
Registering an IP address fax destination
Enter any of the IP address, host name or E-mail address of the destination.
Tap [Utility] - [One-Touch/User Box Registration] - [Create One-Touch Destination] - [Address Book (Public)] - [IP Address Fax] - [New].
The administrator can perform the same actions by selecting [Administrator Settings] - [One-Touch/User Box Registration].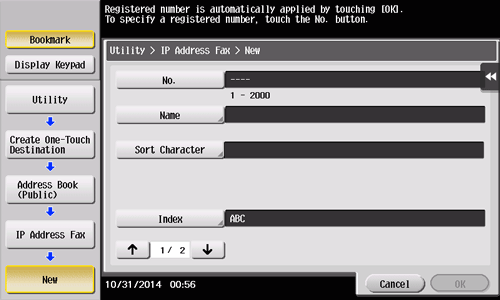
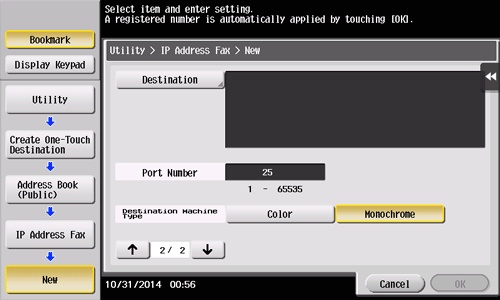
Enter destination information, then tap [OK].
For details on registration information, refer to [IP Address Fax] .
Tips- To check the settings for a registered destination, select its registered name, then tap [Check Job Set.].
- To change the settings for a registered destination, select its registered name, then tap [Edit].
- To delete a registered destination, select its registered name, then tap [Delete].
Reference- You can also register IP address fax destinations using Web Connection. For details, refer to [Registering an IP Address Fax Destination] .
Registering from Address Book
Registering an Internet fax destination
Register destination E-mail addresses.
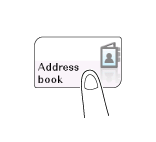
Tap [Address book] on the main menu.
Tap [New].

Select [I-Fax] from [Address Type].
Enter destination information, then tap [Register].
The registered information is the same as that to be registered from the Utility. For details, refer to [Internet Fax] .
Tips- To check the settings for a registered destination, select its registered name, then tap [Check Job Setting].
- To change the settings for a registered destination, select its registered name, then tap [Edit].
- To delete a registered destination, select its registered name, then tap [Delete].
Reference- You can also register Internet fax destinations using Web Connection. For details, refer to [Registering an Internet Fax Address] .
Registering an IP address fax destination
Enter any of the IP address, host name or E-mail address of the destination.
Tap [Address book] on the main menu.
Tap [New].
Select [IP Address Fax] from [Address Type].
Enter destination information, then tap [Register].
The registered information is the same as that to be registered from the Utility. For details, refer to [IP Address Fax] .
Tips- To check the settings for a registered destination, select its registered name, then tap [Check Job Setting].
- To change the settings for a registered destination, select its registered name, then tap [Edit].
- To delete a registered destination, select its registered name, then tap [Delete].
Reference- You can also register IP address fax destinations using Web Connection. For details, refer to [Registering an IP Address Fax Destination] .
Registering from the Fax/Scan basic screen
Registering an Internet fax destination
Register destination E-mail addresses.
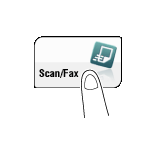
Tap [Scan/Fax].
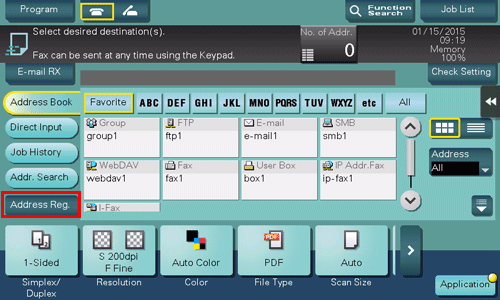
Tap [Address Reg.].
Tap [New].
Select [I-Fax] from [Address Type].
Enter destination information, then tap [Register].
The registered information is the same as that to be registered from the Utility. For details, refer to [Internet Fax] .
Tips- You can check, change or delete the settings for a registered destination from the Utility. For details, refer to [Internet Fax] .
Reference- You can also register Internet fax destinations using Web Connection. For details, refer to [Registering an Internet Fax Address] .
Registering an IP address fax destination
Enter any of the IP address, host name or E-mail address of the destination.
Tap [Scan/Fax].
Tap [Address Reg.].
Tap [New].
Select [IP Address Fax] from [Address Type].
Enter destination information, then tap [Register].
The registered information is the same as that to be registered from the Utility. For details, refer to [IP Address Fax] .
Tips- You can check, change or delete the settings for a registered destination from the Utility. For details, refer to [IP Address Fax] .
Reference- You can also register IP address fax destinations using Web Connection. For details, refer to [Registering an IP Address Fax Destination] .
Registering Directly Entered Destinations in Address Book
Tap [Scan/Fax].
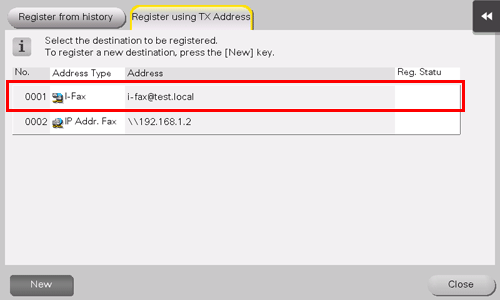
Tap [Direct Input], select the destination type, and then enter a destination.
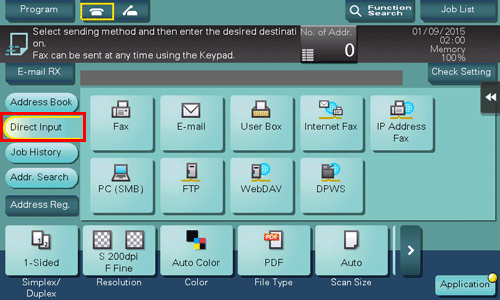
After entering the destination, tap [Address Reg.].
Tap a destination you want to register with the address book.
 Tapping [New] allows you to register a new address, which is not yet entered. For details on how to register, refer to [Registering from the Fax/Scan basic screen ] .
Enter the registration name for the destination.
Add additional search text or enter a sort character as necessary.Settings
Description
[Address Type]
The destination type selected in the Direct Input is displayed.
[No.]
Destination registration number. [No.] is automatically registered using an unused smaller number. If you want to specify a number, tap [No.], then enter the number.
[Name]
Enter the destination name to be displayed on the Touch Panel (using up to 24 characters).
[Sort Character]
Enter the same name as the registered (using up to 24 characters).
You can sort destinations by registration name.
[Index]
Select a corresponding character so that the destination can be index-searched by registration name.
- For a frequently used destination, also select [Favorite]. If [Favorite] is selected, the destination will appear in the main screen of fax/scan mode, enabling the user to easily select a destination.
Destination Information
The destination that is specified by direct input is displayed.
Tap [New], then [Close].
When a fax transmission to the destination which is specified by direct input is complete, tap [Address Book] and check that the destination is registered.
Registering from Transmission Log
Tap [Scan/Fax].
Tap [Address Reg.].
Tap [Register from history].
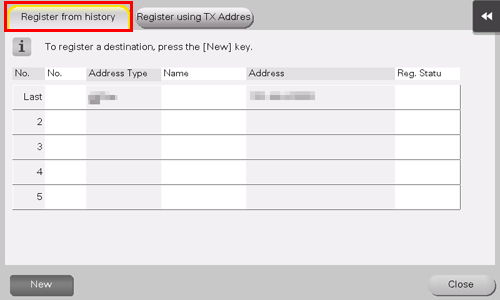
Tap a destination you want to register with the address book.
Enter the registration name for the destination.
Add additional search text or enter a sort character as necessary.Settings
Description
[Address Type]
The destination type selected from the transmission log is displayed.
[No.]
Destination registration number. [No.] is automatically registered using an unused smaller number. If you want to specify a number, tap [No.], then enter the number.
[Name]
Enter the destination name to be displayed on the Touch Panel (using up to 24 characters).
[Sort Character]
Enter the same name as the registered (using up to 24 characters).
You can sort destinations by registration name.
[Index]
Select a corresponding character so that the destination can be index-searched by registration name.
- For a frequently used destination, also select [Favorite]. If [Favorite] is selected, the destination will appear in the main screen of fax/scan mode, enabling the user to easily select a destination.
Destination Information
The information on the destination selected from the transmission log is displayed.
Tap [Register], then [Close].