
Sending the Download URL to Your Address (Scan to URL)
Scan to URL
Scan to URL is a function that sends the URL to download the original data scanned on this machine, to your E-mail address. The scanned original data is saved in a User Box on this machine without being attached to an E-mail during the pre-specified period, so data can be acquired regardless of the sending capacity limit of the E-mail server.
When you log in to this machine that provides user authentication, the [Scan to URL] key appears on the home screen. By selecting this key, you can easily send a URL addressed to your E-mail address.
Also, the [URL] key is displayed in the address book on the [Scan to E-mail] screen. Setting the [URL] key as the address also allows you to always send a URL to yourself using the same workflow as the regular E-mail sending.
Preparation required to use this function (for the administrator)
Configure the settings to use the Scan to URL function.
For details on the setting procedure, refer to Here.

If Active Directory is used as an authentication server, register the user's E-mail address in Active Directory.
Operation flow: When selecting [Scan to URL] on the home screen
Load the original.
Enter user information, and log in to this machine.
For details on how to log in, refer to Here.
Tap [Scan to URL] on the home screen to start transmission.
To send after changing the option settings, tap the menu icon at the top of [Scan to URL] and proceed to step 4.
Change the transmission option settings.
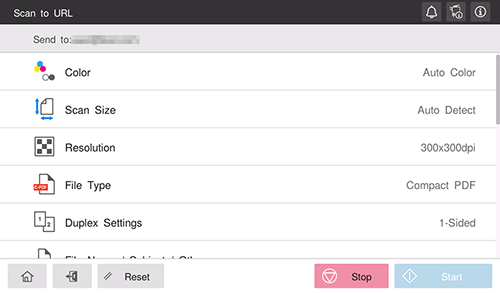
Use the Start key to start transmission.
Using the Stop key enables you to stop scanning the original. A list of the currently stopped jobs is displayed. To stop transmission, select the target job from the list, and delete it.

Operation flow: When selecting [URL] from the address book on the E-mail sending screen
Load the original.
Enter user information, and log in to this machine.
For details on how to log in, refer to Here.
Tap [Scan to Email] on the home screen.

Select [URL].
Specify transmission options as needed.
Use the Start key to start transmission.
Using the Stop key enables you to stop scanning the original. A list of the currently stopped jobs is displayed. To stop transmission, select the target job from the list, and delete it.