Saving/Recalling a Job in/from HDD in Job Centro
Saving in the HDD (Hold Job -> HDD Saved Job)
You can use Job Centro on a computer to save a hold job as a HDD saved job.
This section describes an example of creating and saving to a folder at the time of saving a job in the HDD.
The original hold job remains as is even after it is saved in the HDD. Delete unnecessary hold jobs if any.
Start Job Centro and log in to the machine. (Refer to Starting Job Centro.)
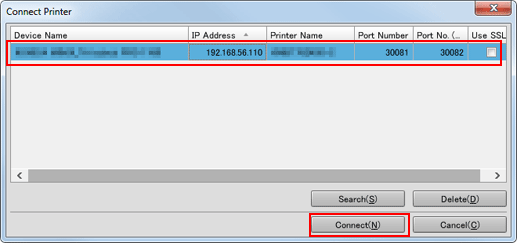
The Job Centro screen is displayed.
Click the [Hold Job] tab and select the job (or jobs) to save in the HDD.
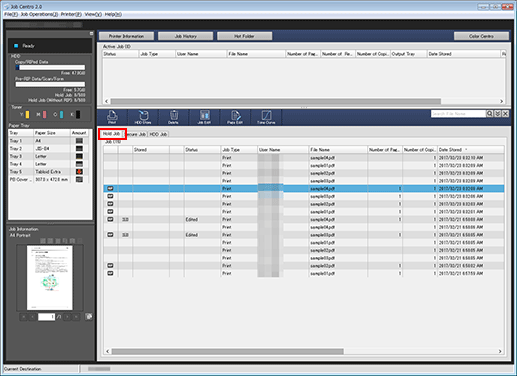
Specify the directory to store the job.
When storing a job in an existing storage location, proceed to step 4.
When creating a new folder or box to store a job in, proceed to step 5.
Click [HDD Store].
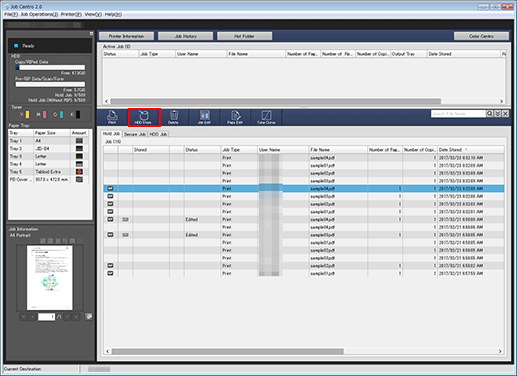
The [Select Folder] screen is displayed. Proceed to step 7.
When creating a new folder or Box to store a job in, click the [HDD Job] tab.
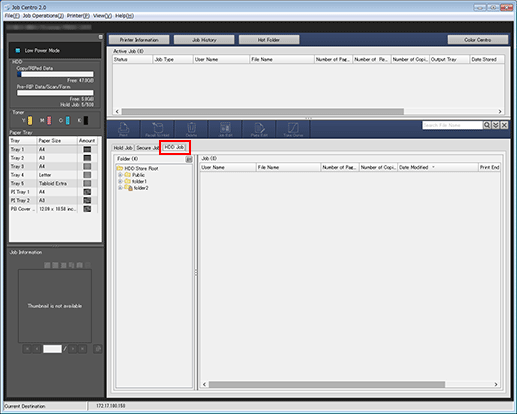
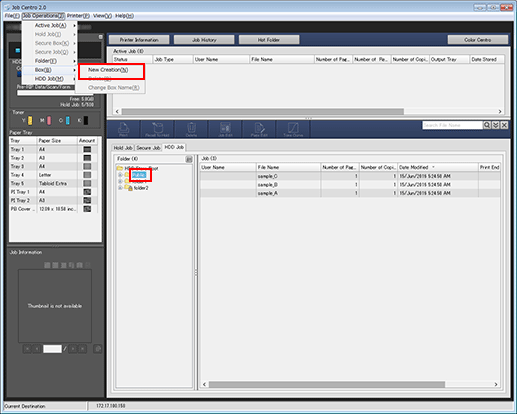
When creating a folder in a level (level 2) under [HDD Store Root], select [HDD Store Root] in the tree on the left, then click [Folder] - [New Creation] in the [Job Operations] pull-down menu.
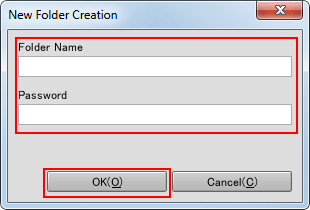
In the [New Folder Creation] screen, enter the desired name in [Folder Name]. Enter the password in [Password] as needed. Click [OK] to display the created folder in the tree on the left.
When creating a Box in a level (level 3) under [Public], select [Public] in the tree on the left, then click [Box] - [New Creation] in the [Job Operations] pull-down menu.
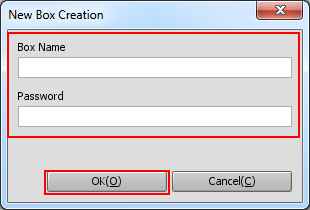
In the [New Box Creation] screen, enter the desired name in [Box Name]. Enter the password in [Password] as needed. Click [OK] to display the created Box in the tree on the left.
Click the [Hold Job] tab and select the job (or jobs) to save in the HDD.
Click [Store on HDD].
The [Select Folder] screen is displayed.
On the [Select Folder] screen, select a location to save a job in the HDD, then click [OK].
The job selected in step 2 or 6 is stored in the selected directory.
When storing a job in the level (level 1) of [HDD Store Root], select [HDD Store Root] in the tree of the [Select Folder] screen, then click [OK].
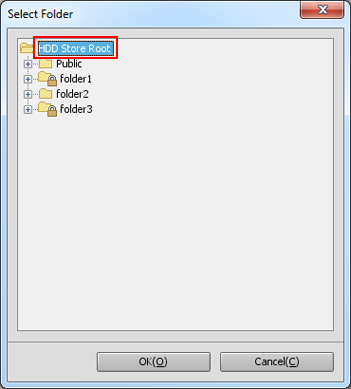
When storing a job in [Public] (level 2), select [Public] in the tree on the left of the [HDD Job] screen, then click [OK].
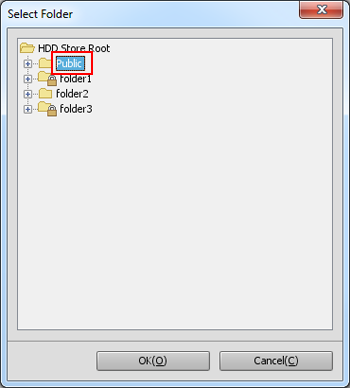
When storing a job in a folder (level 2), select a folder in the tree of the [Select Folder] screen, then click [OK].
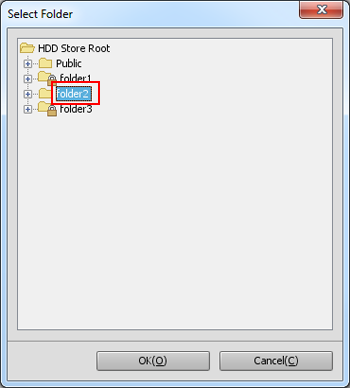
If the folder is password protected, the [Folder Password] screen is displayed. Enter the password, and click [OK].
When storing a job in a Box (level 3), select a Box in the tree of the [Select Folder] screen, then click [OK].
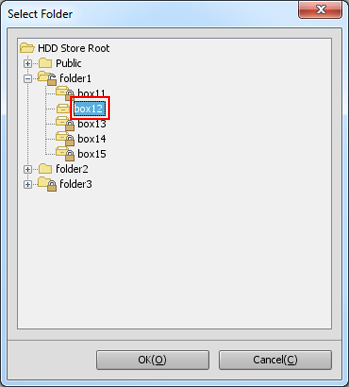
If the Box is password protected, the [Box Password] screen is displayed. Enter the password, and click [OK].
Recalling a HDD Saved Job (HDD Saved Job -> Hold Job)
You can recall HDD saved jobs when necessary to save (copy) them as hold jobs.
The original HDD saved job remains as is even after it is recalled.
Start Job Centro and log in to the machine. (Refer to Starting Job Centro.)

The [Job Centro] screen is displayed.
Click the [HDD Job] tab and select a location to store an HDD saved job to be recalled.
If the job to be recalled is in the [HDD Store Root] level (level 1), select [HDD Store Root] in the tree on the left of the [HDD Job] screen.
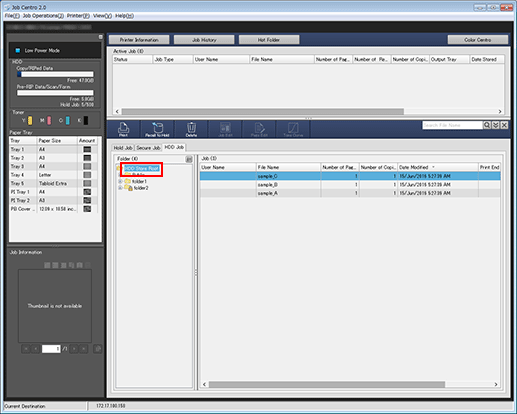
If the job to be recalled is in a folder (level 2), select a folder in the tree on the left of the [HDD Job] screen.
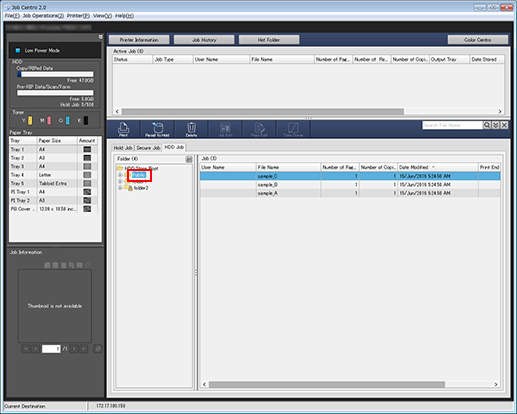
If the folder is password protected, the [Folder Password] screen is displayed. Enter the password, and click [OK].
If the job to be recalled is in a Box (level 3), select a Box in the tree on the left of the [HDD Job] screen, then click [OK].
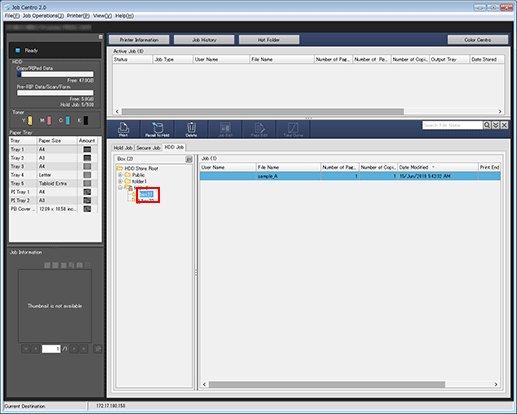
If the Box is password protected, the [Box Password] screen is displayed. Enter the password, and click [OK].
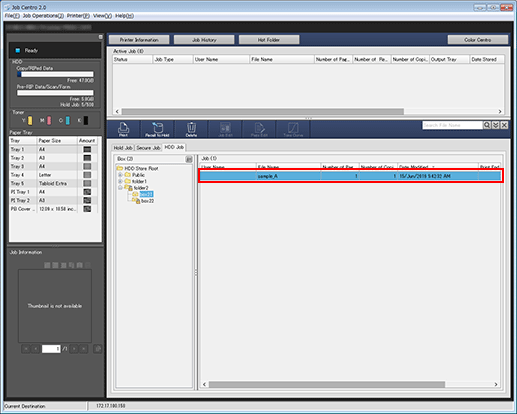
Select an HDD saved job to be recalled.
You can select multiple jobs.
Click [Recall to Hold].
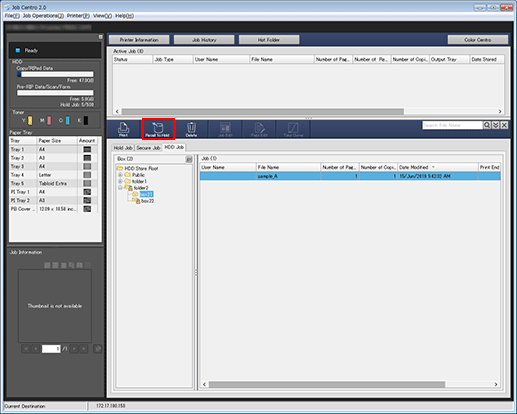
The specified HDD saved job is recalled and saved as a hold job. Click the [Hold Job] tab to check the result.

