Using a Computer to Print a Hold Job
You can print a hold job using Job Centro.
Start Job Centro and log in to the machine. (Refer to Starting Job Centro.)
The [Job Centro] screen is displayed.
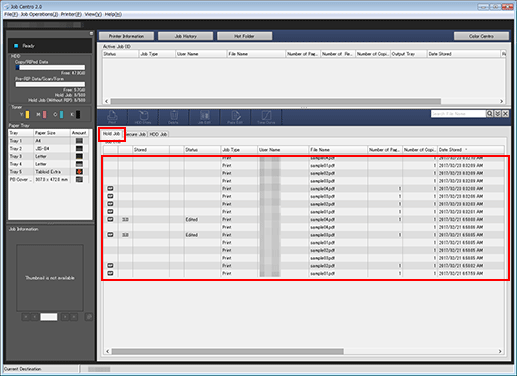
Click the [Hold Job] tab and select the job to be print.

[Job Type] display
[Print]: Print job held from the printer driver
[Copy]: Copy job or scan job held from the control panel of the main body
It is possible to select multiple jobs.
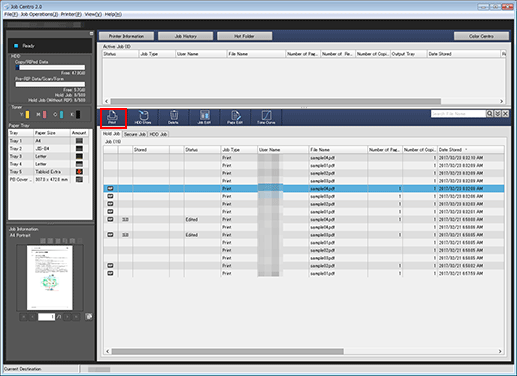
Click [Print].

You can alternately click [Hold Job] - [Print] in the [Job Operations] menu.
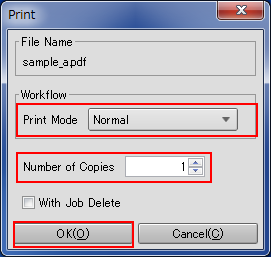
Select [Print Mode] on the [Print] screen, enter [Number of Copies], then click [OK].
[Normal]: Prints data by the number of sets that is specified for the job.
[Proof]: Prints data by only one set to check the output.
[Proof (1st Sheet)]: Prints only the first page to check the output.
[Wait]: Sets the job to the output stop state as a reserved job.

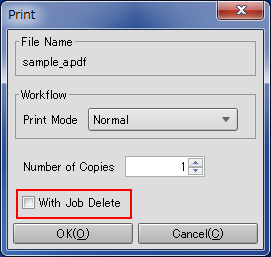
To delete the job at the time of outputting, add a check mark to [With Job Delete].

If multiple jobs are selected in step 2, data is printed by one set. The number of copies cannot be specified.
To delete the job at the time of outputting, add a check mark to [With Job Delete].
The specified job is output.
Tips:
You can also use the following functions.
Change the priority of job output in Job Centro.
Check the job output history in Job Centro.
