Home Read Position Adj(Back): Adjusting the Home Position of the Shading Shaft
Adjust the home position of the shading shaft to correct any image failure due to dirt on the shading shaft on the back side of the ADF.
Press [Adjustment] on the [MACHINE] screen to display the [Adjustment Menu] screen.
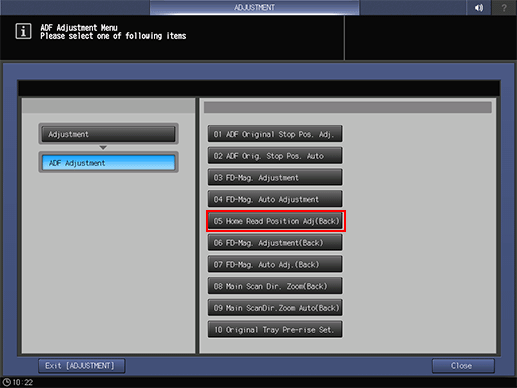
Press [ADF Adjustment] and [Home Read Position Adj(Back)] in sequence.

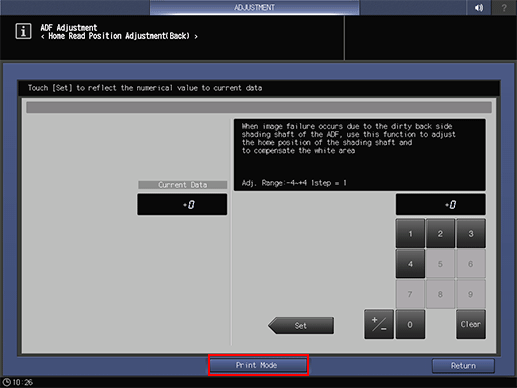
Press [Print Mode].

Load the desired paper into a tray, then select that tray.
Load paper of the same size as the tray selected in step 4 into the ADF tray, then press Start on the control panel.
Check whether an image failure occurs.
If any adjustment is required, press [Exit PrintMode] to return to the [Home Read Position Adjustment(Back)] screen.
Use the touch panel keypad to enter the set value.
Use [+/-] to specify the value to be positive or negative.
Press [Set] to change the current value.
Adjustment Range: -4 to +4 (1 step = 1)
Repeat steps 3 to 8 until the desired result is obtained.
Press [Return].
The screen returns to the [ADF Adjustment Menu] screen.
