IPP Setting
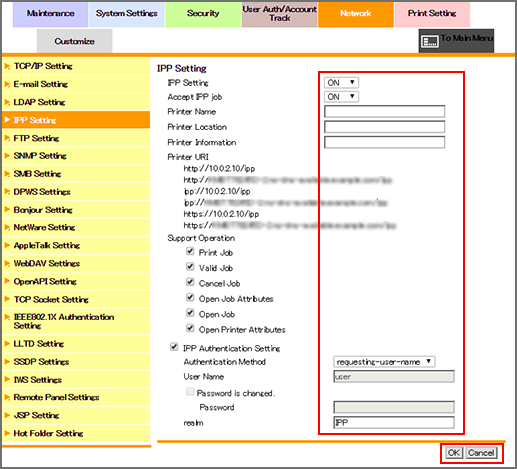
Click [IPP Setting] on the menu of [Network] tab to display this screen.

This screen allows you to make IPP (Internet Printing Protocol) settings.
To use IPP setting, select [ON] from each drop-down list of the [IPP Setting] and [IPP Setting Job Accept].
If necessary, specify [Printer Name], [Printer Location], and [Printer Information]. You can enter up to 127 one-byte characters for each item.
The printer URI is displayed that enables to print data using IPP.
If necessary, specify whether to use IPP for permission in [Support Information].
To use IPP authentication, select the [IPP Auth. Setting] checkbox.
Specify the IPP authentication method.
Specify [Login Name], [Password], and [realm] according to the authentication method.
Click [OK]. Clicking [Cancel] cancels the setting.
Click [OK] on the setting complete screen.
